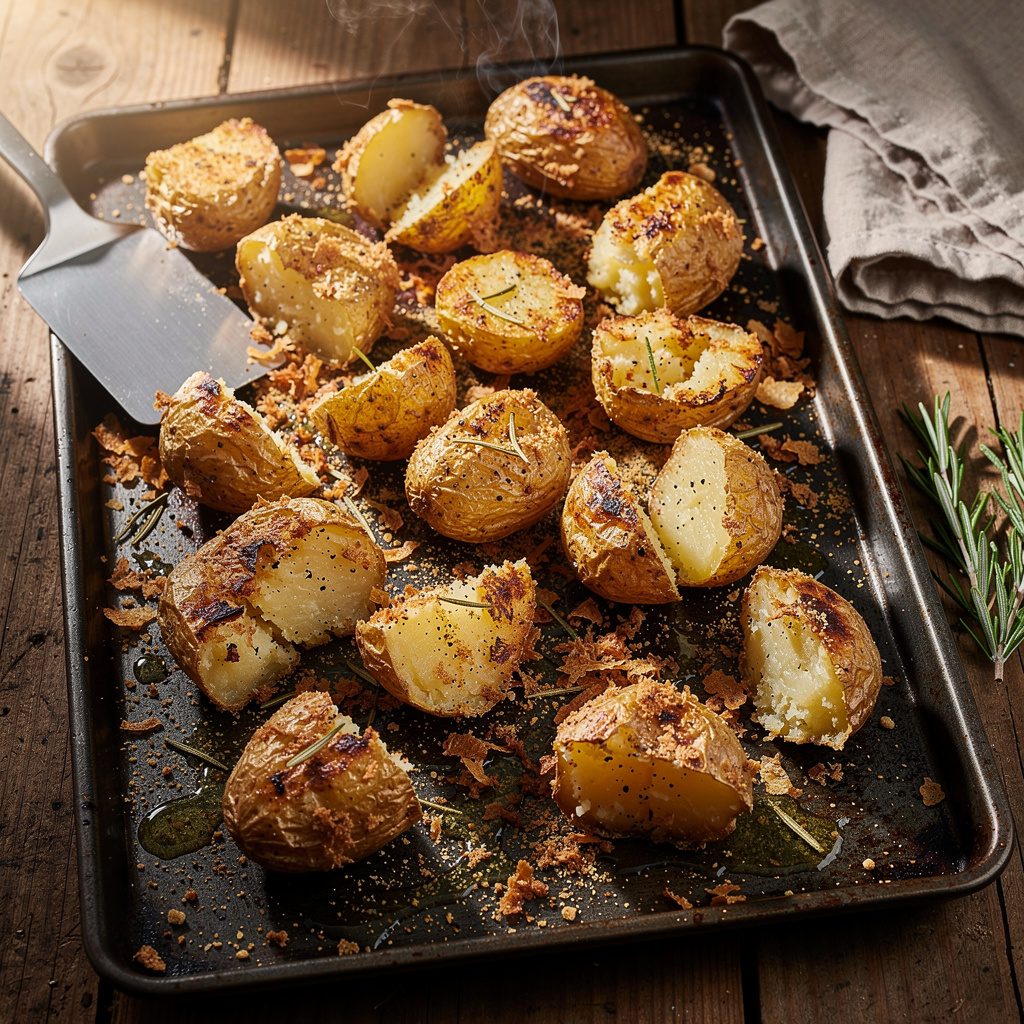
Adding a little baking soda to the water gives roasted potatoes a rough, starchy surface that turns deeply crisp in the oven. The potatoes may look slightly battered after boiling, but that’s exactly the point.
For about 2 1/2 pounds of potatoes, 3/4 teaspoon of baking soda and a 9-minute boil can make the difference between potatoes that are merely browned and potatoes with brittle, crunchy edges and soft centers.
Why Baking Soda Changes the Potato Surface
Baking soda makes the cooking water alkaline. That helps the pectin in the potatoes’ outer layers break down faster, so the surface softens before the centers turn mushy.
As the potatoes boil, their edges become fuzzy and slightly mashed. Those loose bits of starch cling to the pieces, then crisp in hot oil in the oven. More rough edges mean more places for browning to happen.
This is not the method for neat, perfectly smooth potato cubes. They should look shaggy going onto the pan.
Use Yukon Golds or Russets
Yukon Gold potatoes are a strong choice because they stay creamy inside and hold together well enough for boiling, shaking, and roasting. Cut them into even chunks about 1 1/2 inches wide so they cook at the same rate.
Russets also work well, and their higher starch content can produce an especially fluffy interior. They’re more fragile, though, so handle them carefully after boiling.
Red potatoes are less useful for this method. Their waxier texture means they don’t shed as much starch on the outside, so you won’t get the same craggy crust.
Boil Them Just Until the Outside Is Tender

For 2 1/2 pounds of potato chunks, use about 3 quarts of water in a large pot. Add 1 tablespoon kosher salt and 3/4 teaspoon baking soda, then bring the water to a boil.
Add the potatoes and keep the water at a steady, gentle boil for about 8 to 10 minutes. For 1 1/2-inch pieces, 9 minutes is a good target.
Check one around the 7-minute mark. A paring knife should slide easily through the softened outside, while the center still offers some resistance. If the potato is hard throughout, keep boiling. If it’s collapsing in the pot, it has gone too far.
Smaller, 1-inch pieces may be ready in about 6 minutes.
Shake the Pot After Draining
The boiling water starts the roughing-up process, but shaking the potatoes finishes it. After draining them, return the potatoes to the hot, empty pot.
Add your fat and seasonings, cover the pot with its lid, and shake it firmly for about 10 seconds. You want visibly uneven edges, small mashed patches, and a few starchy bits left in the bottom of the pot.
Those scraps are worth scraping onto the sheet pan, too. They can turn into the crunchiest little bits on the tray.
A gentle stir won’t do the same job. The potatoes need a little rough treatment here.
Roast at 450°F With Plenty of Space
Toss the potatoes with 3 tablespoons olive oil, 1 tablespoon melted butter, 1 teaspoon garlic powder, 1 teaspoon chopped rosemary, 1/2 teaspoon black pepper, and another pinch of salt.
Spread them in one layer on a heavy sheet pan. Leave room between pieces. If they’re piled together or crowded on the pan, trapped moisture steams them instead of letting the edges brown.
Roast at 450°F for 45 minutes, flipping the potatoes once around the 25-minute mark. Rotate the pan if your oven has a hot spot.
Parchment makes cleanup easier, but a lightly oiled bare metal pan may give the bottoms more direct browning. Don’t use a cold, crowded pan and expect restaurant-style crunch. The potatoes need heat and space.
What the Finished Potatoes Should Look Like
After 45 minutes, the potatoes should be dark golden brown with jagged, crisp ridges on most exposed surfaces. The texture should not be leathery, dry, or uniformly smooth.
Break one open with a fork. The outside should crackle, while the center looks pale, soft, and fluffy. Yukon Golds tend to stay creamy; russets become more airy and mashed-potato-like inside.
The baking soda should not be noticeable in the flavor at this amount. The potatoes should taste savory and potato-forward, not metallic, soapy, or chemical.
If they do have an off flavor, too much baking soda is the likely culprit. For a 2- to 3-pound batch, stay between 1/2 teaspoon and 1 teaspoon.
Season Them With the Oven in Mind
Garlic powder and rosemary hold up well during a 45-minute roast. Smoked paprika, onion powder, thyme, and black pepper also work nicely.
Save delicate herbs for the end. Fresh parsley, dill, chives, and lemon zest can burn or lose their fresh flavor if they go onto the pan too early. Toss them with the hot potatoes after roasting instead.
Grated Parmesan is another good finishing move, especially if you add it during the last few minutes rather than at the start, when it can darken too much.
Make the Method Easier on a Busy Night
The extra step is mostly hands-off. Boil the potatoes while the oven heats and while you prep the rest of dinner. The active work is chopping, draining, shaking, and flipping once.
You can also boil and season the potatoes up to 24 hours ahead, then refrigerate them until dinner. Spread them on the pan and roast at 450°F when you’re ready to eat.
If your roasted potatoes usually brown at the corners but stay flat everywhere else, try the baking soda boil. A small amount changes the potato surface before it reaches the oven, and that’s where the crisp crust starts.