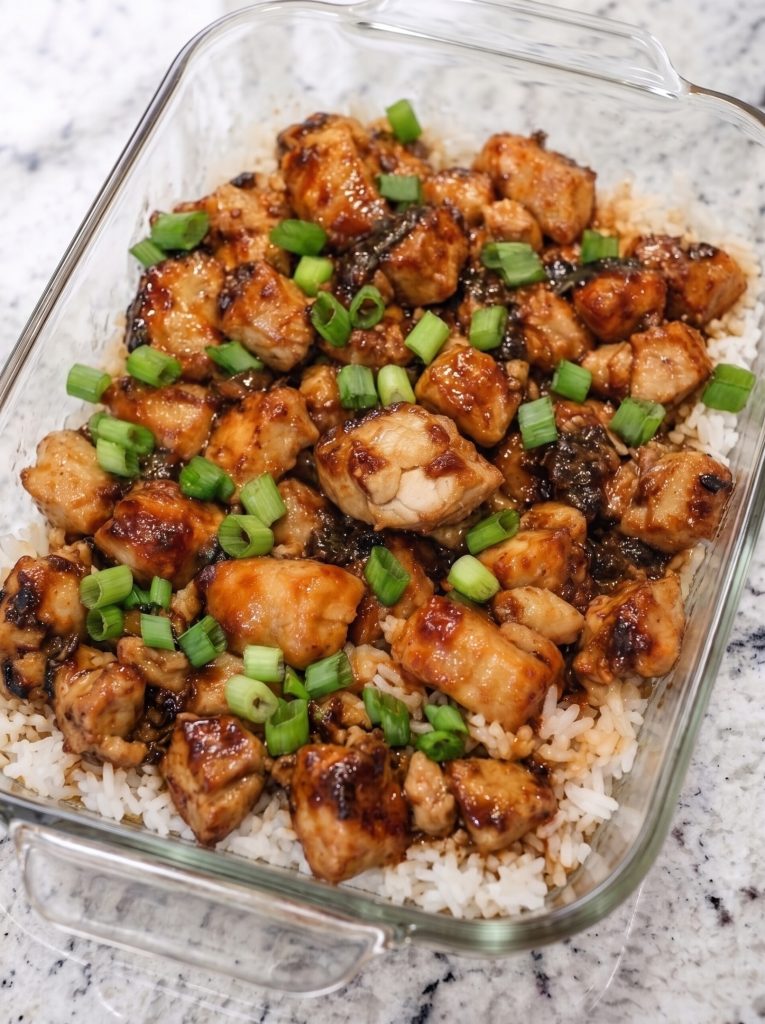
If you’re looking for a weeknight dinner that feels a little special without a lot of effort, this chicken teriyaki rice bake is it. Everything goes into one dish — tender chicken, fluffy rice, a rich homemade teriyaki sauce — and comes out of the oven glossy, caramelized, and completely craveable. It’s the kind of meal that looks like you tried harder than you did.
Why You’ll Love It
- One pan, minimal cleanup — everything bakes together in a single dish, start to finish.
- The rice soaks up the sauce — it gets sticky, savory, and a little caramelized around the edges in the best possible way.
- Made with pantry staples — soy sauce, honey, brown sugar, garlic. Nothing you have to hunt down.
- Great for meal prep — it reheats beautifully, which honestly not all rice dishes can claim.
- Crowd-pleasing every time — kids and adults go back for seconds without fail.
Ingredient Notes
Soy sauce is soy sauce, but I will say I’ve started buying the low-sodium version and then just using a little more of it — makes no sense, probably, but it feels like I’m doing something healthier. Tamari works great if you’re gluten-sensitive, and I’ve used it a couple of times when I had it on hand and couldn’t really tell the difference. Try our 4-Ingredient Slow Cooker Teriyaki Chicken and Broccoli next.
The ginger — fresh is genuinely better here. Ground ginger will work, it will absolutely work, but fresh ginger has this brightness to it that you can taste. I keep a little nub of it in the freezer now because I used to let it go bad in the fridge on a weekly basis and I finally decided I was done with that.
Chicken thighs or breasts, your call. I’ve been a thigh person my whole life — they stay juicier and they’re more forgiving if you accidentally leave them in a few extra minutes. Breasts work fine too, just watch the timing so they don’t dry out. If you like this, you'll love our Poppy Seed Chicken.
Rice: I use regular white rice, already cooked. Day-old rice from the fridge actually works best — it’s a little drier and absorbs the sauce better than freshly cooked rice. If I’m making this for the week, I’ll cook the rice the night before and just leave it in the fridge.
Ingredients
- 2 lbs boneless, skinless chicken thighs (or breasts, if that’s your thing)
- About 3 cups cooked white rice (day-old from the fridge is ideal)
- ½ cup soy sauce (low-sodium; go up to ⅔ cup if you prefer)
- ⅓ cup brown sugar, lightly packed
- ¼ cup honey
- 2 cloves garlic, minced
- 1 tablespoon fresh ginger, grated (or 1 teaspoon ground)
- 2 tablespoons rice vinegar
- 1 tablespoon cornstarch
- 2 tablespoons water
- 2 tablespoons neutral oil (canola or vegetable)
- 3 or 4 green onions, chopped
- Sesame seeds (optional, for garnish)
Instructions
Preheat your oven to 400°F. Grease your baking dish — I use a 9×13 glass pan, though I’ve made it in a slightly smaller ceramic one in a pinch and it turned out fine, just needed a couple extra minutes.
More recipes you might like


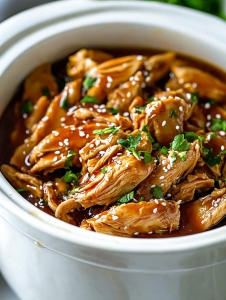
Now, the sauce. Combine the soy sauce, brown sugar, honey, garlic, ginger, and rice vinegar in a small saucepan over medium heat. Stir it and let it come up to a simmer — you want the sugar to dissolve completely, which happens faster than you’d think. While that’s going, mix your cornstarch with the water in a little bowl until it’s smooth. Pour that slurry into the simmering sauce, stir, and within a minute or two it’ll thicken up and turn glossy. It should coat the back of a spoon. Take it off the heat.
If you have time — and I always recommend making time for this part — sear the chicken first. Cut it into bite-sized cubes, heat a little oil in a skillet over medium-high, and cook it for four or five minutes until it’s got some color on it. It does not need to be cooked through. You just want that light browning because it adds flavor and texture that you simply do not get otherwise. I skipped this step once when I was in a real hurry and the chicken was fine but the dish was undeniably less good. I think about that sometimes.
Spread the cooked rice evenly across the bottom of your greased baking dish. Scatter the chicken pieces over the top. Pour the teriyaki sauce over everything — be generous, get it into all the corners — and then slide it into the oven, uncovered, for 20 to 25 minutes. For another easy option, see our Baked Greek Lemon Chicken.
You want the sauce bubbling and starting to caramelize around the edges of the pan. The top of the chicken should look a little lacquered. Let it sit for five minutes out of the oven before you dig in — this is important and most people skip it and burn their mouth and I am including myself in that group.
Finish with a lot of green onions and sesame seeds if you have them.
Variations
Pineapple chunks scattered in before it goes into the oven — I was skeptical the first time I tried it and then went back for seconds. The sweetness plays off the soy really well. Use canned, drained, not fresh — fresh makes it too wet.
I’ve done a version with broccoli stirred in before baking — just lightly steamed first, not raw — and it makes this genuinely complete in a way that feels almost virtuous. Almost.
A teaspoon or two of sriracha added to the sauce is a move I resisted and then fully converted to. If you like heat, try it.
For cauliflower rice, I’d say add it halfway through baking — it gets mushy if you put it in from the start, and mushy cauliflower rice is one of the sadder food outcomes in my experience. You might also like our Oven Baked 3-Ingredient Chicken Huntington.
Storage & Reheating
This keeps well in the fridge for three or four days, maybe five if you’re willing to push it. The rice does get a little sticky and compact as it sits, which some people find less appealing but I actually don’t mind — there’s something almost cake-like about it reheated the next day, the sauce fully absorbed.
Reheat with a splash of water added to keep it from drying out. Microwave is fine, honestly. Covered.
I’ve frozen it too, in individual containers, for those weeks when I’m genuinely too tired to make decisions. From frozen it takes a little longer to reheat and the texture is slightly less than ideal, but it’s still very much worth eating. It travels well for work lunches — just throw a container in your bag and reheat when you’re ready.
One Last Thing
Oh — I always forget to say this but don’t skip letting the rice cool slightly before you assemble the dish. Hot rice added to the pan with the sauce goes in and bakes just fine, but slightly cooled rice absorbs the sauce more evenly during baking instead of sort of steaming from the inside. Is this a small detail? Yes. Does it matter? A little. I learned it by accident when I made this with leftover rice from the previous night and thought it came out noticeably better and then spent twenty minutes trying to figure out why. Try our Oven-Baked 3-Ingredient Chicken Continental Royale next.
Also: use more green onions than you think you need. Just trust me on that one. If you like this, you'll love our Cheesy Yakisoba: The Weird Weeknight Miracle That Somehow Works.
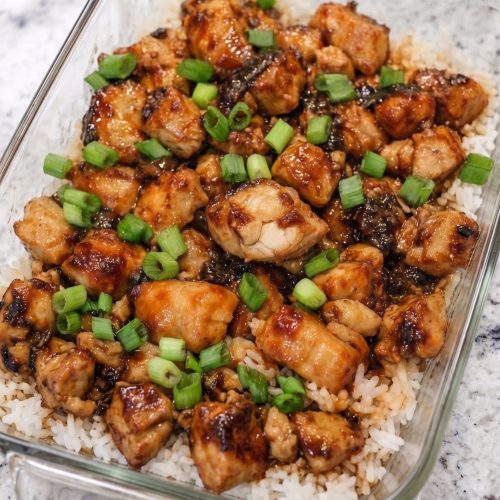
Chicken Teriyaki Casserole
Want This Recipe Later?
Ingredients
- 2 lb boneless skinless chicken thighs or breasts, cut into bite-sized pieces
- 3 cups cooked white rice day-old preferred
- 1/2 cup low-sodium soy sauce use up to 2/3 cup if preferred
- 1/3 cup brown sugar lightly packed
- 1/4 cup honey
- 2 cloves garlic minced
- 1 tbsp fresh ginger grated, or 1 tsp ground ginger
- 2 tbsp rice vinegar
- 1 tbsp cornstarch
- 2 tbsp water
- 2 tbsp neutral oil canola or vegetable oil
- 3 to 4 green onions chopped
- sesame seeds optional, for garnish
Instructions
- Preheat the oven to 400°F and grease a 9x13-inch baking dish.
- In a small saucepan over medium heat, combine the soy sauce, brown sugar, honey, garlic, ginger, and rice vinegar.
- Bring the sauce to a simmer, stirring until the sugar dissolves.
- In a small bowl, mix the cornstarch and water until smooth.
- Pour the cornstarch slurry into the simmering sauce and stir for 1–2 minutes, until thickened and glossy.
- Remove the teriyaki sauce from the heat.
- Heat the neutral oil in a skillet over medium-high heat.
- Add the chicken pieces and sear for 4–5 minutes, until lightly browned but not fully cooked through.
- Spread the cooked white rice evenly across the bottom of the prepared baking dish.
- Scatter the seared chicken pieces over the rice.
- Pour the teriyaki sauce evenly over the chicken and rice, spreading it into the corners.
- Bake uncovered for 20–25 minutes, until the sauce is bubbling, the edges are slightly caramelized, and the chicken is fully cooked.
- Let the casserole rest for 5 minutes before serving.
- Garnish with chopped green onions and sesame seeds if desired.
Notes
Nutrition
Nutrition values are estimates based on the listed ingredients and serving count. Actual values vary with brands, cuts and portion sizes.