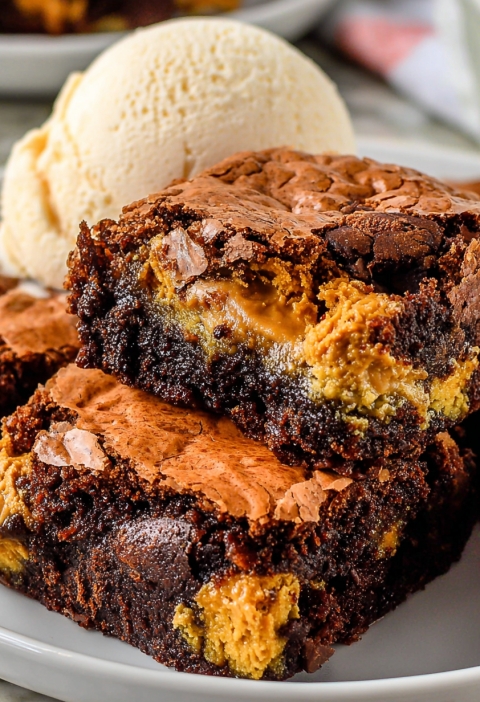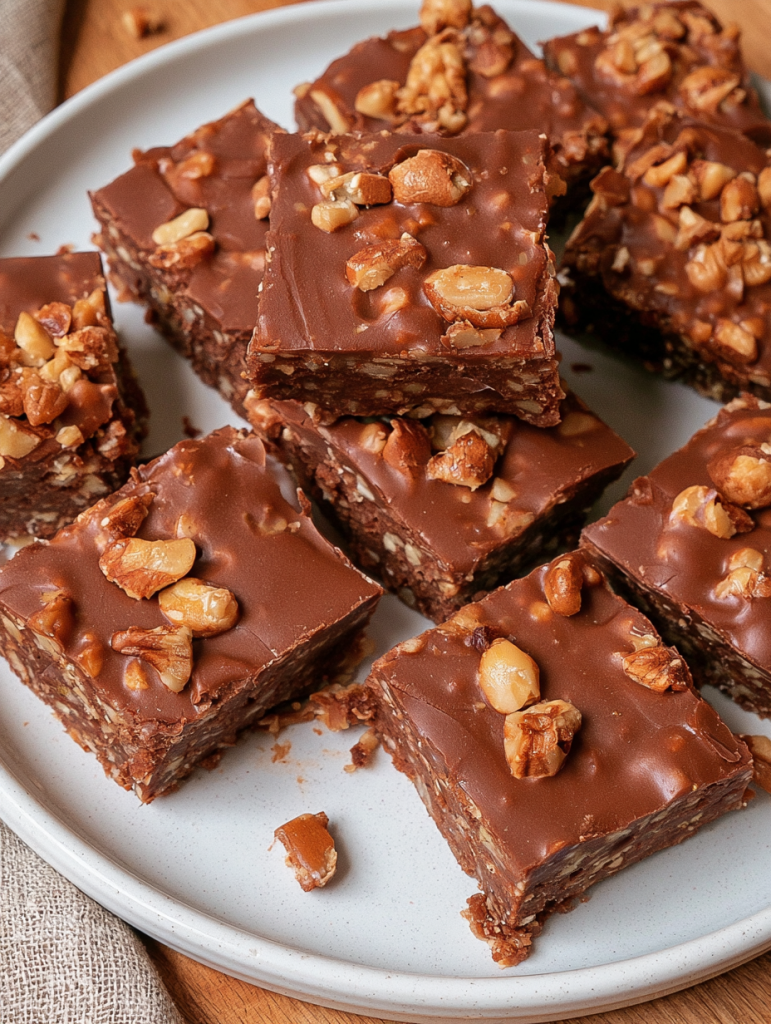
Nut Goodie Bars have a rich, candy-bar flavor with milk chocolate, butterscotch, peanut butter, salted peanuts, and a soft maple center. They’re easy to make in a 9-by-13-inch pan and perfect for keeping chilled until dessert. You’re going to love that sweet-and-salty crunch in every bite.
Why You’ll Love It
- Candy-bar flavor — milk chocolate, butterscotch, peanut butter, salted peanuts, and maple all work together.
- Easy 9-by-13-inch pan — makes 16 good-sized servings without individual candy-making.
- No special equipment — no candy thermometer or complicated techniques needed.
- Great chilled — the layers firm up beautifully in the refrigerator.
- Travels well — easy to bring along once chilled.
Ingredient Notes
Use milk chocolate chips here, not semisweet. The original candy-bar feeling really depends on that softer, sweeter chocolate flavor. Dark chocolate can work well in other recipes, but this is not the place I’d make that switch. Try our Idaho Janes next.
Butterscotch chips are what give the chocolate layers that warm, almost caramel-like flavor. Don’t skip them. The combination of milk chocolate and butterscotch can look a little strange while it’s melting, especially before you stir it smooth, but hang in there.
Creamy peanut butter works best. The regular shelf-stable kind. I use whatever is on sale, usually Jif or Skippy, and I don’t use natural peanut butter for this one because the oil separation can make a mess of the texture. Could it work? Maybe. Do I want to find out with six ounces of chocolate chips involved? Nope.
The pudding mix must be cook ’n serve vanilla pudding mix, not instant. This matters. Read the box. Cook ’n serve. If you like this, you'll love our Ragtag Candies.
And salted peanuts are part of the charm. That salt keeps the whole thing from tasting flat. Dry-roasted peanuts are fine, but I like plain salted peanuts best.
Ingredients
- 6 ounces milk chocolate chips
- 6 ounces butterscotch chips
- 1 cup creamy peanut butter
- 1/2 cup butter, melted
- 1/4 cup milk
- 2 tablespoons cook ’n serve vanilla pudding mix — not instant, I’m saying it again because I care
- 3 cups powdered sugar
- 1/4 teaspoon maple flavoring
- 1 cup salted peanuts

Instructions
Lightly grease a 9-by-13-inch pan. You don’t need to grease it heavily; just enough so you’re not fighting for your life when it comes time to lift out a square. I use cooking spray, though butter works too.
Put the milk chocolate chips, butterscotch chips, and creamy peanut butter in a microwave-safe bowl. Microwave for 1 to 2 minutes, then stir. It will probably look partially melted and somewhat lumpy at this point. That’s normal. Do not panic and crank the microwave for three more minutes straight.
Continue microwaving the mixture in 30-second intervals, stopping each time to stir and check it, until it is fully melted and smooth. Be patient here. Chocolate burns faster than you’d think.
Spread one-half of the chocolate-butterscotch-peanut butter mixture into the prepared pan. I just eyeball half. If you want to measure it precisely, bless you, but this is not a surgery. Smooth it out as evenly as you can.
More recipes you might like


Refrigerate the pan until that bottom layer is firm, about 30 minutes. This is a good time to clear the kitchen or make coffee. For another easy option, see our 4-Ingredient Peanut Butter Balls.
While the bottom layer firms up, combine the melted butter, milk, and cook ’n serve vanilla pudding mix in a saucepan. Bring it to a boil over the stove, stirring as needed so it doesn’t catch. It comes together quickly, and it smells like the beginning of something comforting.
Remove the saucepan from the heat. Add the powdered sugar and maple flavoring. Beat until the mixture is smooth. I use a hand mixer because it gets the job done, but you can beat it by hand if you are in the mood for an arm workout.
Spread the maple filling over the chilled chocolate layer. Try to get it reasonably even, but don’t press too aggressively or drag up the chocolate underneath. Gentle is the word. I have made the mistake of rushing this part, and the layers got marbled together. Still delicious, naturally. Ugly as sin, but delicious.
Stir the salted peanuts into the remaining chocolate mixture. This top layer is where the bars get that real Nut Goodie personality—the crunch, the salt, the whole deal.
Spread the peanut-studded chocolate mixture over the maple layer. Work carefully, using the back of a spoon or an offset spatula if you have one.
Cut the bars into squares and keep them refrigerated. Sixteen squares is a nice serving size, though I’ve cut them smaller for a bigger dessert table because they are rich. Both approaches have their place.
Variations
Dry-roasted peanuts work instead of regular salted peanuts, and a handful of extra peanuts adds even more crunch.
You could chop the peanuts a little if you want cleaner cuts, especially if you’re serving these to little kids or anyone with tender teeth. I usually leave them whole because I like that chunky candy-bar bite. Chopped pecans are not terrible, but they soften the whole thing and don’t have that salty peanut crunch.
I would not mess much with the maple flavoring. A little goes a long way, and the quarter teaspoon is enough. Too much maple flavoring can make the filling taste overly strong.
Storage & Reheating
Keep Nut Goodie Bars covered in the refrigerator. They hold up well for several days, and honestly I think they’re even better after they’ve had time to settle in. The layers firm up, the maple filling gets nice and smooth, and the flavors quit shouting over one another. You might also like our Church Window Cookies.
You don’t need to reheat them. Please don’t microwave one unless you enjoy chasing melted chocolate around a plate with a spoon. If you prefer a softer bite, just set a square out on the counter for 10 or 15 minutes before eating it. In a warm kitchen, that will happen fast enough on its own.
For longer storage, you can freeze them in a covered container with layers separated by wax paper. Let them thaw in the refrigerator. They hold up well after freezing, though the edges may get a little frosty.
Final Notes
There is something wonderfully old-fashioned about a bar dessert that doesn’t try too hard to be trendy. No browned butter, no flaky sea salt scattered like fairy dust, no tiny edible flowers that cost more than the actual meal. Just chocolate and butterscotch and peanut butter, a soft maple middle, salted peanuts on top.
That said, these are not delicate little tea-time bars. They are sturdy, sweet, refrigerator-cold squares that make people pause halfway through a conversation.
Make them when you need a dependable dessert, when company is coming over, when the week has been rough, or when you simply have a bag of butterscotch chips staring at you from the pantry. Cut them small if you’re being sensible. Cut them large if it’s one of those days. Try our Fudgy Brownie Cookies next.
Either way, keep a couple tucked in the back of the refrigerator if you can. Not because you’re hiding them exactly. Just… preserving your options. If you like this, you'll love our Chocolate Peanut Butter Haystacks — A Sweet Little Shortcut to Happiness.
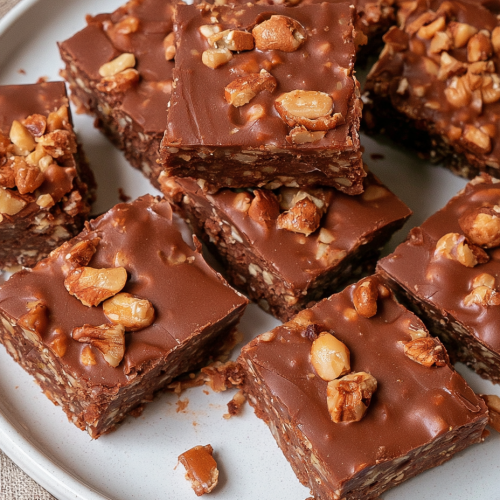
Nut Goodie Bars
Want This Recipe Later?
Ingredients
- 6 ounces milk chocolate chips
- 6 ounces butterscotch chips
- 1 cup creamy peanut butter
- 1/2 cup butter melted
- 1/4 cup milk
- 2 tablespoons cook ’n serve vanilla pudding mix not instant
- 3 cups powdered sugar
- 1/4 teaspoon maple flavoring
- 1 cup salted peanuts
Instructions
- Lightly grease a 9-by-13-inch pan with cooking spray or butter, using just enough so the bars release easily.
- Place the milk chocolate chips, butterscotch chips, and creamy peanut butter in a microwave-safe bowl and microwave for 1 to 2 minutes, then stir.
- Continue microwaving in 30-second intervals, stirring and checking after each interval, until the mixture is fully melted and smooth.
- Spread one-half of the chocolate-butterscotch-peanut butter mixture into the prepared pan and smooth it as evenly as possible.
- Refrigerate the pan until the bottom layer is firm, about 30 minutes.
- While the bottom layer firms up, combine the melted butter, milk, and cook ’n serve vanilla pudding mix in a saucepan and bring it to a boil, stirring as needed so it does not catch.
- Remove the saucepan from the heat, add the powdered sugar and maple flavoring, and beat until the mixture is smooth.
- Spread the maple filling gently and reasonably evenly over the chilled chocolate layer without pressing too aggressively or dragging up the chocolate underneath.
- Stir the salted peanuts into the remaining chocolate mixture.
- Carefully spread the peanut-studded chocolate mixture over the maple layer, using the back of a spoon or an offset spatula if you have one.
- Cut the bars into 16 squares and keep them refrigerated until serving.
Notes
Nutrition
Nutrition values are estimates based on the listed ingredients and serving count. Actual values vary with brands, cuts and portion sizes.