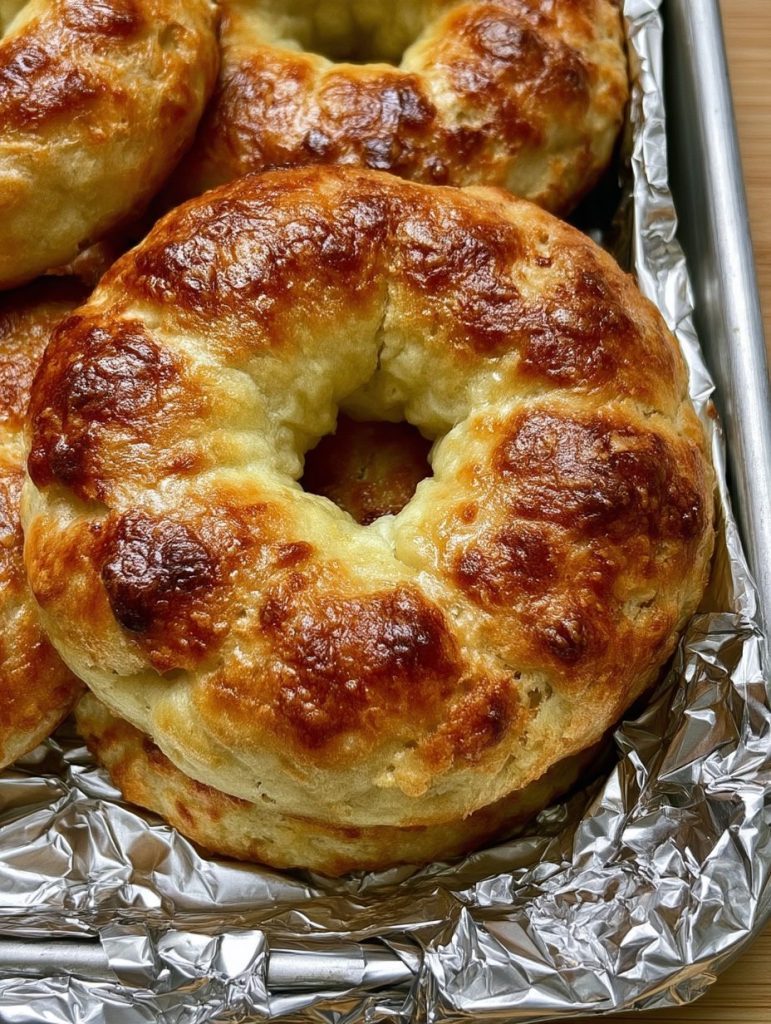
These 2-ingredient yogurt bagels are warm, chewy, and so easy to make with self-rising flour and Greek yogurt. No yeast, no rising time, and no boiling needed. You’re going to love them toasted with butter, cream cheese, or your favorite bagel toppings.
Why You’ll Love It
- Just 2 main ingredients — self-rising flour and thick plain Greek yogurt make the dough.
- No yeast or rising time — mix, shape, and bake without waiting.
- Chewy and tender — golden outside with a soft, bready center.
- Forgiving to shape — uneven rings still bake up deliciously.
Ingredient Notes
The flour needs to be self-rising flour, which already has the leavening and salt mixed in. Don’t grab regular all-purpose flour and expect the same thing—been there, made six very dense little bracelets. If you don’t keep self-rising flour around, you can make it yourself with all-purpose flour, baking powder, and fine salt. I keep telling myself I’ll label the jar in my pantry, but instead I play Flour Roulette every time I bake.
For the yogurt, use thick plain Greek yogurt—full-fat or 2% both work nicely. Regular plain yogurt is usually too thin and will turn the dough into a sticky nuisance. Thick yogurt is what gives these bagels their body and that soft, bready center. I usually buy whatever plain Greek yogurt is on sale, although I do have opinions about certain brands being mysteriously watery. You know who you are.
You can brush a little extra yogurt or water over the tops before baking if you want a bit of shine. This is optional. Half the time I do it, half the time I’ve already washed my hands and simply cannot be bothered.
Ingredients
- 2 cups self-rising flour, plus extra for dusting the counter and your hands
- 1 1/2 cups plain Greek yogurt, thick full-fat or 2% is best
- A tiny bit of extra Greek yogurt or water for the tops, optional—I just dab it on with my fingertips

Instructions
- Preheat your oven to 375°F and line a baking sheet with parchment paper, or lightly grease it.
- Put the self-rising flour in a large mixing bowl and make a little well in the center. Add the Greek yogurt right into that hollow. It looks almost too simple at this point, like you have forgotten several important ingredients, but you haven’t.
- Stir the flour and yogurt together with a sturdy spoon or spatula until you have a shaggy, rough-looking dough. It will be sticky and uneven, and you may be tempted to add a lot more flour immediately. Don’t. Give it a minute. I have ruined enough dough by panicking early in the process; this is one of my less charming kitchen traits.
- Lightly flour a clean counter, cutting board, or whatever flat surface you have available. Turn the dough out, dust the top and your hands with a little flour, and gently knead it for 1 to 2 minutes. You are just bringing it together into a soft, mostly smooth ball—not working out your frustrations from the cable company. Stop when it is manageable and no longer terribly sticky.
- Pat the dough into a thick disc and cut it into 6 roughly equal wedges, like slicing a pie. “Roughly” is doing a lot of work here. Mine are never truly equal, despite the fact that I should probably own a ruler or a kitchen scale or both.
- Take one wedge and roll it into a rope about 6 to 7 inches long, using your hands or the floured surface. Bring the ends together into a ring and pinch them firmly to seal. Place it on the prepared baking sheet, then repeat with the remaining pieces, leaving a couple inches between them. If a seam opens while baking, it is not the end of civilization. It just becomes a very good roll.
- If you want a shinier top, lightly rub or brush each bagel with a tiny bit of yogurt or water. You don’t need much. Too much and they can look pale and a little odd, though they’ll still taste perfectly fine.
- Bake for 20 to 25 minutes, until the bagels are puffed and lightly golden. Every oven has its own peculiar personality. Mine runs hot on the left side, because apparently even appliances have moods.
- Turn the oven to low broil and broil the bagels for 1 to 3 minutes, watching them very closely, until the tops deepen to a rich golden brown. Do not walk away to answer a text, refill coffee, let the dog out, or see why the house has suddenly gone suspiciously quiet. Broilers are sneaky little devils.
- Remove the bagels from the oven and transfer them to a foil-lined platter or a cooling surface. Let them rest for at least 10 to 15 minutes before slicing. The insides keep setting as they cool, and slicing too soon gives you steam burns and a gummy middle. Ask me how I know. Actually don’t; it makes me feel foolish every single time.
Variations
If you don’t have self-rising flour, whisk together 2 cups all-purpose flour, 3 teaspoons baking powder, and 1/2 teaspoon fine salt, then use it exactly as you would the self-rising flour here.
You can press sesame seeds, poppy seeds, dried onion, or a little coarse salt onto the shaped bagels before baking. Dried onion and sesame seeds make the bagels smell like an everything bagel shop in the best possible way.
For a sweeter version, stir 1 tablespoon of sugar or honey into the yogurt before mixing it with the flour. Those are lovely with jam or cinnamon butter. I once tried stirring cinnamon directly into the dough, thinking I was being clever. It was not terrible, exactly. But it tasted like somebody had dropped a cinnamon candle into a bread basket. We ate them anyway. Waste not, want not, and all that.
You can also shape the dough into rolls rather than rings; just bake them a little less and keep an eye on the color.
Storage & Reheating
These are best the day they’re baked—warm, preferably, with something creamy or buttery on them. Store leftovers in an airtight container at room temperature for up to 1 day, or refrigerate them for up to 3 days.
They firm up after the first day, which is normal. Don’t throw them out or write them off as failures. Split them and toast them; that chewy crust comes back beautifully. They’re also great toasted with turkey and cheese for lunch, or with cream cheese and sliced tomato.
For longer storage, freeze the cooled bagels in a sealed freezer bag. You can toast them from frozen or warm them in the oven. Freezing them in pairs helps keep them easy to grab.
Final Notes
There are recipes that make you feel accomplished because they are complicated, and there are recipes that make you feel accomplished because you had the sense to keep them simple. These bagels are the second kind.
Make these on a morning when you need the kitchen to smell warm and hopeful. Make them when the grocery list is pathetic and the bakery sounds like too much effort. Make them uneven. Toast them well. Put too much butter on one if that’s the kind of day it is.
Some days, that’s plenty.
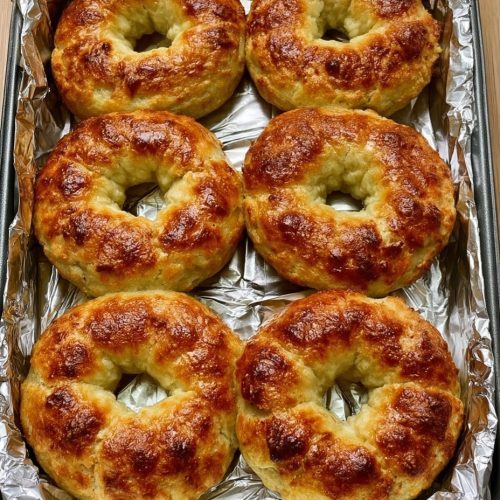
2-Ingredient Yogurt Bagels
Want This Recipe Later?
Ingredients
- 2 cups self-rising flour Plus extra for dusting the counter and your hands
- 1 1/2 cups plain Greek yogurt Thick full-fat or 2% yogurt is best
Instructions
- Preheat the oven to 375°F and line a baking sheet with parchment paper, or lightly grease it.
- Put the self-rising flour in a large mixing bowl, make a well in the center, and add the Greek yogurt.
- Stir the flour and yogurt together with a sturdy spoon or spatula until a shaggy, rough-looking dough forms.
- Lightly flour a clean work surface, turn out the dough, dust your hands and the dough with flour, and gently knead for 1 to 2 minutes until manageable and mostly smooth.
- Pat the dough into a thick disc and cut it into 6 roughly equal wedges.
- Roll each wedge into a rope about 6 to 7 inches long, bring the ends together to form a ring, and pinch the ends firmly to seal. Place the rings on the prepared baking sheet, leaving a couple of inches between them.
- For a shinier top, lightly rub or brush each bagel with a tiny bit of extra Greek yogurt or water.
- Bake for 20 to 25 minutes, until the bagels are puffed and lightly golden.
- Turn the oven to low broil and broil the bagels for 1 to 3 minutes, watching them closely, until the tops deepen to a rich golden brown.
- Remove the bagels from the oven, transfer them to a cooling surface, and let them rest for at least 10 to 15 minutes before slicing.