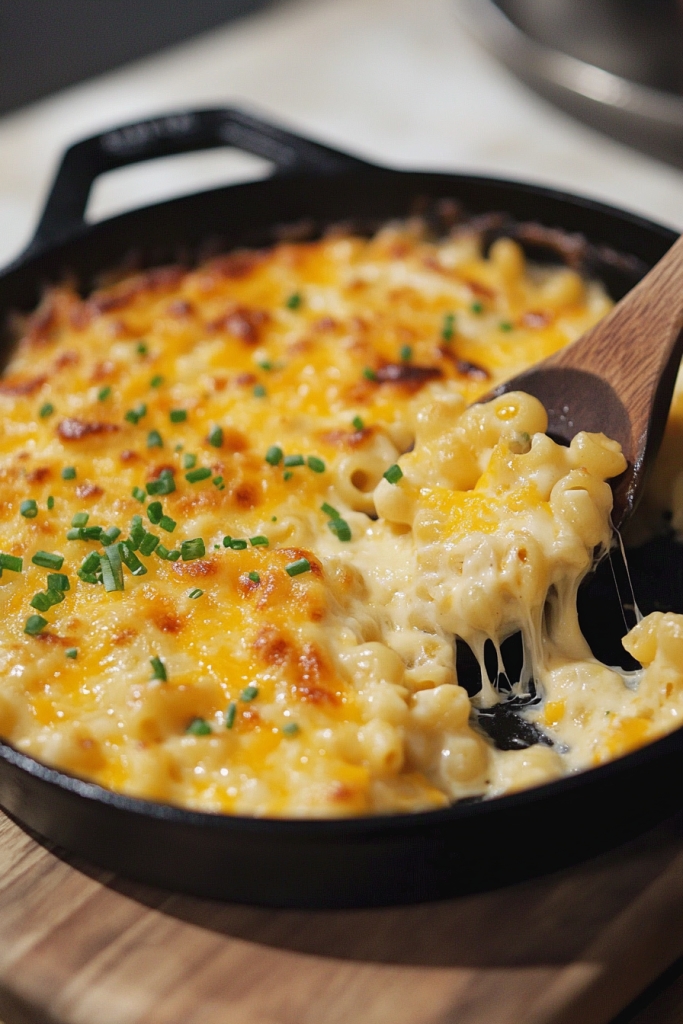
Raise your hand if you’ve ever sat at a Korean BBQ spot and just completely forgotten about the piles of sizzling meat because your eyes (and, honestly, your heart) only had room for that hot, gooey, ridiculously craveable corn cheese bubbling away in its little skillet. (Just me? Oh, I know I’m not alone.) I swear, it’s the dish I end up dreaming about long after the plates are cleared—just sweet corn and melty cheese, but somehow so much more than the sum of its parts.
The very first time I tried Korean Corn Cheese, I came home a little bit obsessed (okay, a lot obsessed). I had that “Wait. Why have I never made this?! How hard can it really be?” kind of feeling. Turns out, this is the rare comfort food that’s as simple to whip up as it is to accidentally polish off a pan. Whether you spoon it up alongside smoky bulgogi, scoop it straight from the skillet, or serve it on a random Tuesday because, well, you deserve it, this dish is pure, unpretentious comfort in every single cheesy bite.

Why You’ll Love This Recipe
- Quick and Dangerously Easy: You’ll have this on the table in under 20 minutes. (Honestly, that’s a blessing and a curse—my family inhales it so fast!)
- The Cheese Pull Situation: That mozzarella stretch! I mean, who doesn’t love a food that’s basically designed for a dramatic cheese pull?
- The Ultimate Shareable: It’s a side, snack, appetizer—heck, I’ve eaten it straight out of the pan for lunch (no judgment, please).
- Adjustable and Forgiving: Tweak the sweetness, add a little kick, swap in what you’ve got. Impossible to mess up.
- Multi-talented: Amazing next to BBQ, but just as good piled on toast, scooped with chips, or tucked next to a runny egg for breakfast.
Key Ingredients
Corn: Honestly, use what you have. I reach for canned most days (drain it well!), but frozen and thawed is great, and if you’re going the extra mile in summer, fresh-off-the-cob is just dreamy. You’ll want about 3 cups total—that’s two big cans, drained. Try our Slow Cooker Cream Cheese Corn Casserole next.
Mozzarella Cheese: Freshly grated melts best (and seriously, that cheese pull…), but pre-shredded gets the job done on busy nights. If you want to add a little sharpness, stir in a handful of Monterey Jack or even a sprinkle of cheddar, but keep the mozz as your main character.
Mayonnaise: I know, some folks run for the hills at the word “mayo.” Trust me: mixed in here, it doesn’t taste mayo-y. It just gives everything a creamy, rich backbone and holds the corn and cheese together. In a pinch, swap in sour cream or thick Greek yogurt for a little tang.
Butter: 3 tablespoons, and yes, you do need it! It makes things glossy and rich. I use unsalted so I can control the salt later.
Green Onion: A full stalk, very thinly sliced—because a sprinkle of something green makes any bubbly skillet look (and taste) more irresistible.
Sugar: Just a couple teaspoons! Don’t skip it—the tiny bit of sweetness totally highlights the corn and plays so well with all the savory cheese.
Want to jazz things up? Check out the “Variations” below—you can toss in bacon, go spicy, or even riff on Mexican street corn if you’re feeling wild. If you like this, you'll love our Amish Snow Day Soup.
Step-by-Step Instructions
Step 1: Prepare the Ingredients
Start by draining two 15-ounce cans of corn (or use 3 cups of frozen and thawed corn). Pour them into a colander and give them a really good shake. Excess water = watery corn cheese, and that is not the goal! Slice up a green onion super thin for color and crunch at the end. Grate up a generous cup of mozzarella—shoot for 4 ounces, but don’t bother measuring precisely. More cheese is always welcome here.
Step 2: Cook the Corn Mixture
Grab your trusty cast iron skillet if you’ve got one, or any oven-safe pan. Medium heat is your friend. Toss the drained corn into the pan with 3 tablespoons of unsalted butter. Stir until the butter is happily melted and the kernels are slick and glossy—take a moment to inhale that crazy good smell (so simple but, wow). Add in a heaping 1/3 cup of mayo, 2 teaspoons of sugar, and a big pinch of kosher salt. Give it a taste—maybe you’ll want a pinch more salt or pepper. The mixture should look luscious and creamy, like the most comforting corn salad you’ve ever seen.
Step 3: Melt the Cheese
Spread the corn mixture into an even layer so there’s plenty of surface area for that cheese blanket. Scatter all the shredded mozzarella right on top. Now, slide the whole skillet under your broiler (set to low, if yours has settings). Stay close! Three to five minutes is all it takes for the cheese to get bubbly and golden and develop those irresistible browned spots. The difference between perfect and burnt is, like, thirty seconds—so don’t wander far. (And if your oven doesn’t broil, just crank it up as high as it goes.) For another easy option, see our Southern Squash Casserole.
Step 4: Garnish and Serve
Let the finished corn cheese sit for a minute or two (I know it’s hard). Shower the top with your sliced green onions right before serving. Now, take the whole skillet to the table and get ready to see everyone’s eyes light up! It’s meant to be shared, though if you sneak an extra spoonful before announcing it’s ready, your secret’s safe with me. Serve it right out of the skillet, and don’t be shy—forks, spoons, chips, torn bread, whatever gets that glorious cheese and corn to your mouth fastest.
Serving Suggestions
- Korean BBQ Night: The salty-sweet, cheesy goodness is a perfect match next to grilled bulgogi, galbi, or slices of pork belly. Trust me, everyone will go back for seconds.
- Wraps & Tacos: Spoon a little inside lettuce wraps (add kimchi if you dare) or tacos with grilled veggies—it’s like summer on a plate.
- Snack-Attack Mode: Serve with sturdy tortilla or potato chips and invite friends over for game day, movie night, or just because it’s Wednesday.
- Breakfast Deluxe: Heap a scoop on hot toast, add a fried or soft-scrambled egg, and prepare to be everyone’s favorite morning person.
Storage and Reheating Tips
If you somehow end up with leftovers (miracles never cease), here’s how to keep the magic alive: You might also like our Oven-Baked 4-Ingredient Potato Au Gratin Cups.
More recipes you might like



- Refrigeration: Scoop any leftovers into an airtight container and stash in the fridge for up to 3 days. It reheats like a dream.
- Reheating: I like to pop it back in a skillet on low, stirring until hot and bubbly. The microwave also works—just pause and stir every 30 seconds so the cheese heats evenly. Want bonus gooeyness? Sprinkle on extra cheese right before reheating.
- Freezing: Honestly, I wouldn’t. The mayo and cheese get a little weird after thawing. Make enough to eat within a few days—it won’t go to waste.
Variations
- Spicy Corn Cheese: Stir in a good pinch of gochugaru (Korean chili flakes), a dab of gochujang, or even a swirl of sriracha if you love some heat.
- Bacon Dream: Crispy bacon bits, pancetta, or prosciutto stirred in make it truly next-level—because bacon and cheese just belong together, right?
- Garlic Lovers: Sauté a couple cloves of minced garlic in the butter before adding the corn for roasty, toasty flavor.
- Mexican-Inspired: Swap mayo for crema, add cotija cheese on top, dust with chili powder and some chopped cilantro. Instant fusion brilliance.
- Veggie Add-Ins: Finely diced bell pepper, a handful of jalapeños for zip, or even sautéed mushrooms all take well to this cheesy corn party.
Conclusion
So that’s Korean Corn Cheese—the kind of dish that just feels like a warm hug at the end of a long workday, a party hit, or a family favorite you never knew you needed. It pops up at almost every get-together in our house and, honestly, I make it for “just us” nights just as often. That dreamy combo of gooey, golden cheese, super-sweet corn, and creamy richness? It’s irresistible. If you decide to give this a try, drop me a note below—do you spice it up, stick to the classic, or find a totally new way to enjoy it? I absolutely love seeing how you make cozy comfort food your own. Try our Oven-Baked Swiss Onion Potato Bites next.
And here’s my last little tip—if you’re craving an extra golden cheese cap, a culinary torch (or just popping the skillet under the broiler for an extra minute) works wonders. Now, go grab your skillet, gather your ingredients, and treat yourself to the coziest, cheesiest bite. You deserve it! If you like this, you'll love our Asparagus Casserole That Tastes Like Spring and Sunday Dinner Had a Baby.
FAQ
Can I use fresh corn instead of canned, and do I need to cook it first?
Absolutely! Fresh corn is actually amazing in this recipe. You’ll want to cook it first though – just boil the kernels for about 3-4 minutes until tender, then drain them really well. You can also cut kernels off grilled corn cobs for extra smoky flavor. Just make sure to let any cooked corn cool down a bit and drain off excess moisture before mixing with the other ingredients.
How do I know when the cheese is perfectly melted without burning it?
Great question! Stay right by the oven because it happens fast. You’re looking for the cheese to be bubbly all over with some gorgeous golden-brown spots on top. It usually takes 3-5 minutes under the broiler. If your broiler runs hot, start checking at 2 minutes. The cheese should be melted through but not dark brown or black – that bitter burnt taste is not what we’re going for here!
My corn cheese looks a little watery – what went wrong?
This usually happens when the corn wasn’t drained well enough or if you used frozen corn that still had ice crystals. Don’t panic though! Just keep cooking it on the stovetop for a few extra minutes to let some of that liquid evaporate before adding the cheese. For next time, really shake that colander hard when draining canned corn, and if using frozen, thaw it completely and pat dry with paper towels.
How long will leftovers keep, and what’s the best way to reheat them?
Leftovers will keep in the fridge for about 3 days in a covered container. For reheating, I love putting it back in a skillet over low heat and stirring until it’s hot and bubbly again – this keeps that nice texture. The microwave works too, just heat in 30-second bursts and stir between each one. Pro tip: sprinkle a little extra cheese on top before reheating for that fresh-melted goodness!
Can I make this ahead for a party, and will it still taste good?
You can definitely prep the corn mixture ahead of time – just make it through step 2 and keep it covered in the fridge for up to a day. When you’re ready to serve, reheat the corn mixture in the skillet, add the cheese, and pop it under the broiler. I wouldn’t recommend making the whole thing ahead though, since reheated cheese just doesn’t have that same amazing gooey factor as fresh-melted cheese!

Korean Corn Cheese
Want This Recipe Later?
Ingredients
- 2 cans corn kernels 15 oz each, drained
- 1/3 cup mayonnaise
- 2 teaspoons granulated sugar
- 3 tablespoons unsalted butter
- 1 cup shredded mozzarella cheese grated
- 1 green onion thinly sliced, for garnish
- kosher salt to taste
- freshly ground black pepper to taste
Instructions
- Drain two 15-ounce cans of corn kernels thoroughly to remove excess liquid. Thinly slice one green onion for garnish, and grate 1 cup of mozzarella cheese for a creamier texture.
- Preheat a cast iron skillet over medium heat. Add the drained corn and 3 tablespoons of unsalted butter. Stir until the butter melts and coats the corn evenly. Stir in 1/3 cup mayonnaise and 2 teaspoons granulated sugar, mixing well. Season with kosher salt and freshly ground black pepper to taste.
- Sprinkle 1 cup of grated mozzarella cheese evenly over the bubbling corn mixture. Place the skillet under the broiler on low for 3-5 minutes until the cheese is melted, bubbly, and golden brown on top. Watch closely to prevent burning.
- Remove the skillet from the oven and let cool slightly. Sprinkle the sliced green onions on top. Serve hot, directly from the skillet, as a side dish, appetizer, or pairing for Korean BBQ.
Notes
Nutrition
Made this recipe? Tap a star to rate it.
Nutrition values are estimates based on the listed ingredients and serving count. Actual values vary with brands, cuts and portion sizes.