
Save This Recipe
Hydrangeas have a way of stealing the show. Big, cloud-like blooms. Colors that shift like mood rings. And yet… sometimes they just don’t perform the way you expect.
Smaller flowers. Fewer blooms. Lots of leaves, but not much wow.
Here’s the thing—most people focus on spring and summer care. Feeding, watering, pruning. All good habits. But the real magic? It often starts earlier. Quietly. When the plant looks like it’s doing absolutely nothing.
Yes, we’re talking about dormancy.
When Nothing’s Happening… Something Actually Is
At first glance, a dormant hydrangea looks lifeless. Bare stems. No leaves. No movement.
But underground? It’s a different story.
Roots are still active—slow, steady, and Surprisingly responsive. They’re not distracted by leaf or flower production, which means they’re far more receptive to nutrients you introduce at this stage.
Think of it like prepping soil before planting. Or marinating before cooking. The payoff comes later, but the work happens early.
And honestly? This is where many gardeners miss an easy win.
So What Do Hydrangeas Actually Need? (Let’s Keep It Simple)
Plants aren’t that complicated—but they are specific.
Hydrangeas rely on three core nutrients:
- Nitrogen – for leafy growth (important, but easy to overdo)
- Phosphorus – this is the bloom driver
- Potassium – supports overall strength and resilience
Then there are the supporting players—magnesium, calcium, iron. You don’t hear about them as much, but they quietly keep everything running smoothly.
If phosphorus builds the flowers, magnesium helps the plant actually use energy to grow them.
It’s a team effort.
The 3-Ingredient Mix That Makes a Real Difference
Now here’s where things get practical.
You don’t need a shelf full of products or anything complicated. Just three simple ingredients:
- Compost tea
- Bone meal
- Epsom salt
That’s it.
It sounds almost too basic, right? But together, they cover a surprising amount of ground—nutrition, soil health, and root support.
And more importantly, they work with the plant’s natural cycle instead of forcing growth at the wrong time.
Why These Ingredients Work (Individually and Together)
Let’s break it down quickly—no jargon overload.
Compost tea
This is your foundation. It’s alive with beneficial microbes and organic matter. It improves soil structure, helps roots absorb nutrients better, and honestly, it just makes the soil feel… healthier.
Bone meal
This is your phosphorus source. Slow-release, steady, reliable. It doesn’t rush things—which is exactly what you want during dormancy.
Epsom salt
Magnesium and sulfur. Magnesium supports chlorophyll production (yes, even before leaves fully emerge), while sulfur helps nutrient uptake.
On their own, they’re useful. Together? They create a balanced, root-focused boost.
Mixing It—No Perfection Required
You don’t need lab-level precision here. Gardening rarely works that way anyway.
Here’s a simple approach:
- Fill a bucket (about 5 gallons) with water
- Add a bag or cloth filled with finished compost
- Let it sit for 24–48 hours (stir occasionally if you remember)
Once that’s ready:
- Add 1 cup of bone meal
- Add 1 tablespoon of Epsom salt per gallon of liquid
Give it a good stir. It might look a bit murky. That’s fine. That’s kind of the point.
Timing—This Part Really Matters
You could have the perfect mixture… and still get mediocre results if you apply it at the wrong time.
Aim for two key windows:
- Late fall (after leaves drop, before hard freeze)
- Early spring (just as the ground starts to thaw)
Why both?
The first application strengthens roots before full dormancy. The second one gives the plant a gentle push as it wakes up.
Skip the timing, and you’re basically feeding at the wrong phase—like watering a plant at noon in the desert sun. Not ideal.
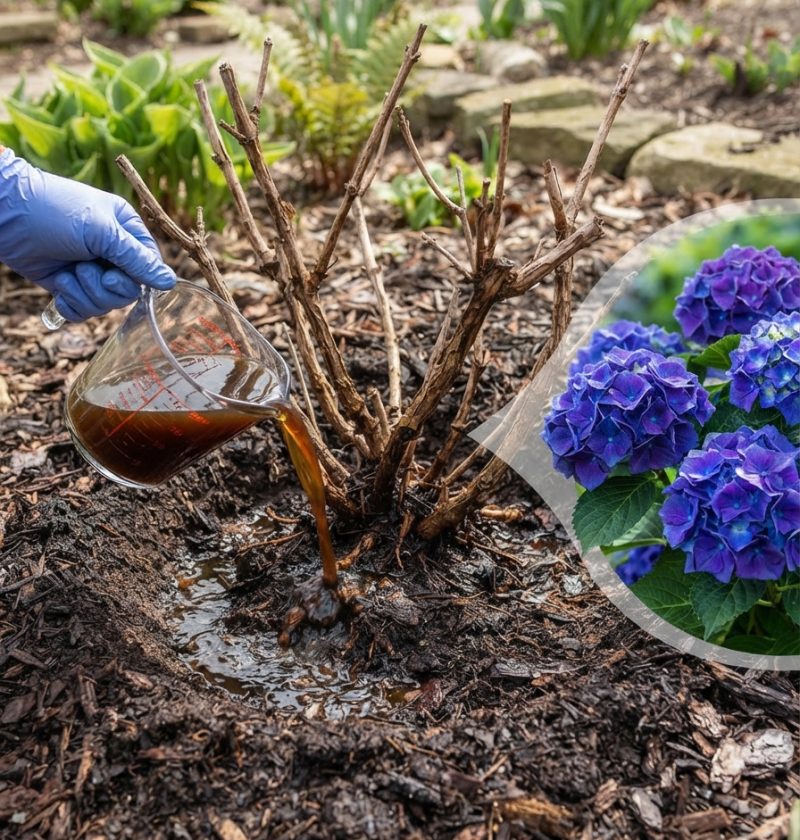
How to Apply It Without Wasting It
This isn’t a “dump and go” situation.
Take a minute to prep:
- Clear away leaves and debris around the base
- Loosen the top layer of soil slightly (if it’s compacted)
Then:
- Pour slowly around the root zone
- Let it soak in—don’t flood it
- Avoid runoff (that’s nutrients going to waste)
You want the mixture to reach the roots, not sit on the surface.
A Few Mistakes That Are Easy to Make
Honestly, most problems come down to overdoing it.
- Too much bone meal → nutrient imbalance
- Too much Epsom salt → soil buildup over time
- Applying too late → frozen ground blocks absorption
More isn’t better here. Consistent and measured wins.
What Changes Will You Actually Notice?
This is the part everyone cares about.
If the process works well, you’ll start to see:
- Stronger stems (less flopping)
- Bigger buds forming earlier
- More blooms overall
- Richer color—especially in pinks and blues
Now, will it turn a struggling plant into a miracle overnight? No.
But will it noticeably improve bloom quality over a season or two? Very likely.
Prefer a Fully Organic Route? No Problem
If bone meal or Epsom salt isn’t your thing, there are alternatives:
- Fish emulsion – balanced nutrients, fast-acting
- Seaweed extract – excellent for trace minerals and root stimulation
They’re gentler, a bit less targeted—but still effective.
So… Is It Worth the Effort?
Honestly? Yes.
It’s simple, low-cost, and fits naturally into the plant’s lifecycle. No complicated schedule. No expensive products.
And there’s something satisfying about doing the work when no one else is thinking about it—late fall, early spring—knowing it’ll show up months later in full bloom.
Because that’s the thing about hydrangeas.
When they’re happy… they don’t just grow.
They perform.