
Save This Recipe
This oven-baked spring pea pasta is the weeknight dinner I keep coming back to when I want something cozy, Creamy, and completely hands-off. You scatter frozen peas over dry shells in a baking dish, pour a simple cream-and-Parmesan sauce over the top, cover it with foil, and let the oven do all the work. No boiling water, no separate sauce pan — just one dish and about forty-five minutes.
Why You’ll Love It
No boiling water required — dry pasta goes straight into the baking dish, no pre-cooking needed
Frozen peas stay bright and sweet — they steam perfectly in the oven and never go mushy
One dish, start to finish — it goes from the oven straight to the table with almost nothing to clean up
The sauce thickens as it rests — give it five minutes and you get a silky, creamy coating that clings to every shell
Endlessly adaptable — add rotisserie chicken, stir in spinach, or throw on a breadcrumb topping without changing the method
A Few Notes on the Ingredients
The pasta: medium shells are the move. They catch the sauce inside, which is exactly what you want. I’ve used elbows in a pinch and it was fine — a little flat, texturally, but fine. Do not use Spaghetti or anything long. It doesn’t bake the same way.
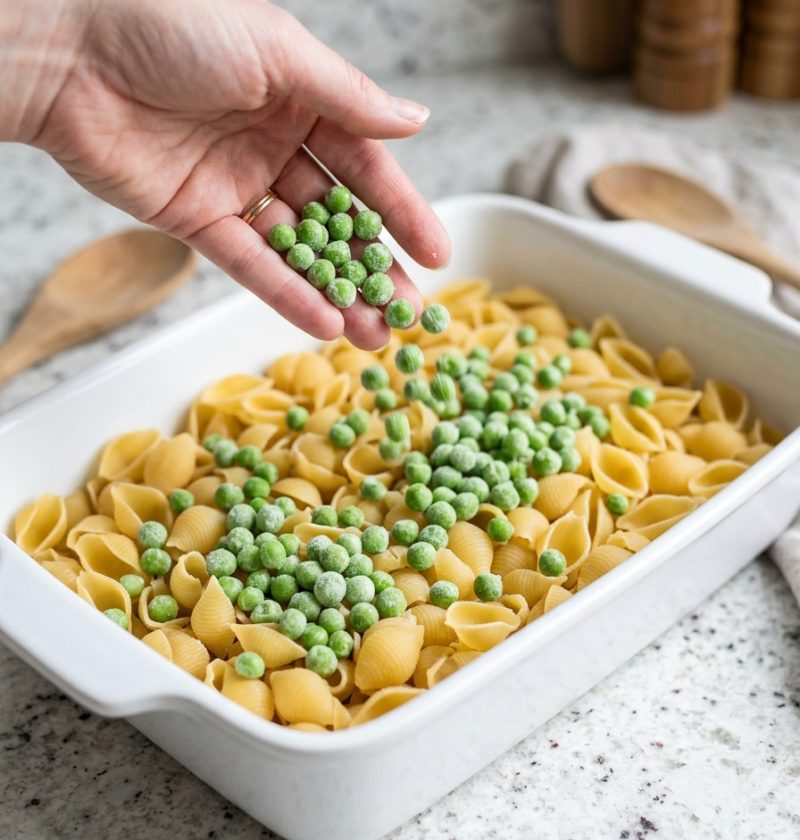
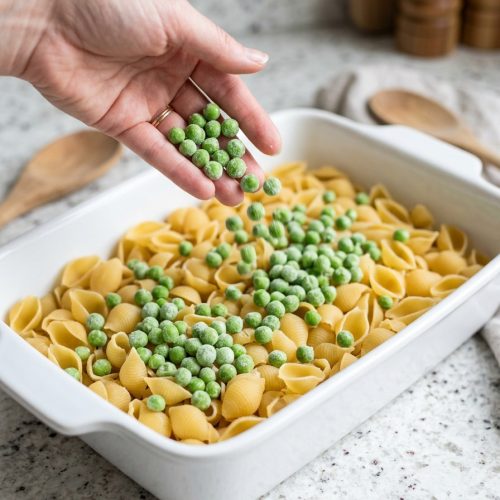
The peas: do not thaw them. I know that sounds weird. Just pour them straight from the bag, frozen solid. They’ll steam perfectly in the oven and they won’t turn to mush.
The Parmesan: grate it yourself if you can. The pre-grated stuff in the green can — look, I’ve used it, it works, but it doesn’t melt into the sauce the same way. It gets a little grainy. Freshly grated is worth the thirty extra seconds.
Broth: I use chicken broth because it’s what I usually have open, but vegetable broth works just as well. Low-sodium is better here because the Parmesan brings its own saltiness and you can always add more at the end.
Heavy cream: yes, the full-fat kind. I’ve tried half-and-half. It’s thinner and less satisfying. Some things are worth the calories and this is one of them.
Ingredients
(Makes about 4 servings — or 3 if one of those people is particularly hungry, which in my house is always a possibility)
8 ounces dry medium pasta shells
1½ cups frozen green peas — straight from the freezer, please
2 cups low-sodium chicken or vegetable broth
1 cup heavy cream
1 cup finely grated Parmesan, plus a bit more to sprinkle at the end
1 teaspoon kosher salt (start here, taste later)
½ teaspoon freshly ground black pepper
A little olive oil or softened butter for the dish

How to Make It
Preheat your oven to 375°F. Lightly grease a medium baking dish — I use a two-quart ceramic one that’s the right size for this. Something similar will work.
Pour in the dry shells and spread them into a mostly even layer. Don’t obsess over it. Scatter the frozen peas over the top — just tip them right out of the bag and distribute them around. They’ll settle where they want.
In a bowl or a big measuring cup (I use the measuring cup because fewer dishes), whisk together the broth, heavy cream, Parmesan, salt, and pepper. The cheese won’t dissolve completely and that’s fine — you’re not trying to make a smooth béchamel, you’re just combining things. Give it a taste and see if the seasoning feels right, keeping in mind it will concentrate a little as it bakes.
Pour the liquid slowly over the pasta and peas. Nudge any shells that are completely exposed down into the liquid — just a gentle press, you’re not trying to submerge everything, just make sure nothing is sitting high and dry. A few pieces on top are fine. They’ll brown a bit, which is honestly good.
Cover the dish tightly with foil. Tight matters here. You want that steam trapped inside doing the cooking, and if the foil is loose it just escapes and you end up with crunchy pasta, which is not what anyone wants.
Bake covered for 30 minutes. Pull it out carefully — there will be a rush of hot steam when you lift the foil, so do that away from your face. Stir it gently from the bottom. The pasta should be getting tender but the sauce will look loose and almost soupy, which is normal. Don’t panic.
Put it back in the oven uncovered and bake for another ten to fifteen minutes, stirring once if you think about it, until the pasta is fully cooked and the sauce has thickened up and the top has a few golden spots. My oven takes about twelve minutes for this part, but ovens vary — just watch it and taste a shell.
Let it sit for five minutes before you serve it. The sauce will tighten up. If it looks too thick when you come back to it, a splash of warm broth loosened it right up. If it looks too loose, it just needs another minute or two.
Taste it, add more salt if it needs it, and shower a little more Parmesan over the top before you bring the dish to the table.
Variations I’ve Tried
This is great with rotisserie chicken tucked in before the peas — just pull it apart and layer it right on the shells, about a cup and a half or so, and it still works without crowding things. Good for nights when you need the pasta to be dinner and enough protein to count.
I’ve also stirred in a handful of baby spinach during the last ten minutes or so. It wilts down and basically disappears into the sauce, but it’s there and it makes me feel better about the whole thing. Kale would probably work too — chopped small, given a few extra minutes.
A breadcrumb topping is good if you want crunch. Just mix some panko with a little Parmesan and olive oil and sprinkle it on top for the last ten minutes uncovered. I only do this when I’m not in a hurry, which is not that often.
I’ve been meaning to try it with a little lemon zest stirred in at the end. Haven’t gotten around to it yet. I imagine it would be good.
Leftovers
It keeps in the fridge for about three days, covered. The sauce thickens considerably overnight so you’ll want to add a splash of water or broth when you reheat it — I do it right in a small saucepan on low heat, stirring, and it comes back pretty well. The microwave works in a pinch, same deal, just add a little liquid first or it’ll be gluey.
I’ve left it on the counter too long more than once while I was distracted and then eaten it at room temperature and it was fine, in case that information is useful to anyone.
Oven-Baked Spring Pea Shell Pasta
Ingredients
- 12 oz medium shell pasta
- 2 cups frozen peas thawed
- 1 1/2 cups shredded mozzarella cheese
- 1 cup ricotta cheese
- 3/4 cup grated Parmesan cheese
- 1 cup heavy cream
- 1/2 cup milk
- 2 tbsp butter
- 1 tsp garlic powder
- 1/2 tsp salt
- 1/4 tsp black pepper
Instructions
- Preheat the oven to 375°F and lightly grease a 9x13-inch baking dish.
- Cook the shell pasta in salted boiling water until just al dente, then drain.
- In a large bowl, combine the ricotta cheese, heavy cream, milk, butter, garlic powder, salt, and black pepper.
- Stir in the cooked pasta, thawed peas, 1 cup mozzarella cheese, and 1/2 cup Parmesan cheese until evenly coated.
- Spread the pasta mixture into the prepared baking dish.
- Sprinkle the remaining mozzarella and Parmesan cheese over the top.
- Bake for 20–25 minutes, until hot, bubbly, and lightly golden on top.
- Let the pasta rest for 5 minutes before serving warm.