
Save This Recipe
These no-bake chocolate silk bars are rich, creamy, deeply chocolatey, and completely plant-based — and they taste like something from a fancy bakery. No oven, no complicated steps, just layers of silky chocolate filling and a nutty crust that comes together with minimal effort.
Why You’ll Love It
No oven required — Just mix, layer, and chill. Perfect for warm days when heating the kitchen isn’t an option.
Silky smooth texture — The coconut cream filling sets up like chocolate mousse — light and creamy without being heavy.
Low-carb and dairy-free — Works for a variety of dietary needs, and nobody at the table will know unless you tell them.
Make-ahead friendly — These get better overnight, making them ideal for holiday tables or dinner parties when you want dessert handled the day before.
Endlessly customizable — Once you have the base down, you can go a dozen different directions depending on your mood or what’s in the pantry.
A Few Notes on Ingredients
Almond flour is what gives the crust its body. I’ve tried a few different brands over the years and honestly, most of them work fine — just make sure you’re using almond flour and not almond meal, which is coarser and a little oily. The texture of the crust depends on it.
For the cocoa powder, this is not the place to grab whatever’s been sitting in the back of your cabinet since who-knows-when. Use a good, fresh unsweetened cocoa — it makes a noticeable difference in the final flavor. Dutch-process cocoa will give you a slightly smoother, less bitter chocolate taste if you can find it.
The coconut cream is the whole reason the filling works the way it does. Full-fat, not light — I cannot stress this enough. I tried using a lighter version once because that’s what I had, and the filling never quite set up properly. It was still edible, but it had this slightly loose, soupy quality that drove me crazy. Full-fat is the move.
Melted dark chocolate gets whisked right into the filling alongside the cocoa powder, and it’s what pushes this from “chocolatey” to actually rich and luxurious. I usually use a bar with around 70% cacao. Anything above 85% can get a little sharp — but again, adjust to your taste.
One last thing: don’t skip the sea salt. Both in the crust and in the filling. Salt does something to chocolate that’s almost impossible to explain if you haven’t experienced it — it just deepens the whole flavor, makes it taste more like itself.
Ingredients
For the crust:
1½ cups almond flour
¼ cup unsweetened cocoa powder
3 tablespoons melted coconut oil
2 tablespoons maple syrup (or your preferred low-carb sweetener)
Pinch of salt
For the chocolate silk filling:
1 cup full-fat coconut cream
½ cup unsweetened cocoa powder
⅓ cup sweetener (maple syrup or low-carb — your call)
¼ cup melted dark chocolate
1 teaspoon vanilla extract
Pinch of sea salt
Optional toppings:
Dark chocolate shavings
A dusting of cocoa powder
Crushed nuts
Coconut flakes
Fresh raspberries or strawberries

Instructions
Line your pan. Start with an 8×8-inch square baking dish and line it with parchment paper — and let the edges hang over the sides a little. You’ll thank yourself later when you’re trying to lift the whole thing out cleanly. I’ve made the mistake of not doing this and ended up hacking the bars directly out of the pan, which still tasted fine but looked like a disaster.
Make the crust. Combine the almond flour, cocoa powder, melted coconut oil, sweetener, and salt in a mixing bowl. Stir it together until it looks like damp, coarse crumbs — it should hold together when you press it between your fingers. Press it firmly and evenly into the bottom of your prepared pan. A flat-bottomed measuring cup works great for this. Once it’s smooth and even, pop it in the fridge while you work on the filling.
Make the filling. In a blender or a deep mixing bowl, combine the coconut cream, cocoa powder, sweetener, melted dark chocolate, vanilla, and sea salt. Blend or whisk until it’s completely smooth and glossy — no streaks, no lumps. Taste it here. Adjust the sweetness if needed. The texture should be thick and pourable, almost like a very loose chocolate pudding.
Assemble. Pour the filling over the chilled crust and spread it into an even layer with a spatula. At this point it looks incredible and you will absolutely want to eat it immediately. Don’t.
Chill. Refrigerate for at least four hours. Overnight is better. The filling firms up considerably as it chills, going from silky-loose to silky-firm — that beautiful mousse-like texture that makes these bars what they are. I’ve tried rushing this step more times than I should admit, and it never goes well. Just let it chill.
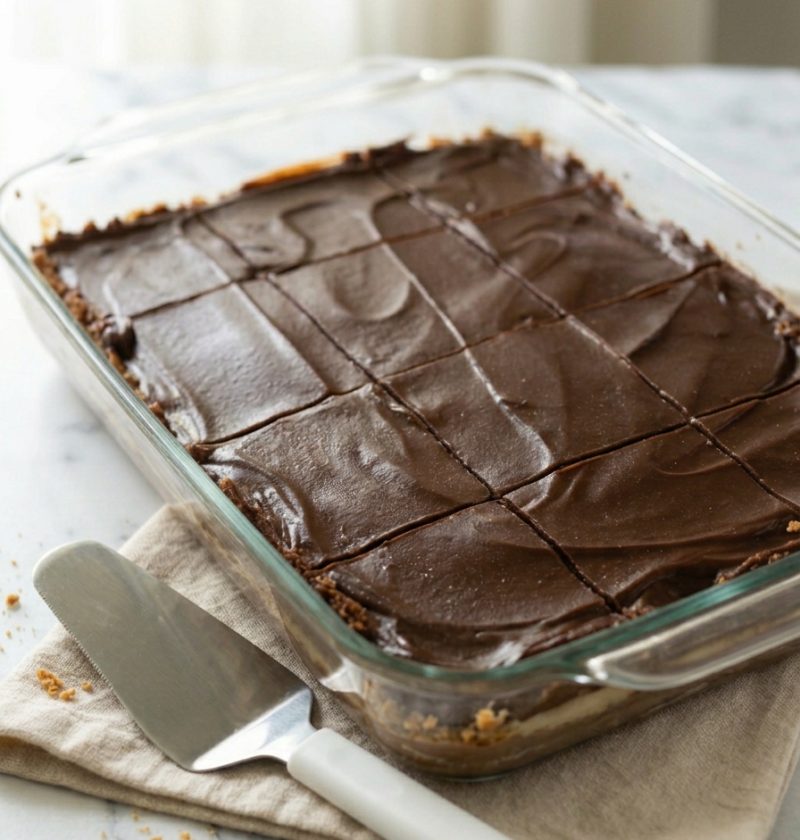
Slice and serve. Use the parchment to lift the whole thing out of the pan onto a cutting board. Slice into squares or rectangles. Running your knife under warm water between cuts gives you cleaner edges if you’re serving these for company. Add toppings right before serving.
Variations Worth Trying
The base recipe is a great starting point, but it’s pretty flexible. If you want a peanut butter version, spread a thin layer of natural peanut butter over the crust before pouring in the filling — the combination is kind of addictive. For a mocha variation, whisk a teaspoon of instant espresso powder into the filling. You don’t taste coffee so much as a deepened, more complex chocolate flavor. It’s subtle but really good.
Peppermint extract — just a few drops — turns these into something that tastes like a fancy chocolate mint truffle. Around the holidays, this version tends to disappear fast. A handful of fresh raspberries on top right before serving adds a nice tartness that cuts through the richness, too.
If you need these to be nut-free, sunflower seed flour works as a substitute for almond flour in the crust. The flavor is slightly different — a little more neutral — but the texture holds up fine.
Storage
Keep these covered in the refrigerator for up to five days, though in my experience they rarely make it past day three. They also freeze surprisingly well — cut them into individual portions, wrap each one in plastic wrap, and stash them in a freezer bag for up to two months. Let them thaw in the fridge overnight before serving. Don’t try to rush it at room temperature; the filling gets a little soft and loses that nice firm texture.

No-Bake Chocolate Silk Bars
Ingredients
- 2 cups chocolate cookie crumbs
- 1/2 cup butter melted
- 8 oz cream cheese softened
- 1 cup powdered sugar
- 1 1/2 cups semi-sweet chocolate chips melted and cooled slightly
- 8 oz whipped topping thawed
- 1 tsp vanilla extract
Instructions
- Line an 8x8-inch baking dish with parchment paper.
- In a medium bowl, combine the chocolate cookie crumbs and melted butter until evenly moistened.
- Press the crumb mixture firmly into the bottom of the prepared dish to form the crust.
- In a large bowl, beat the softened cream cheese and powdered sugar until smooth.
- Add the melted chocolate and vanilla extract, then beat until creamy and fully combined.
- Fold in the whipped topping until the filling is light, smooth, and evenly mixed.
- Spread the chocolate filling evenly over the crust.
- Cover and refrigerate for at least 4 hours, or until firm enough to slice.
- Lift from the pan using the parchment paper, cut into bars, and serve chilled.