
Save This Recipe
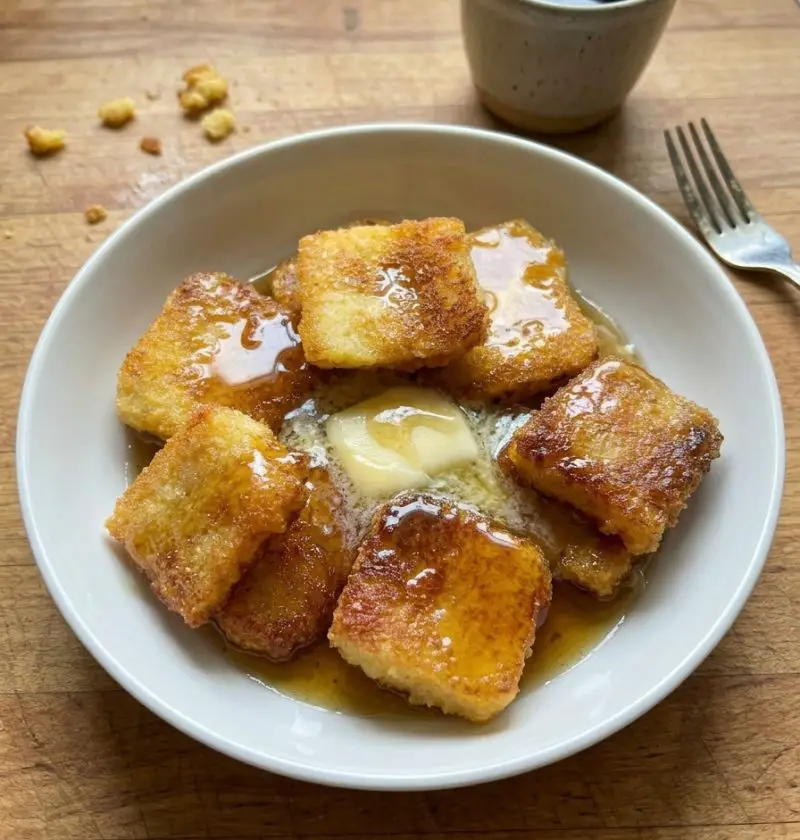
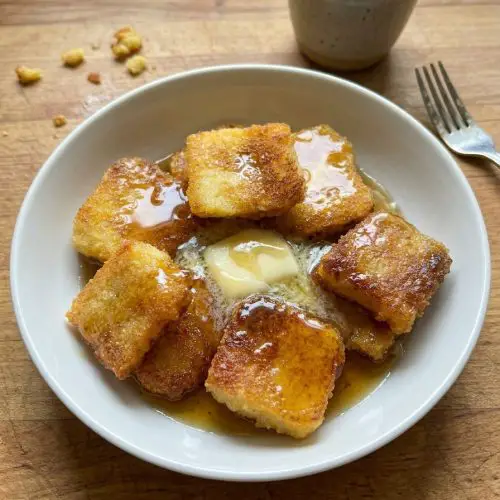
This 3-ingredient fried cornmeal mush is one of those old-fashioned, Depression-era breakfasts that proves simple food can be incredibly comforting. A big pan of mush chills overnight, then you fry thick golden squares in the morning until the edges are shatteringly crisp and the centers stay soft and steamy. Cheap, filling, and made from pantry basics you probably already have on hand.
Why You’ll Love It
Only 3 ingredients — cornmeal, water, and salt. That’s it.
Prep happens the night before — by morning, breakfast is halfway done before you even turn on the stove.
Unbeatable texture — crackling crispy edges with a soft, steamy center you don’t get from most breakfasts.
Genuinely filling — sticks with you all morning without feeling heavy.
Endlessly versatile — goes sweet with maple syrup or savory with a fried egg and cheese.
A Note on the Ingredients
Cornmeal: Yellow is traditional. Medium grind is what I reach for — the coarse stuff takes longer to cook and can be a little gritty if you’re not patient, and fine grind just disappears into itself somehow. Whatever you have is probably fine, honestly.
Water: Tap water works. I’ve made it with half water and half chicken broth when I had some leftover and needed to use it up, and it adds a nice savory depth without being weird about it. Not necessary, just something to know.
Salt: Don’t skip it. The mush itself is pretty bland without it and you need that seasoning built in before it firms up.
Oil or bacon grease for frying: If you have bacon grease, use it. Otherwise a neutral oil works fine. Butter burns too fast and you end up with a mess.
Ingredients
1 cup yellow cornmeal
3 cups water, divided (1 cup to mix, 2 cups to boil)
1 teaspoon salt
Oil or bacon grease for frying — enough to coat the pan generously, maybe 2–3 tablespoons, I eyeball it

Instructions
Start the night before. This is non-negotiable unless you have 4+ hours to kill during the day, and who has that. Grease a loaf pan — a 9×5 works well — or really any small baking dish you have. I’ve used a round Pyrex before. It was fine. The shape barely matters since you’re slicing it up anyway.
Whisk the cornmeal into 1 cup of cold water in a bowl until it’s smooth and there are no lumps. This is your slurry, for lack of a better word. Doing this step first saves you from the clumps you’ll absolutely get if you dump dry cornmeal straight into boiling water. I made that mistake once. Just the once.
Bring the other 2 cups of water and the salt to a boil in a medium saucepan over medium heat. When it’s bubbling, turn down the heat just a little and Slowly pour in your cornmeal mixture while you whisk. Don’t rush this part. Keep whisking as you pour. Then switch to a wooden spoon and stir pretty much constantly over low heat for 10 to 15 minutes — it needs to get really thick, like thick enough that it pulls away from the sides of the pan and kind of holds its shape when you drag the spoon through it.
Scrape it all into the prepared pan, smooth the top as best you can (it’s sticky and uncooperative, this is normal), let it cool, then cover and refrigerate overnight. Or at least 4 hours, but overnight is easier.
In the morning — and this is the part I still find a little satisfying every time — run a knife around the edges of the pan and tip it out onto a cutting board. It should come out in a firm block. Slice it into pieces about half an inch thick, maybe a little thicker. Thinner slices tend to break apart when you fry them and then you have a whole situation on your hands.
Heat a skillet over medium heat with a generous amount of oil or bacon grease. You want the pan well coated. When the oil is hot and shimmering, lay the slices in without crowding them — give them a little room, do batches if you need to. Then leave them alone. Do not move them, do not peek under them after thirty seconds, do not fiddle. Three to five minutes per side, depending on your heat. You’re looking for deep golden brown, almost mahogany at the edges. That’s when you flip.
When they’re done, set them on a paper towel for just a minute, then serve immediately. They’re best hot, straight from the pan.
Variations
Some people make theirs sweet — add a tablespoon of sugar to the mush before chilling and serve the fried slices dusted with cinnamon sugar like a breakfast dessert. It’s good. For a savory version, lay a slice of American cheese over the hot pieces right when they come out of the pan, let it melt for a minute, and then top with a fried egg. That’s a full breakfast. Hot sauce works surprisingly well too, though I wouldn’t have predicted it.
I tried adding herbs to the mush once — some dried thyme, a little garlic powder — and it was interesting but honestly felt like it was trying too hard. The simplicity is part of the point.
Storage
The unfried mush keeps in the fridge for three days, easy. Keep it covered tightly — cornmeal absorbs refrigerator smells if you’re not careful and then it tastes a little off. Slice off what you need each morning and fry it fresh.
Leftover fried pieces reheat okay in a dry skillet over medium heat — they crisp back up pretty well. The microwave makes them soft and a little gummy, which is technically edible but not really the same experience. I’ve eaten microwave-reheated mush more times than I can count but I wouldn’t call it the ideal outcome.
3-Ingredient Fried Cornmeal Mush
Ingredients
- 1 cup cornmeal yellow
- 3 cups water divided
- 1 tsp salt
- oil or bacon grease for frying
Instructions
- Whisk cornmeal with 1 cup cold water until smooth.
- Bring remaining 2 cups water and salt to a boil.
- Slowly whisk in cornmeal mixture and cook, stirring constantly, until thick.
- Transfer to a greased pan, smooth top, and refrigerate until firm.
- Slice into pieces and fry in hot oil until golden brown on both sides.