
Save This Recipe
This is my go-to when dinner isn’t planned and energy is low. You pour cold whole milk right over dry elbow Macaroni in a ceramic casserole dish, layer on cheese and butter, cover it with foil, and let the oven handle everything. No boiling, no roux, no extra pots. Just five pantry staples and about fifty minutes — and you’ve got Creamy, bubbly mac and cheese that tastes like you actually tried.
Why You’ll Love It
No boiling required — dry pasta goes straight into the dish, no extra pots or draining
One dish to clean — everything bakes together in the same ceramic casserole you serve from
Only five ingredients — pasta, milk, cheddar, butter, salt, and that’s it
Hands-off cooking — covered in foil for most of the bake, so you can step away and do something else
Genuinely creamy — the milk and cheese cook down into a sauce right in the dish, no roux needed
Ingredient Notes
Five ingredients. I feel like that needs to be said again. Five.
The pasta: dry elbow macaroni, the kind in the blue box or whatever’s on sale. Nothing fancy. The small, classic elbows work best — I tried the large ones once and the bake time got weird and uneven. Stick with standard.
The milk: whole milk, and it needs to be cold. Not room temperature, cold. I know that sounds fussy but I think it matters — it all comes together differently somehow, though I couldn’t tell you the science of it. I’m sure someone on the internet could explain it. I just trust it.
The cheese: sharp cheddar, shredded fresh if you have the patience, though I almost always use the bag. Pre-shredded is fine. I’ve used mild when that’s all I had and it’s still good, just a little more… quiet. Sharp gives it that bite you want.
Butter: just unsalted butter cut into little pieces. Nothing complicated.
Salt: I use kosher. If all you have is table salt, use a little less than called for — table salt is saltier by volume and it’s easy to overdo it.
Ingredients
2 cups dry elbow macaroni
3 cups cold whole milk
2 cups shredded sharp cheddar, loosely packed (I sometimes do a little more, honestly)
3 tablespoons unsalted butter, cut into small pieces
1 teaspoon kosher salt, plus more at the end if it needs it

Instructions
Preheat your oven to 350°F. Get out your ceramic casserole dish — I use a 2.5 quart oval one that I’ve had forever, the rim is slightly chipped on one side, I keep meaning to replace it but somehow never do. Anything in that 2 to 2.5 quart range works. Give the inside a light swipe of butter or a quick spray so nothing sticks.
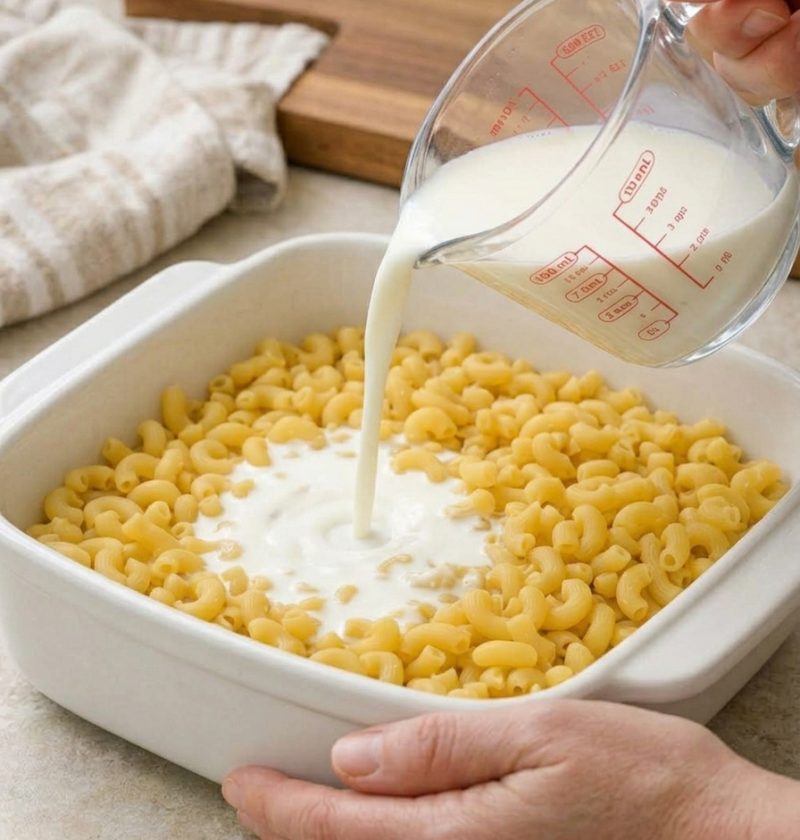
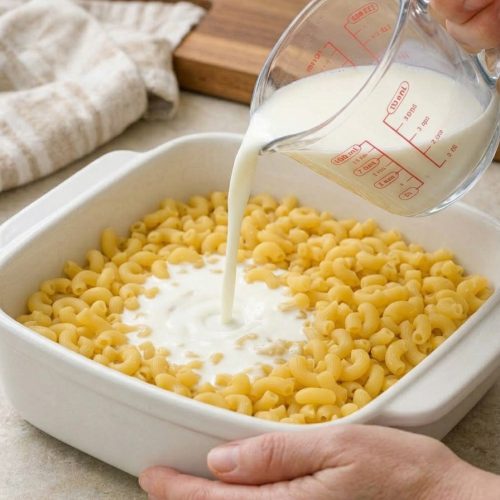
Pour the dry macaroni right in. Spread it out so it’s in an even layer — this matters more than it sounds like it should. If it’s piled up in the middle, the pasta cooks unevenly and you’ll get some pieces that are still too firm on the bottom.
Sprinkle the salt over the dry pasta. Scatter the butter pieces across the top, all over. Then pour the cold milk in slowly, making sure to hit all the edges. The pasta won’t be completely submerged — that’s okay — but press anything that’s really poking up down into the milk with the back of a spoon. You want most of it at least touching the liquid.
Now scatter about one and a half cups of the cheese over everything. Don’t stir it. I know it looks strange just floating there. Leave it.
Cover the dish tightly with foil. I mean tightly — you want that steam trapped in there. Put it on the middle rack and bake for 35 to 40 minutes. The pasta should be mostly tender when you poke at a piece with a fork. Mostly. Not all the way done.
Here’s where people sometimes panic the first time: when you pull back the foil, it might look kind of soupy or separated. Don’t worry. This is normal and also why you — carefully, there will be steam that will try to burn you — take a spoon and stir everything up from the bottom. You’ll feel it start to come together as you stir. The thickened bits that clung to the sides scrape up into a sauce. It’s almost like magic, which is a thing I don’t say lightly because I am not a magical-thinking person.
Once you’ve stirred it all together, sprinkle that last half cup of cheese over the top. Back into the oven, uncovered this time, for another 10 to 15 minutes until the top is melted and a little golden around the edges.
Let it sit for five minutes before you serve it. I know, I know. But it really does thicken up those last few minutes and it’s worth the wait. Taste it before you bring it to the table — sometimes it wants another pinch of salt, sometimes it doesn’t.
Variations
For a crunchy top, toss half a cup of plain breadcrumbs with a little olive oil or melted butter and sprinkle it on with that last layer of cheese before the final uncovered bake. It gets nicely golden and adds a little texture if that’s your thing.
If you’re feeding anyone who finds sharp cheddar “too much,” mild cheddar works, or even a mix of mild and mozzarella. The mozzarella makes it stretchier in a way that some people find deeply satisfying. I tried Gruyère once when I was feeling fancy and it was actually very good, a little nuttier, though it cost more than I’d normally spend on a weeknight dinner.
Stir-ins are possible if you want to make it more of a meal: diced ham, bacon bits that you cook and crumble in, a handful of frozen peas that you’ve let thaw. Add those after the first bake when you’re doing the big stir, before the last layer of cheese goes on.
Storage & Leftovers
There are almost never leftovers when I make this for a full table. But when there are — and this is important — it keeps in the fridge, covered, for about one day. Maybe two, but I’d eat it by day three. It thickens up a lot when cold. To reheat, I do it on the stovetop in a small saucepan with a splash of milk, stirring over low heat until it loosens back up. The microwave works too, just stir it halfway through. It won’t be quite as creamy as fresh but it’s still good the next day.
I once left the dish on the counter overnight and threw it out in the morning. Don’t do that. Dairy. You know.
Oven Baked 5-Ingredient No-Boil Mac and Cheese
Ingredients
- 2 cups elbow macaroni uncooked
- 4 cups whole milk
- 2 cups shredded cheddar cheese
- 4 tbsp butter melted
- 1/2 tsp salt
Instructions
- Preheat the oven to 375°F and lightly Grease a 9x13-inch baking dish.
- Add the uncooked elbow macaroni, milk, melted butter, and salt to the baking dish.
- Stir well to make sure the pasta is evenly spread and mostly covered by the milk.
- Cover the dish tightly with foil and bake for 30 minutes.
- Carefully remove the foil and stir in 1 1/2 cups of the shredded cheddar cheese.
- Sprinkle the remaining 1/2 cup cheddar cheese over the top.
- Return the dish to the oven, uncovered, and bake for 10–15 minutes, until the pasta is tender, the sauce is creamy, and the top is melted and lightly golden.
- Let the mac and cheese rest for 5 minutes before serving warm.