
Save This Recipe
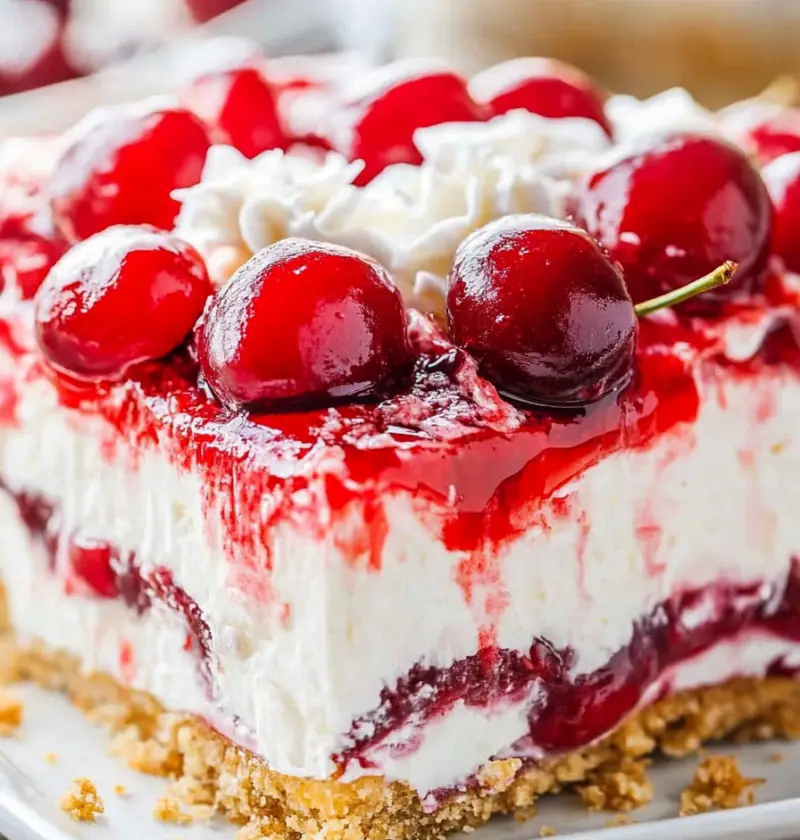
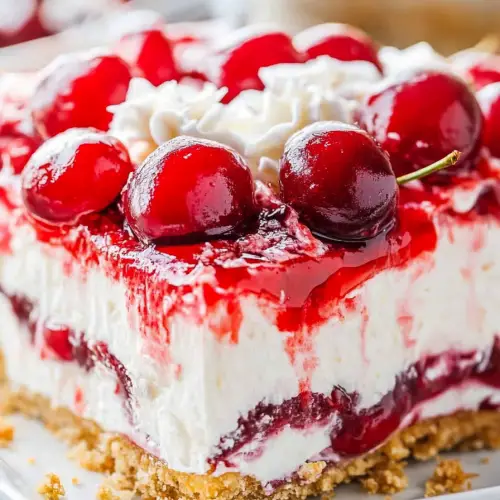
Cherry Cheesecake Lush is a no-bake masterpiece, combining layers of buttery Oreo crust, luscious cream cheese filling, velvety cheesecake pudding, sweet cherry topping, and airy whipped cream. This Dessert not only looks great served at gatherings but also is a habit for yourself to indulge. Every bite gives you the symphony of textures and flavors that you will totally adore.
Why You’ll Love This Recipe
Cherry Cheesecake Lush is the ultimate no-bake treat for any occasion and has layers of gold Oreo crust, creamy cheesecake filling, rich cheesecake pudding, tangy cherry pie topping, and a fluffy whipped cream finish. This is a satisfying crowd-pleaser that creates a crunchy yet creamy, and sweet yet sour symphony in every bite. And also, it’s so easy to make that it doesn’t require an oven. If you bake this dessert on a holiday, birthday, or just on any weekday night on which you fancy something sweet, everyone is gonna be so impressed!
Key Ingredients
Golden Oreos are the base of this dessert and create a buttery, sweet crust with the proper crunch.
Sarles Butter lends richness to the crust and balances out the sweetness.
Cream Cheese, soft, brings a tangy creaminess to the cheesecake layer.-White Sugar brings that signature cheesecake flavor to the cream cheese layer.
Frozen Whipped Topping [Thawed] is featured here to lend volume as well as creaminess to all layers.
Cheesecake Instant Pudding Mix should ensure that the pudding layer is dense, creamy, and properly bursting with cheescake flavor.
Whole Milk when combined with the pudding mixture forms a silky smooth texture.
Cherry Pie Filling offers that tangy and colorful top that matches the soft creamy layers below.
Chopped Pecans o Walnuts, these give the whipped topping a delightful nutty crunch.
Complete list of ingredients with quantities and instructions is located in the recipe card below

Step-by-Step Instructions
Preparing the Crust
Prepare the Baking Dish: Butter a 9×13-inch baking dish to prevent sticking.
Crush the Cookies: Use a food processor to crush the golden Oreos into fine crumbs.
Combine Crumbs and Butter: Add melted butter to the crumbs and pulse until the mixture resembles wet sand.
Form the Crust: Press the mixture evenly into the bottom of the prepared dish. Use a spoon or flat object to compact the crust.
Set the Crust: Place the crust in the freezer for 10 minutes.
Making the Cream Cheese Layer
Mix Cream Cheese Filling: In a bowl, beat softened cream cheese, ¾ cup sugar, and 1 cup whipped topping until smooth.
Spread Over Crust: Spread the cream cheese mixture evenly over the chilled crust with a spatula.
Firm Up the Layer: Freeze for another 10 minutes.
Preparing the Pudding Layer
Mix Pudding: Whisk together 2 packages of cheesecake pudding mix, 3 cups milk, and ½ cup whipped topping until thickened (2-3 minutes).
Layer the Pudding: Spread the pudding mixture over the cream cheese layer evenly.
Chill: Refrigerate for 30 minutes to set.
Adding the Cherry Pie Filling
Add Cherry Filling: Gently spread the cherry pie filling over the pudding layer, ensuring an even layer.
Finishing the Dessert
Top with Whipped Topping: Spread the remaining whipped topping evenly over the cherry filling.
Sprinkle with Nuts: Add chopped pecans or walnuts evenly over the whipped topping.
Chilling and Serving
Chill: Refrigerate the dessert for 1-2 hours to allow layers to set.
Serve: Slice into squares and serve chilled. Enjoy the layered flavors and textures!
Serving Suggestions
This cherry cheesecake lush can be nicely paired up with the following accompaniments:
Hot Beverages: A cup of coffee or tea could be ever the suitable option with these creamy and sweet layers.
Ice Cream: It would be an excellent choice to serve with scoops of vanilla or cherry ice cream for a more indulgent treat.
Cocktails: Sparkling rosé or fruity sangria is a neat match making for some real upgrade for a special occasion dessert.
And as an adornment, put a maraschino cherry or crushed golden Oreos on the top of an angled slice.
Storage Tips
Refrigeration: Wrap the dish in plastic cling film or tightly secure the lid and store in the refrigerator up to 3 days to maintain fresh, crisp layers.
Freezing: Individual slices can be frozen in an airtight container for about one week, but freezing the entire dish is highly unadvisable. Let it thaw in the refrigerator before serving.
Make-Ahead: There is an alternative from which to choose; prepare the dish no longer than 24 hours in advance so that the flavors meld overnight, gaining even more beauty together.
Variations
Berry Bliss: Opt for blueberry, strawberry, or any mixed-berry pie filling when cherry pie filling exchange is just about ready.
Tropical Delight: Crushed graham crackers on the crust and layer within Pineapple or mango pie filling.
Nut-Free Version: Supreme no nuts; here are easy add-ins like chocolate or caramel sauce for light decadence.
Low-Sugar Option: sugar-free pudding mix, lightly sugar-topped whip, light cherry filling in a healthy package.
Cookie Crust Swap: Use another favorite cookie, sandwich cookies, or graham crackers, instead of Golden Oreos.
Conclusion
Thus, in your lifestyle, “Cherry Cheesecake Lush” becomes the grounds of a matter. It simply is wonderful, never-fussy treat with which great flavor and satisfaction has been put hand in hand. Construct your own version with your favorite fruits; make it for an occasion you will not be able to avoid some hours before or just have the treat yourself to leisure on weekends-it is still a hit. With the various eleven-ninth, unbelievable layers and how good it tastes, this may be your constant kitchen companion. Treat yourself; you’ve earned it!
Cherry Cheesecake Lush
Ingredients
- 1 package golden Oreos 14 oz, crushed in a food processor
- 1/3 cup salted butter melted
- 1 tbsp butter for preparing the pan
- 8 oz cream cheese softened to room temperature
- 3/4 cup white sugar
- 16 oz frozen whipped topping thawed, divided use
- 2 packages cheesecake flavored instant pudding mix small boxes
- 3 cups whole milk
- 2 cans cherry pie filling large cans
- 1 cup chopped pecans or walnuts for topping
Instructions
- Butter a 9x13-inch baking dish to prevent sticking. Use a food processor to crush the golden Oreos into fine crumbs. Combine the crumbs with melted butter and pulse until the mixture resembles wet sand. Press the mixture evenly into the bottom of the prepared dish and compact with a spoon or flat object. Place the crust in the freezer for 10 minutes to set.
- In a bowl, beat softened cream cheese, white sugar, and 1 cup whipped topping until smooth. Spread the cream cheese mixture evenly over the chilled crust with a spatula. Freeze for another 10 minutes to firm up.
- Whisk together the cheesecake pudding mix, whole milk, and 1/2 cup whipped topping until thickened (2-3 minutes). Spread the pudding mixture evenly over the cream cheese layer. Refrigerate for 30 minutes to set.
- Gently spread the cherry pie filling over the pudding layer, ensuring an even layer.
- Spread the remaining whipped topping evenly over the cherry filling. Sprinkle chopped pecans or walnuts evenly over the whipped topping for added crunch.
- Refrigerate the dessert for 1-2 hours to allow layers to set. Slice into squares and serve chilled. Enjoy the layered flavors and textures!
