
Save This Recipe
You know those nights when you just want something totally dependable and satisfying? The kind where everyone comes to the table with their “I’m-starving” face, and you just want to plop down something warm, fluffy, and familiar? That’s exactly how these Instant Pot Baked Potatoes landed in our rotation. I remember the very first time I tried making baked potatoes in a pressure cooker — I was SO nervous (what if they turned into mashed potato soup?!). But, oh my word. They were perfect. Fluffy on the inside, steamy and tender, and the skins have just the right kind of chew. Total comfort food magic… and done before I can even finish folding the laundry. That’s a mom win if I’ve ever seen one, right?
Why You’ll Love This
- So quick and hands-off — the Instant Pot does all the heavy lifting.
- Perfectly fluffy baked potatoes every time (seriously, you’ll love the texture!).
- No need to heat up your oven, especially on summer days — kitchen stays nice and cool.
- Customizable for picky eaters; everyone gets to choose their own toppings.
- This is a naturally gluten-free, healthy option for a comforting side dish — or a quick lunch with the works!
- Works with lots of potato varieties, but the classic russet is a dream here.
Ingredient Notes
Russet Potatoes: The classic choice. Big, starchy, and absolutely perfect for getting that fluffy, melt-in-your-mouth inside. Try to pick ones that are all roughly the same size so they cook evenly. (You can use Yukon Golds or red potatoes, too, but the texture will be creamier and less “classic baked potato.” Either way, still delicious!)
Water: Yes, boring old water — but you need it! Most Instant Pot models call for at least 1 cup of liquid to build up steam. Don’t skip this or you’ll get that dreaded “burn” notice.
Optional Toppings: This is where things get FUN. Go classic with butter, sour cream, and chives, or load ‘em up with shredded cheese, bacon bits, green onions, or even broccoli and shredded rotisserie chicken for a full-on meal. (We’ve done taco-spiced leftovers, barbecue pulled pork, even chili — go wild!)
Olive Oil & Kosher Salt (for the skins): Totally optional, but if you like crispy, seasoned skins, you can rub the potatoes with olive oil and a sprinkle of salt before cooking. I usually do this if I’m serving these at a “baked potato bar” night — everyone loves the extra flavor.
Step-by-Step Directions
1. Prep Your Potatoes: Give those potatoes a good scrub (they’re root veggies, after all, so don’t be shy!). Dry them off with a clean towel. For extra flavor and a lovely, seasoned skin, rub each one with a drizzle of olive oil and sprinkle of kosher salt. Not a must, but really tasty if you like eating the skins.
2. Prick ‘Em: Use a fork to poke each potato a few times all around. This little step keeps steam from making your potato explode (I promise, it’s worth those couple fork pokes!).
3. Set Up Your Instant Pot: Pour 1 cup of water into the bottom of your pressure cooker. Place the metal trivet (the little rack it came with) inside — this keeps your potatoes from sitting right in the water. Stack your potatoes on the trivet — set them in a single layer if you can, but if you have to stack, angle them with a little space between each. Don’t overload here; about 4 large potatoes is perfect for a 6-quart Instant Pot.
4. Cook: Lock the lid and be sure the valve is set to “Sealing.” Now set the pressure cooker to Manual (or “Pressure Cook”) on HIGH. Here’s a quick cheat sheet:
- Small potatoes (6–7 oz each): 12–14 minutes
- Medium potatoes (8–10 oz): 15–18 minutes
- Large potatoes (11–13 oz): 20–22 minutes
(It’s better to err on the side of more time — undercooked potatoes are not the goal!)
5. Natural Release: When the cook time is done, just let everything sit for 10–15 minutes so the pressure drops naturally. This keeps your potatoes extra fluffy inside. After that, use a wood spoon handle to flip the valve and release any remaining steam.
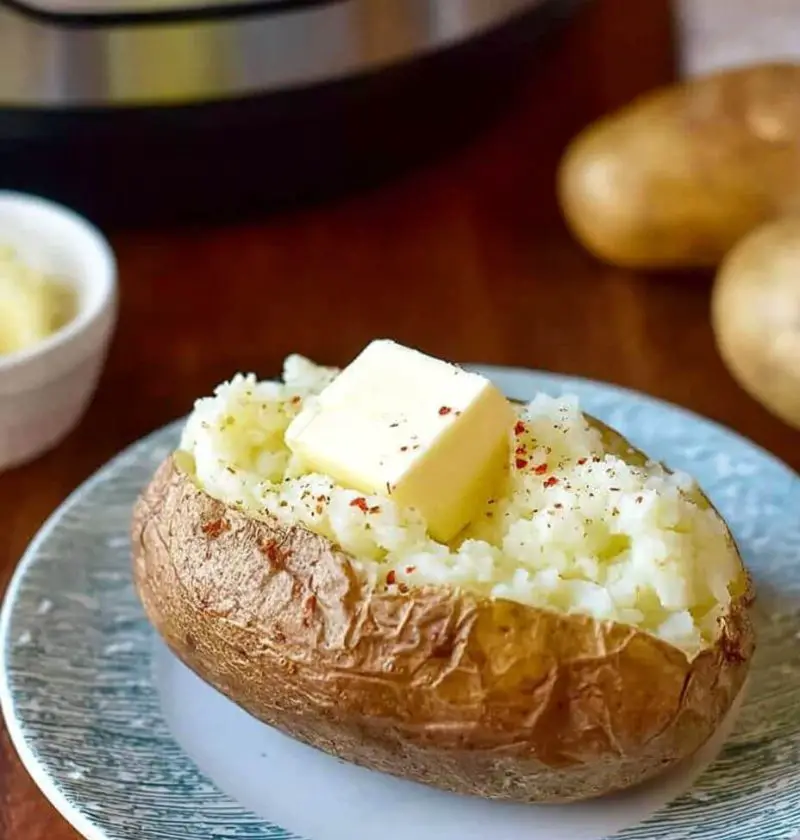
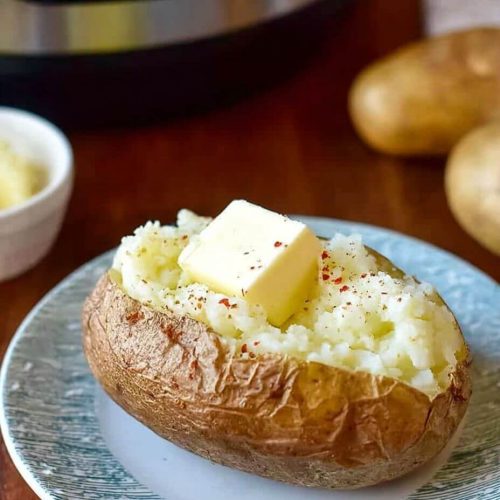
6. Serve: Grab those hot potatoes (carefully! They’re steamy!) and slice them open. Fluff up the insides with a fork, then go to town with your favorite toppings. Butter melts in those fluffy jackets like a dream… and if you ask me, a sprinkle of sharp cheddar and a dollop of cool sour cream is heaven.
Optional Variations & Flavor Twists
Cheesy Broccoli Bakes: Top steamy potatoes with steamed broccoli and a pile of shredded cheddar for a meatless meal everyone loves. My daughter asks for this combo every week.
Southwest Fiesta: Layer with black beans, Corn, a dollop of salsa, and sprinkle of cotija cheese for a Tex-Mex vibe. A squeeze of lime and you’re golden.
Baked Potato Bar Night: Lay out bowls of bacon bits, chives, herbs, different cheeses, chili, and even leftover grilled chicken. Let everyone make their own masterpiece — it’s SO fun and makes a plain old weeknight feel like a party (especially if you have kids or picky eaters around).
Herbed Skins: Rub the potatoes with herbed olive oil, garlic powder, or even smoked paprika before cooking. Leaves the skins with a little extra zip!
Storage & Reheating Tips
If you somehow have leftovers (this is rare at my house!), just let the potatoes cool, then pop them in an airtight container and refrigerate for up to 4 days. The skins soften, but the inside stays fluffy — promise.
To reheat, I love to pop whole potatoes in the microwave for 2–3 minutes, flipping once so they warm evenly. If you want to crisp up those skins, wrap the potato in foil and bake at 400ºF for about 15–20 minutes instead. Or, slice up your leftover baked potatoes, toss with a bit of olive oil and seasoning, and pan-fry for crispy breakfast hash. (It’s so good with eggs and hot sauce!)
By the way, leftover baked potatoes also make killer potato salad or loaded smashed potatoes. Just rough-chop, toss with some tangy yogurt or mayo, a little mustard, scallions, and whatever’s in your fridge.
Let’s Talk—What’s Your Favorite Topping?
Are you a butter-and-salt purist, or do you turn your baked potato into a full-on meal with everything but the kitchen sink? Drop your favorite topping ideas and Instant Pot tricks down below — I love seeing what everyone brings to the table! And if this method saves your dinnertime (like it has for me, more times than I can count), let me know. Nothing makes me happier than swapping cozy comfort food tips with fellow home cooks. Happy potato night, friends!
Baked Potato Chicken and Broccoli Casserole
Ingredients
- 4 large russet potatoes washed and scrubbed
- 2 cups cooked chicken diced or shredded
- 2 cups broccoli florets blanched
- 1 1/2 cups cheddar cheese shredded
- 1 cup sour cream
- 1/2 cup milk
- 2 tablespoons unsalted butter
- 2 tablespoons all-purpose flour
- 2 cloves garlic minced
- Salt and pepper to taste
- Chopped fresh chives or green onions optional, for garnish
Instructions
- Preheat your oven to 375°F (190°C) and grease a 9×13-inch baking dish with butter or non-stick spray.
- Place the washed and scrubbed potatoes directly on the oven rack and bake for 45-60 minutes, or until tender. Let them cool slightly.
- In a saucepan over medium heat, melt the butter and cook the garlic for 1 minute. Stir in the flour and cook for another minute, stirring constantly.
- Gradually whisk in the milk, stirring continuously until smooth and thickened. Remove from heat and stir in 1 cup of shredded cheddar cheese and sour cream. Season with salt and pepper to taste.
- Slice the baked potatoes in half lengthwise and scoop out the flesh, leaving a thin layer in the skins. Place the potato shells in the prepared baking dish.
- Dice the scooped-out potato flesh and combine it with the cooked chicken, blanched broccoli, and cheese sauce. Stir until well combined.
- Spoon the chicken, broccoli, and cheese mixture into the potato shells, dividing evenly. Sprinkle the remaining shredded cheddar cheese on top.
- Bake for 20-25 minutes, or until the cheese is melted and bubbly. The top should be golden brown.
- Let the Casserole cool slightly before serving. Garnish with fresh chives or green onions if desired. Enjoy warm!