
Save This Recipe
There’s something timeless about irises. Their delicate, ruffled petals dancing in shades of purple, yellow, white, and even deep burgundy—it’s like nature’s own little fashion show every spring. I remember the first time I planted a row of them along the back fence. I was chasing that “cottage garden” look from a magazine spread (you know the one—where everything is magically blooming at once and nothing ever wilts?). Well, it didn’t quite turn out like the picture, but those irises? They showed up and showed out.
But like anything in the garden—and life, really—they need a little TLC to Keep looking their best. And that means dividing them. Yep, I said it. Time to get in there with your spade and your gumption.
Let’s talk about why fall is the perfect time to divide your irises, and exactly how to do it without making a mess of things.
Why You’ll Love Doing This (Even If It Sounds Like Work)
-
Keeps your irises from getting overcrowded and cranky
-
Boosts blooming next season—more flowers, less fuss
-
Prevents disease and gives each plant room to breathe
-
A free way to expand your garden (or make a friend’s day with a gifted rhizome!)
-
Cooler temps + fall rain = less stress on your plants and you
What’s Really Going On Beneath Those Petals?
Let me explain. Irises have a bit of a dramatic flair—they bloom hard in late spring or early summer, show off for a few weeks, and then head into dormancy for summer. During that rest period, their rhizomes (those chunky underground stems) are still growing, sneaky little things. They start piling up like holiday leftovers in the fridge.
If you don’t divide them every few years, they get crowded and stop blooming well. You’ll notice fewer flowers, rhizomes creeping above ground, and a sad little dead patch right in the middle of the clump. That’s your cue—it’s time.
So, Why Fall?
Here’s the deal. Late summer into early fall is ideal because the plants are coming out of dormancy, full of stored energy, and they’ve still got time to settle in before winter. Think of it like moving into a new house—better to do it when the weather’s mild and there’s time to unpack before the holidays hit.
Plus, the soil’s still warm, which encourages root growth, and cooler air helps prevent transplant shock. It’s a win-win.
Quick Checklist: Tools You’ll Need
-
Garden fork or sturdy spade
-
Sharp knife or pruning shears (disinfected—trust me)
-
Gloves (those rhizomes can be scratchy)
-
Hose or bucket of water
-
A tarp or old sheet for sorting (optional but helpful)
-
Plant tags or markers if you’re replanting different varieties
Let’s Get Dirty: Step-by-Step Iris Division
-
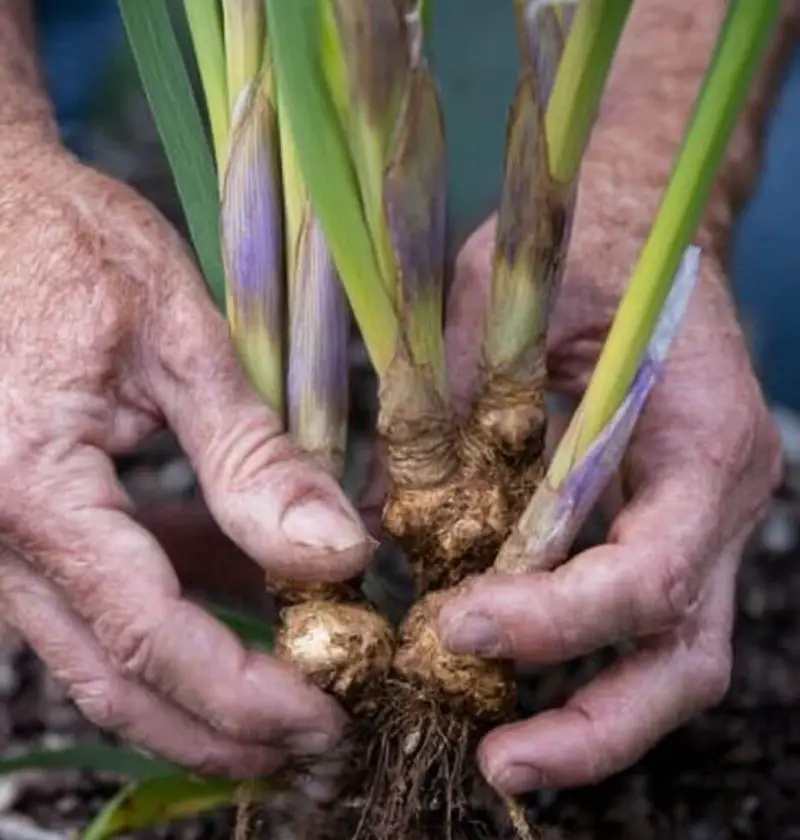
Dig around the clump. Give it a wide berth—don’t just yank. You want the whole rhizome system out in one piece if possible.
-
Shake off excess soil. Rinse with the hose if needed so you can see what you’re working with.
-
Inspect and trim. Healthy rhizomes are firm and tan. Cut away the old center and any mushy or diseased parts.
-
Divide smart. Each new section should have a fan of leaves and strong roots attached. Think of them like little iris starter kits.
-
Trim the leaves. Snip the foliage down to about 6 inches. It helps the plant focus on rooting instead of leaf maintenance.
-
Replant. Set them in well-drained soil, spacing them 12–18 inches apart. Keep the rhizome just above the soil line—don’t bury it!
-
Water well. Not a flood, but a good soak. That’s all they need to get comfy.
Common Mistakes (That I’ve Totally Made)
-
Waiting too long. If you wait until the ground’s frozen, it’s game over. Shoot for August to early October.
-
Burying the rhizomes. Tempting, I know, but they like their backsides in the sun.
-
Replanting too close. You’re just creating next year’s problem.
-
Ignoring diseased pieces. Don’t “save” them—toss ‘em. It’s not worth the risk.
Taking Care After the Job’s Done
Once your irises are tucked into their new spots, you’ll want to baby them just a bit:
-
Water weekly if it’s dry.
-
Add a light mulch (but not right on the rhizomes).
-
Weed regularly—don’t let them fight for nutrients.
-
Come spring, you can feed them with a low-nitrogen fertilizer. They’ll thank you with blooms.
Want to Shake Things Up? Try These Variations
-
Soak the clumps in water for 30–60 minutes before dividing—it softens the soil and makes teasing apart the rhizomes way easier.
-
Use a serrated knife if the roots are stubborn. (An old bread knife works great—just don’t put it back in the kitchen!)
-
Label each division by variety—use a Sharpie on plant tags or popsicle sticks. You’ll thank yourself next spring.
The Payoff: A Garden That Glows
When you divide your irises regularly—every 3 to 5 years, give or take—you’re Setting your garden up for a more colorful, healthy future. Your plants will bloom stronger, look tidier, and you’ll have plenty to share or spread around.
Plus, it’s one of those gardening tasks that feels kind of therapeutic. You’re literally pulling apart the old to make room for new life. I don’t know about you, but I’ll take that metaphor with my coffee any day.
Wrapping Up: Let’s Talk Irises
So, tell me—have you divided your irises before? Thinking about doing it this fall? Got a funny story or maybe a trick I didn’t mention?
Leave a comment and let’s swap notes. Gardening’s more fun when we do it together, dirt and all.
Happy digging,