

Save This Recipe
The first time I heard the words Beaver Nuggets, I honestly thought my cousin in Dallas was pulling my leg. We were sitting at her kitchen table, back in the early 2000s, when she slid a plastic bag across the counter and said, “Try these.” I figured it was some kind of inside joke, or worse, jerky. But no—it was these sweet, golden, crunchy little clouds. One bite and I was sold.
If you’ve ever driven through Texas, you already know about Buc-ee’s. That place is less of a gas station and more of an amusement park for road-weary families. My kids still laugh about the time I almost cried in the Beef jerky aisle because it was so overwhelming. You think I’m exaggerating, but when you’ve been in a minivan with three children under twelve for nine hours—one of them still in braces at the time, so everything was a production—something as simple as 50 varieties of dried meat can unhinge you.
Anyway, Beaver Nuggets became our little road trip ritual. We’d grab a few bags (and inevitably eat one before leaving the parking lot). But here’s the thing—once you’re back home, unless you live close to one of those giant red-beaver-head signs, you’re out of luck. And the mail-order versions… well, they never taste the same. Maybe it’s the air conditioning blasting in your face or the sight of that impossibly clean restroom that makes them better.
So I started tinkering. This recipe isn’t exact, of course—there’s some magic dust those Texans sprinkle in—but it scratches the itch. It’s buttery, caramel-sweet, and has that maple-kissed crunch that just makes you keep reaching into the bowl long after you swore you were done.
Why You’ll Love It
-
Road trip nostalgia in a bowl. Every bite takes me back to those sweaty gas station stops where the kids begged for Icees and my husband insisted we “make good time.”
-
Ridiculously simple. It’s corn puffs, a saucepan of syrup, and the oven doing most of the work. No candy thermometers, no mysterious techniques.
-
Dangerously addictive. I’m warning you—make this for a group, or you’ll find yourself eating handfuls standing at the counter, pretending you’re “just checking if it cooled.”
-
Perfect for gifting. I’ve stuffed mason jars with these nuggets and tied ribbons around the lids at Christmas. People always ask for more.
Ingredient Notes
-
Corn Puff Cereal or Puffed Corn: Look in the snack aisle, not the cereal section. It’s often sold in big bags near popcorn. Don’t use cheese puffs (unless you want something truly bizarre).
-
Butter: I stick with unsalted because the syrup already has salt, but if salted is all you’ve got, just reduce the extra salt a pinch.
-
Corn Syrup: Light corn syrup helps keep the caramel glossy and chewy. I know some folks are wary of it, but it’s what gives that authentic snap.
-
Brown Sugar: Packed in tight—don’t skimp. The molasses flavor deepens the sweetness.
-
Maple Syrup: Not traditional, but I like the whisper of maple. It reminds me of Sunday mornings when the kids were little and sticky pancakes were the norm.
-
Baking Soda: The oddball ingredient, but it’s key. It makes the caramel foam up and coat every nook of the puffed corn.

Instructions
-
Preheat and prepare. Set your oven to 275°F. Line a big baking sheet with parchment paper. I’ve forgotten this step more than once and ended up chiseling caramel off metal—don’t skip it.
-
Start with the corn puffs. Pour them into the largest mixing bowl you own. If you only have a medium one, use two bowls—it’s easier to coat evenly later.
-
Make the syrup. In a medium saucepan, melt the butter, brown sugar, corn syrup, and salt over medium heat. Stir gently until it bubbles. Once boiling, drop the heat low and let it simmer for 4–5 minutes. (It should look smooth and glossy, not grainy.)
-
Add the flavor kick. Remove from heat. Stir in vanilla, maple syrup, and baking soda. The mixture will foam up like a science fair volcano—this is normal.
-
Coat the puffs. Immediately pour the hot mixture over your corn puffs. Use a greased spatula (or two wooden spoons if you don’t mind some mess) to toss until every piece is coated. Work quickly—once it cools, it sticks.
-
Spread and bake. Transfer to your prepared baking sheet, spreading the nuggets into a thin layer. Slide it into the oven for 45 minutes, stirring every 15 minutes. This step keeps them from clumping, though I secretly like the big clusters.
-
Cool and break apart. Once baked, let them cool completely. Break into bite-sized nuggets and try not to eat half the tray standing up.
Variations or Substitutions
-
Cinnamon Sugar Twist: Toss in a teaspoon of cinnamon with the syrup before pouring it over. It makes the nuggets taste like a churro’s cousin.
-
Nutty Crunch: Add a cup of roasted pecans or peanuts when mixing the syrup into the puffs. My son swears this version is “like Cracker Jack on steroids.”
-
No Maple? Just use more vanilla. Or a splash of bourbon, if you’re feeling rowdy. (Yes, I’ve tried it—it works.)
-
Spicy Kick: A pinch of cayenne in the syrup turns these into sweet-spicy nuggets. My daughter calls it “cowboy style.”
Storage & Reheating Tips
Honestly, these rarely last long enough to worry about storage, but:
-
Airtight container: Keep them in a sealed jar or Tupperware on the counter for up to a week. Beyond that, they get chewy.
-
Freezer hack: I’ve frozen a batch before Christmas baking marathons. Just seal in a freezer bag. Thaw at room temp, and they crisp right back up.
-
Reviving stales: If they lose their crunch, pop them in a 250°F oven for 5 minutes. Works like a charm.
-
Travel tip: Don’t leave them in a hot car. I did that once driving back from San Antonio, and the nuggets melted into one giant caramel brick. We still ate it, of course.
Final Thoughts
This recipe is less about perfect replication and more about capturing the feeling—sticky fingers, crunch between your teeth, maybe even the faint whiff of gasoline from a Buc-ee’s parking lot if you close your eyes.
Make a double batch if you’ve got teenagers around. I once left a tray on the counter, ran upstairs to fold laundry, and came back to crumbs and guilty smiles. I didn’t even get mad—just poured myself some coffee and made more.
And maybe that’s the best part. These aren’t just snacks; they’re little edible excuses to Slow down, sit together, and remember road trips that were messy and loud and wonderful.
Now, if only I could figure out how Buc-ee’s keeps their bathrooms so clean…
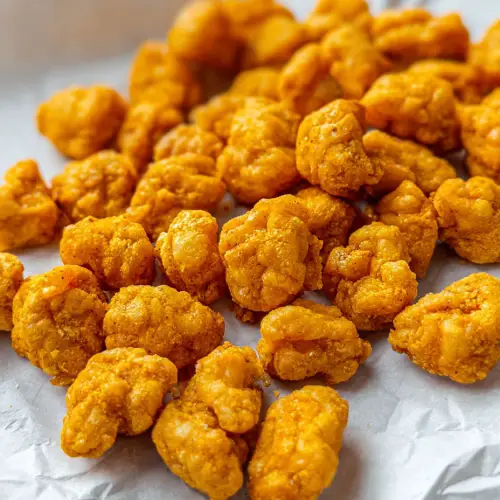
Texas Beaver Nuggets
Ingredients
- 8 cups corn puff cereal
- 1 cup brown sugar packed
- 1 cup unsalted butter
- 3/4 cup light corn syrup
- 1 teaspoon salt
- 1 teaspoon vanilla extract
- 1 teaspoon baking soda
- 1/2 cup maple syrup
Instructions
- Preheat oven to 275°F (135°C) and line a large baking sheet with parchment paper. Set aside.
- Add the corn puff cereal to a large mixing bowl. Set aside.
- In a medium saucepan, combine brown sugar, butter, light corn syrup, and salt. Bring to a boil over medium heat.
- Reduce heat and simmer the mixture for 4–5 minutes. Remove from heat and stir in vanilla extract, maple syrup, and baking soda. Mixture will foam slightly and lighten in color.
- Pour hot mixture over cereal and stir gently with a greased spatula until cereal is fully coated.
- Transfer coated cereal to the prepared baking sheet and spread evenly. Bake for 45 minutes, stirring every 15 minutes.
- Let the nuggets cool completely, then break into pieces. Store in an airtight container.
