
Save This Recipe
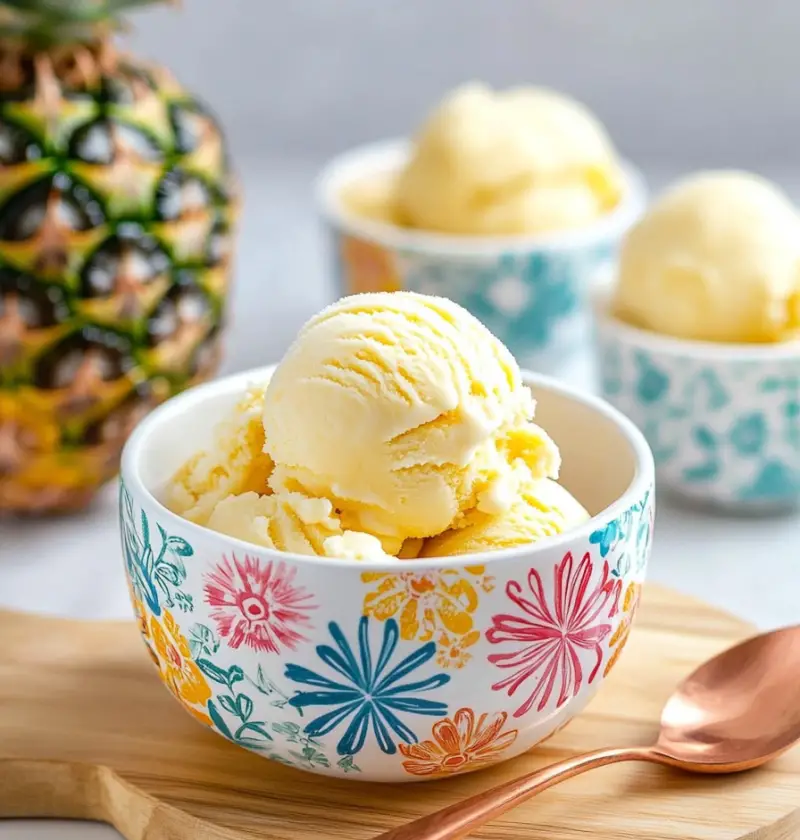
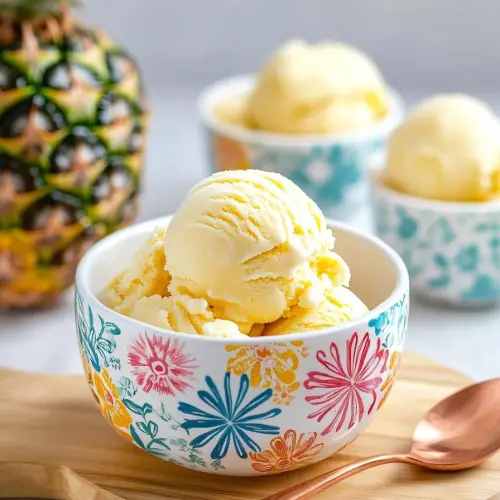
You know those desserts that just make you happy? That’s how I feel about this homemade Pineapple Ice Cream. There’s something irresistible about that bright, sunny pineapple flavor mixed with rich creaminess — it tastes like summer vacation in a bowl, no plane ticket required! When my kids were younger, we’d make this together on sticky-hot July afternoons, and it always brought out big smiles (even from my husband, who claims he “doesn’t like sweet stuff”… sure, dear). It’s almost too easy: just a few simple ingredients, a bit of mixing, a splash of patience, and BOOM. Creamy, dreamy pineapple ice cream that knocks the socks off anything in those store-bought cartons. After we churn a fresh batch, my favorite ritual is scooping it into waffle cones and sitting out on the back deck—listening to the birds and catching all those drips before they run down our hands. It’s cozy, nostalgic, and a lot more affordable than any trip to the islands (although I certainly wouldn’t turn one down).

Why You’ll Love This Recipe
- So fruity and refreshing — it really does taste like sunshine in a scoop.
- No fussy hard-to-find ingredients. We’re talking fruit, cream, sugar, plus a little Vanilla (and you can even sub a can of pineapple in a pinch).
- Easy to make, even if you’re not usually the homemade ice cream type — no eggs, no fancy custard steps.
- You control the sweetness, add-ins, and fun toppings. (Toasted coconut and cherries? Yes, please!)
- It’s a crowd pleaser, whether you serve it at a family BBQ or just sneak a bowl while bingeing your favorite show.
Key Ingredients
Fresh Pineapple: This is your star! I love grabbing a ripe pineapple from the store, but if all you’ve got is canned, that totally works (just drain it well and maybe cut the sugar a tiny bit if your pineapple is packed in syrup). The bright, tangy sweetness is what sets this apart.
Granulated Sugar: Pineapple’s naturally sweet, but a little sugar takes the edge off any tartness. If your pineapple is super-ripe, use a lighter hand—you can always taste as you go.
Heavy Cream & Whole Milk: The dream team for homemade ice cream. Cream brings body and richness, while milk keeps things smooth (and just a little lighter). You can absolutely use half-and-half or even a splash of coconut milk for fun, tropical vibes.
Vanilla Extract: I love the warmth it adds—kind of rounds out all that zingy pineapple flavor.
Pinch of Salt: Don’t skip it! A tiny bit of salt makes everything pop and balances sweetness.
For the exact measurements (and a printable recipe card), scroll down to the bottom of this post. But honestly, this is one of those recipes where a little “taste as you go” magic never hurts.
Step-by-Step Instructions
Step 1: Prepare the Pineapple
Rough-chop your pineapple and toss it into your blender or food processor. Puree it until it’s smooth and pourable—no big chunks left behind. (Yes, this is going to smell incredible. Try not to eat it all before it makes it to the pot!)
Transfer the pineapple puree into a saucepan. This little step helps coax out all the natural sweetness and gets rid of the sometimes “raw” pineapple bite.
Step 2: Cook the Pineapple Mixture
Stir sugar right into the saucepan with your puree. I usually start with a cup, but feel free to adjust if your pineapple is extra sugary or you lean tart.
Cook the mixture over medium heat, stirring now and then so it doesn’t stick. After 10 to 15 minutes, it’ll thicken a bit—almost like a golden pineapple jam. (Warning: the kitchen will smell so good, family members will start wandering in asking what’s up.)
Once thickened, pull it off the heat and let it cool completely. You can pop it in the fridge to speed things up if you’re as impatient as I am.
Step 3: Make the Ice Cream Base
Grab a mixing bowl and whisk together your heavy cream, whole milk, vanilla, and a good pinch of salt. You want this well-combined and slightly frothy looking. No need to break out the mixer—a hand whisk does the trick!
Step 4: Combine and Chill
Once the pineapple mixture is completely cool, stir it into the cream base. Don’t worry if it looks a little speckled or rustic—homemade ice cream is delightfully imperfect.
Cover and chill the whole mixture in the fridge, at least two hours (overnight is fine, if you’ve got the willpower).
Step 5: Churn the Ice Cream
Pour your chilled mix into your ice cream maker. Every machine’s a bit different, but most take 20-25 minutes to churn things into an utterly craveable soft-serve texture. (That’s when I start taking “sample” spoonfuls for quality assurance.)
Step 6: Freeze
Scoop the soft ice cream into an airtight container, smooth the top, and press a piece of plastic wrap right onto the surface (this helps keep ice crystals away). Pop it in the freezer for at least 4 hours—or until scoop-able and firm.
Step 7: Serve
When you’re ready to dish up, let it sit at room temp for about 5-10 minutes. Homemade ice cream can be a little stubborn straight from the freezer, but just be patient—it’ll scoop perfectly creamy in no time.
Spoon it into bowls, cones, or straight out of the container—no judgment. A few fresh pineapple chunks or a sprinkle of toasted coconut on top, and it’s next-level amazing!
Serving Suggestions
- Classic scoops: Pile it in a bowl or your favorite waffle cone for a treat that’s simple but impossible to resist.
- Tropical Sundae: Top your scoops with toasted coconut flakes, a drizzle of caramel, and a cherry for instant “vacay mode.”
- Cake pairing: Serve a scoop alongside coconut cake or warm pound cake for a dessert folks will be talking about all week.
- Pineapple Float: Plop a scoop in a glass of pineapple soda (or plain sparkling water) for an old-school soda shop vibe.
- Try a little drizzle of honey, a sprig of mint, or even a handful of macadamia nuts for extra crunch and color.
Storage Tips
Freezing
Store your ice cream in a tightly sealed container, pressing plastic wrap right onto the surface before you put on the lid. That’ll help keep those pesky ice crystals at bay. Honestly, it’s best enjoyed in the first week or so, but it’ll stay just fine for up to two weeks—if it lasts that long!
Scoop
If your ice cream’s especially firm (homemade stuff can be stubborn!), let it rest at room temp for 5-10 minutes before scooping. No shame in sneaking a “test” bite while you wait.
Variations
- Coconut Pineapple Ice Cream: Use half coconut milk and half cream for a lush, extra-tropical twist. (A sprinkle of toasted coconut doesn’t hurt either!)
- Pineapple Sorbet: Skip the dairy and just puree pineapple with sugar and a splash of lime. Super refreshing on extra-hot days.
- Pineapple-Mango: Blend in a cup of ripe mango for a sweet-and-tangy combo that tastes like a tiki drink in dessert form.
- Spiked Pineapple Ice Cream: Stir in a splash of rum or coconut rum after churning for a grown-up treat (just keep it away from the kiddos).
- Pineapple Swirl: Fold in caramelized pineapple pieces after churning for a culinary surprise in every scoop. It’s dreamy.
Conclusion
If you’re like me and love chasing that summertime feeling—no matter what month it is—this Pineapple Ice Cream brings it right to your kitchen. It’s so simple, so cheerful, and so darn delicious that it’s hard not to smile every time you pull a fresh scoop. Whether you stick to the classic or try out some wild variations, I hope your family enjoys it as much as mine does!
Let me know in the comments what toppings or spins you try, or if you have a favorite ice cream memory to share. There’s always room at my (virtual) table for one more story. Until next bowl—happy scooping!
Pineapple Ice Cream
Ingredients
- 2 cups fresh pineapple chunks
- 1 cup granulated sugar
- 1 cup heavy cream
- 1 cup whole milk
- 1 teaspoon vanilla extract
- pinch of salt
Instructions
- In a blender or food processor, puree fresh pineapple chunks until smooth. Pour the pineapple puree into a medium saucepan.
- Stir in 1 cup of sugar into the pineapple puree. Heat the mixture over medium heat, stirring occasionally, until the sugar dissolves and the mixture thickens slightly, about 10-15 minutes. Remove from heat and let cool completely.
- In a large mixing bowl, whisk together heavy cream, whole milk, vanilla extract, and a pinch of salt until well combined.
- Stir the cooled pineapple mixture into the cream mixture until fully combined. Cover the bowl and refrigerate for at least 2 hours or until thoroughly chilled.
- Pour the chilled mixture into an ice cream maker. Follow the manufacturer’s instructions, typically churning for 20-25 minutes, until the ice cream reaches a soft-serve consistency.
- Transfer the churned ice cream into an airtight container. Freeze for at least 4 hours or until firm.
- Scoop and serve the pineapple ice cream in bowls or cones. Optionally, garnish with fresh pineapple slices or coconut flakes for an extra tropical touch.
