
Save This Recipe
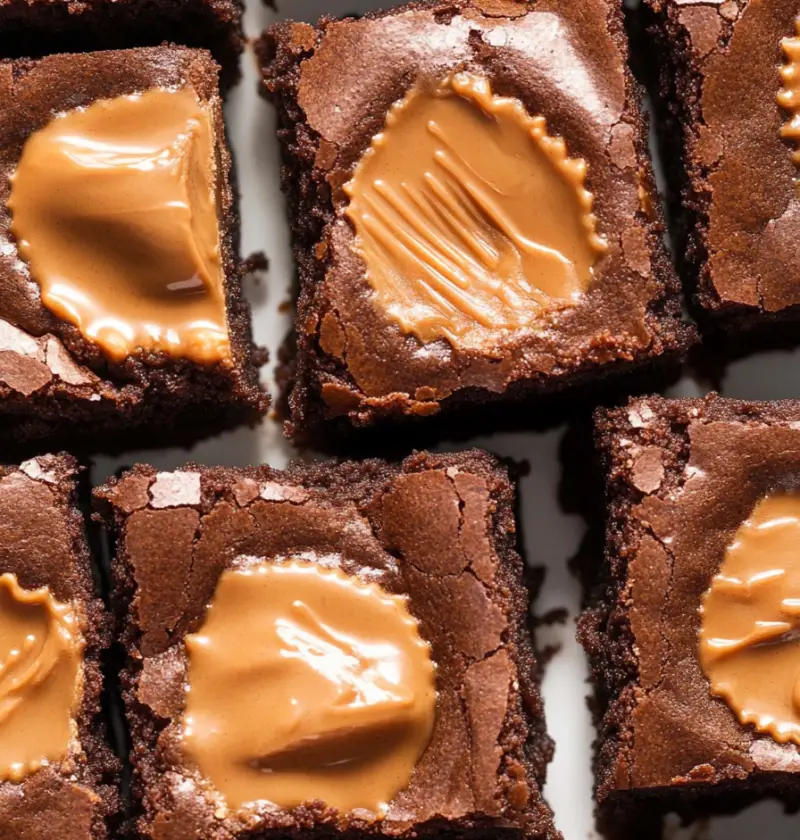
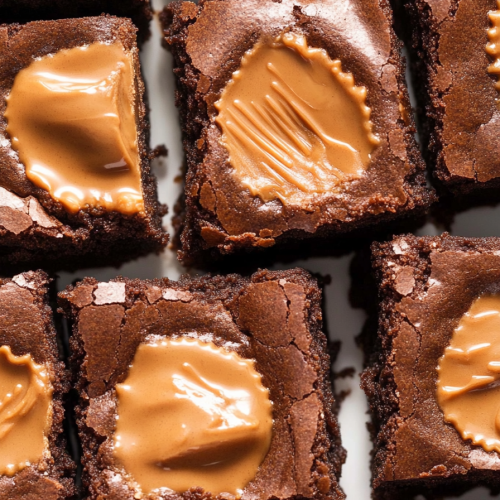
You know, I’ve yet to meet a soul (kid, grown-up, or sensible grandma) who can resist a perfectly fudgy brownie—especially when you swirl in rivers of creamy peanut butter and sprinkle it all with little peanut butter cup treasures. It’s the kind of feel-good treat you whip up for everything from a movie night on the couch to a last-minute potluck, and somehow there are never leftovers. Not in my house!
There’s something so homey and—dare I say—downright magical about that combo of deep, chocolatey richness with the salty, melty whirls of peanut butter. It reminds me of after-school snacks, family birthday parties, or honestly, just those days when I need a little comfort food hug (and we know those pop up more often than a certain someone finishes the last corner piece without telling you…).

Why You’ll Love This Recipe
- Super Fudgy Texture: If you live for that ultra-rich, gooey brownie experience—these deliver. No dry crumbs here, friend!
- Peanut Butter Heaven: Swirled peanut butter ON TOP and chunky peanut butter cups mixed right in. Oh my stars, you’ll want to lick the spoon (no judgment).
- Easy, One-Pot Wonder: Nobody wants to wash five bowls. This recipe keeps things simple—just a saucepan and a mixing bowl, and you’re set.
- Crowd-Pleaser: Adults, kids, bonus neighbors who “just happened to stop by” (mm-hmm)—these vanish fast.
- Customizable: Love dark chocolate? More nuts? Gluten-free? I’ve got options for you coming right up.
Ingredient Notes & Friendly Tips
- Unsalted Butter: I always reach for unsalted so you can control the saltiness. If all you have is salted, just skip adding extra salt later. Melt it gently for that shiny, luscious batter base.
- Granulated Sugar: Don’t skimp—this gives you that glossy-top brownie magic. You can sub with coconut sugar in a pinch; just note the flavor gets a tad deeper.
- Unsweetened Cocoa Powder: I love a rich, Dutch-processed cocoa, but honestly, any unsweetened cocoa works. Just make sure it’s not the chocolate milk mix from the back of your pantry (we’ve all been there).
- Vanilla Extract: Adds cozy warmth—that background “yum.”
- Eggs: Room temperature helps with mixing, but don’t stress if they’re cold. Add one at a time, no rush.
- All-Purpose Flour: Straightforward. If gluten-free is your jam, swap in a 1:1 GF flour blend (I promise, still fudgy!).
- Baking Powder: Tiny bit for just a little lift—don’t skip it.
- Salt: Just enough to balance the chocolate and make everything pop.
- Peanut Butter Cups: Go wild with Reese’s, Trader Joe’s, or any brand you love. Chop them roughly so you get big bites and little nuggets throughout.
- Creamy Peanut Butter: For swirling, the smoother the better. Natural brands work fine—just make sure to stir them up if there’s oil separation! Microwave for 20 seconds so it’s flowy and easy to marble on top.
Tip: Want extra chocolate overload? Add a handful of chocolate chips along with those PB cups. Why not?
Complete list of ingredients with quantities and instructions is located in the recipe card below.
Step-by-Step Instructions
Step 1: Preheat the Oven
Set your oven to 350°F (175°C). Grease a 9×13-inch baking pan (I usually just swipe on a pat of butter with a paper towel). For easy removal and zero drama later, line the bottom with a strip of parchment paper, leaving some overhang—you’ll thank yourself when it’s time to lift them out in one piece!
Step 2: Melt Butter and Mix with Sugar
Grab your medium saucepan and melt 1 cup (2 sticks) unsalted butter over medium heat. Turn off the heat, then whisk in 2 cups sugar and 3/4 cup unsweetened cocoa powder. Stir until it’s glossy and mostly smooth—kind of like thick hot fudge sauce. Try not to eat it all with a spoon (voice of experience).
Step 3: Add Eggs and Vanilla
Add in 2 teaspoons vanilla extract. Then, crack 4 eggs in, one at a time, beating after each so they’re fully incorporated. (If the batter looks a bit separated after the second egg, no worries—it’ll come together with flour.)
Step 4: Combine Dry Ingredients
In a separate bowl, whisk together 1 cup all-purpose flour, 1/2 teaspoon baking powder, and 1/4 teaspoon salt. Now, stir this flour mixture into your wet batter just until you don’t see any major streaks. Overmixing equals tough brownies, so stop when you’re almost there—it’s okay if there’s a streak or two.
Step 5: Fold in Peanut Butter Cups
Gently fold in 1 cup chopped peanut butter cups. You want a mix of bigger and smaller bits. Don’t overwork it—just a few lazy stirs so the treasures are scattered throughout.
Step 6: Pour Batter & Add Peanut Butter Swirl
Scrape all that luscious brownie batter into your prepared pan and smooth out the top. Next, drizzle 1/3 cup melted peanut butter over the surface in long lines or zigzags. Grab a butter knife and gently swirl it through—the goal is pretty marbled streaks, not full-on mixing (trust me, the drama is worth it).
Step 7: Bake
Pop the pan in the oven and bake for 25–30 minutes. Ovens vary, so start checking at 25. Stick a toothpick in the center—if it comes out with just a few moist crumbs (not goopy batter), you’re good. Err on the side of underbaked; they keep cooking a bit as they cool.
Step 8: Cool and Serve
This is the hardest part: let the brownies cool completely in the pan before slicing. (Go put your feet up, you’ve earned it!) Once cool, grab the parchment overhang and lift them out. Cut into generous squares and serve. Prepare for happy noises and maybe a few “is this your secret recipe?” texts.
Serving Suggestions
- À la Mode: Warm up a square and top with vanilla or chocolate ice cream (my niece calls this “dessert heaven”).
- Extra Peanut Butter Drizzle: Heat a bit more peanut butter (or even a little chocolate sauce) and zigzag it over the top.
- Holiday Tray: Pile brownie squares on a cute platter and sprinkle with a little sea salt or festive sprinkles for celebrations.
- Perfect Pairings: These go fabulously with a mug of hot coffee or an extra-frothy cappuccino. Just sayin’.
Storage Tips
- Room Temp: Store in an airtight container on the counter for up to 3 days. Layer with parchment if you’re stacking—to avoid sticky disasters!
- Fridge: For a cold-texture treat (some folks love that), keep them in the fridge up to a week. Bring them back to room temp before eating for best fudginess.
- Freezer: Yep, these freeze beautifully! Wrap the whole slab tightly in foil and plastic, or freeze individual squares layered between parchment. Good for 2 months. Thaw overnight in the fridge or zap briefly in the microwave.
Variations & Fun Twists
- Extra Chocolaty: Toss in a half-cup of chocolate chips with the peanut butter cups if you really mean business.
- Nutty Crunch: Scatter chopped roasted peanuts or even pecans into the batter—hello, salty crunch!
- Dark Side: Use dark cocoa powder and dark chocolate PB cups for a sophisticated, grown-up dessert vibe.
- Totally Gluten-Free: Swap in a 1-for-1 gluten-free flour blend. Nobody will know (seriously, I’ve fooled plenty of guests with this move).
- Holiday Flair: Use mini holiday-themed PB cups, or sprinkle on some colored sugar for a festive look.
Just a Little Wrap-Up
If brownies had a royalty tier, these peanut butter cup beauties would wear the crown in my kitchen. Deep, inky chocolate, rivers of peanut butter, and those hidden chunks in every bite—seriously, it’s what bake-sale glory is made of. Whether you’re spoiling your own little crew after a rough day or showing a potluck crowd who’s boss, this recipe is the cozy, craveable answer.
Questions? Stories? Did your kids sneak an extra square before supper? Drop me a note in the comments—I LOVE hearing how these brownies turn out for you. Happy baking, friend! And if you’re anything like me, go ahead and save a corner piece for yourself. You’ve earned it.
FAQ
Can I use natural peanut butter for the swirl, or will it mess up the recipe?
Natural peanut butter works totally fine! Just give it a good stir first if there’s oil separation, and definitely microwave it for about 20 seconds to make it nice and flowy for swirling. The slightly grainier texture actually adds a lovely rustic look to the marbled top, and the flavor is just as delicious.
How do I know when they’re actually done? I’m always worried about over or underbaking brownies.
The toothpick test is your best friend here! Stick it in the center—you want it to come out with just a few moist, chocolatey crumbs clinging to it. If it’s completely clean, you’ve probably overbaked them. If there’s wet batter, give them another 3-5 minutes. Remember, they’ll keep cooking a bit as they cool, so err on the side of slightly underdone for that perfect fudgy texture.
The peanut butter isn’t swirling nicely—it’s just sitting on top. What am I doing wrong?
This usually happens when the peanut butter is too thick or cool. Pop it back in the microwave for another 10-15 seconds until it’s really runny, then try again. Also, make sure you’re using a light touch with the knife—you’re not trying to mix it in completely, just creating pretty streaks through the batter. Think gentle zigzags, not aggressive stirring!
How should I store these, and will they stay fudgy?
They’ll stay beautifully fudgy if you store them right! Keep them in an airtight container at room temperature for up to 3 days—this keeps that perfect chewy texture. If you stack them, put parchment paper between layers so they don’t stick. You can also refrigerate them for up to a week, but let them come back to room temp before serving for the best fudgy experience.
Can I cut and freeze individual portions, and what’s the best way to thaw them?
Absolutely! These freeze beautifully. Cut them into squares and wrap each one individually in plastic wrap, or layer them between parchment paper in a freezer container. They’ll keep for up to 2 months. To thaw, just leave them on the counter for about 30 minutes, or if you’re impatient like me, pop one in the microwave for 10-15 seconds for that warm, gooey texture.
Peanut Butter Cup Brownies
Ingredients
- 1 cup unsalted butter melted
- 2 cups granulated sugar
- 3/4 cup unsweetened cocoa powder
- 2 teaspoons vanilla extract
- 4 large eggs
- 1 cup all-purpose flour
- 1/2 teaspoon baking powder
- 1/4 teaspoon salt
- 1 cup peanut butter cups chopped
- 1/3 cup creamy peanut butter melted, for swirling
Instructions
- Preheat your oven to 350°F (175°C). Grease a 9×13-inch baking pan and line it with parchment paper for easy removal.
- In a medium saucepan, melt the butter over medium heat. Remove from heat and stir in granulated sugar and cocoa powder until smooth.
- Stir in vanilla extract, then add eggs one at a time, mixing well after each addition.
- In a separate bowl, whisk together flour, baking powder, and salt. Gradually add this dry mixture to the wet mixture, stirring just until combined.
- Gently fold in chopped peanut butter cups, ensuring they are evenly distributed throughout the batter.
- Pour the brownie batter into the prepared pan and spread it evenly. Drizzle melted peanut butter over the top and use a knife to swirl it into the batter for a marbled effect.
- Bake in the preheated oven for 25-30 minutes, or until a toothpick inserted into the center comes out with a few moist crumbs.
- Let the brownies cool completely in the pan before slicing into squares. Serve and enjoy!
