
Save This Recipe
I still remember the first time I brought this cheesecake to a neighborhood BBQ. Somebody’s kid took one bite and announced, “It’s like Ice Cream Cake, but happier!” And honestly, I couldn’t argue with that. There’s just something about the combination of creamy, Strawberry-flecked filling and that fabulous cookie crunch on top—it’s pure summertime bliss, minus the stress of turning on your oven or worrying if your cheesecake will crack. My family now expects this no-bake strawberry crunch cheesecake at pretty much every gathering, and between you and me, I kind of hope there are leftovers for breakfast the next day.
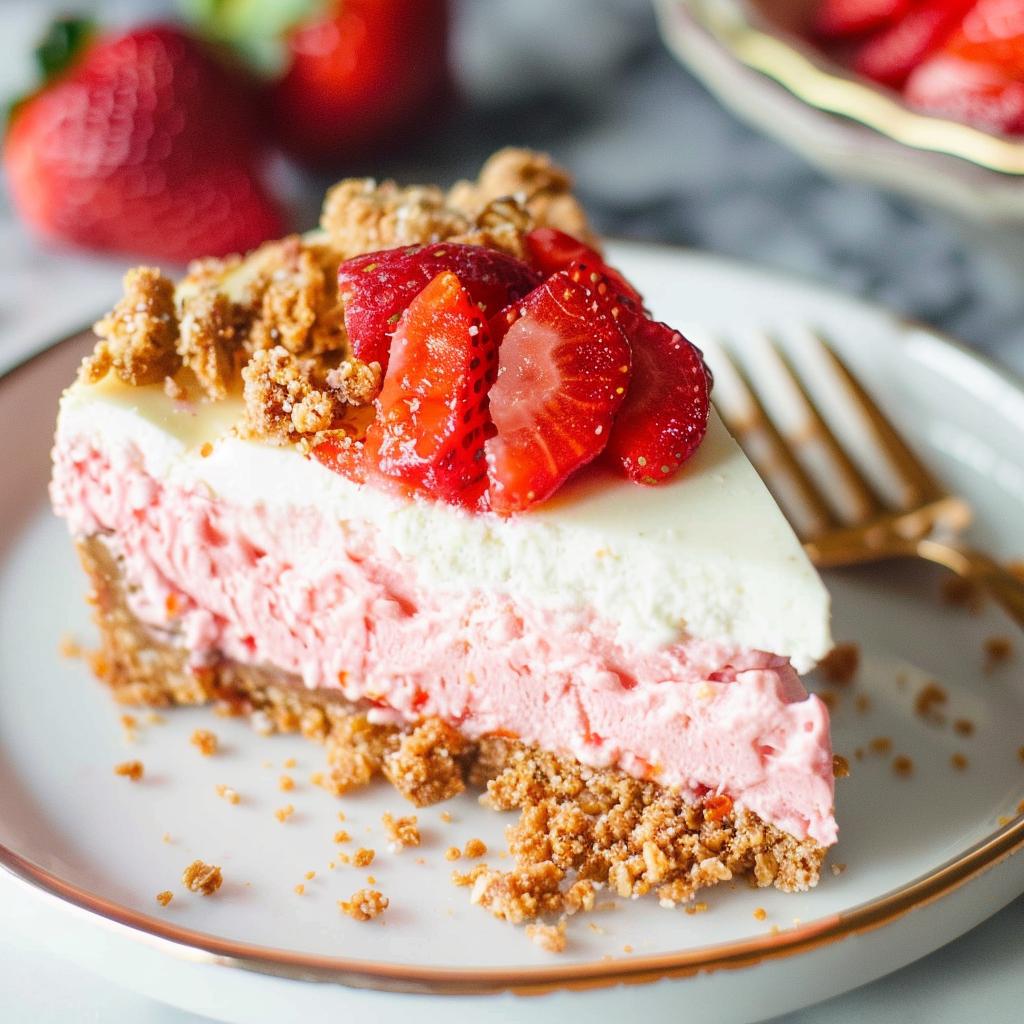
Imagine creamy cheesecake swirled with sweet strawberries and topped with a crunchy cookie crumble. If you’re in the mood for a beautiful, show-stopping, but still ridiculously easy dessert, this No-Bake Strawberry Crunch Cheesecake is exactly what you need. No oven, just a cool and refreshing treat that’s perfect for everything from graduation parties to Mother’s Day brunch or, let’s be real, a random Tuesday when you want something special.

Let’s get right into why this has become one of my favorite warm-weather desserts (and why I tell everyone to bring Tupperware for leftovers!).
No-Bake Strawberry Crunch Cheesecake Features
Honestly, if you’re looking for every excuse to make cheesecake this summer (or any season), this recipe’s going to be right up your alley. Here’s what’s to love:
- No oven necessary — Say bye-bye to a hot kitchen, especially when it’s already 90 degrees outside (don’t get me started on summer in the Midwest!).
- Creamy + dreamy texture — Between the Whipped Cream and softened cream cheese, every bite practically melts in your mouth. My youngest calls it “cloud cake.”
- Ultimate cookie crunch — The mix of strawberry wafers and vanilla cookies makes for the best sweet, crunchy finish. Even the adults fight over the topping.
- Simple, layered, and foolproof — No tricky baking skills required! If you can use a spatula, you’re set.
- It’s GORGEOUS — That pink hue and the playful topping just scream “celebration.”
Must-Have Essentials of the Best Strawberry Crunch Cheesecake
This recipe is all about dreamy flavors and simple pantry ingredients. Here’s what you need (and how to swap, if you’re a little low on something):
For the Crust:
- Vanilla Cream Cookies — Think Golden Oreos or any sandwich-style vanilla cookie. They make a sweet, buttery base.
- Unsalted Butter — I always use unsalted so I can control the flavor, but salted works if that’s what you’ve got (just skip adding extra salt).
For the Cheesecake Filling:
- Strawberry Jello — This gives major strawberry flavor and a cheerful pink color. If all you have is a different flavor (like raspberry), nobody will complain.
- Cream Cheese — The heart and soul of any cheesecake. Don’t skip softening it, or you’ll be stuck with bumps.
- Heavy Whipping Cream — Whip it to stiff peaks for the lightest, fluffiest filling.
- Granulated + Powdered Sugar — The combo gives just the right sweetness. If you’re out of one, you can fudge it a bit—nobody’s grading you!
- Strawberry Wafer Cookies — Chop them up for that “surprise crunch” in the filling. (I could eat a whole pack plain, but try to save some for the cheesecake!)
For the Crunch Topping:
- Crushed vanilla cream cookies & strawberry wafers — It’s that simple! Some folks like to toss in a few animal crackers for fun, but classic is the way we go.
- (Optional) Pink Food Coloring — Just a couple drops, if you want an extra pop of color on top.
Step-by-Step Guide to Making No-Bake Strawberry Crunch Cheesecake
Step 1: Make the Cookie Crust
- Crush the cookies: Pop 26 vanilla cream cookies in a food processor and pulse till you get fine crumbs. Save a handful for sprinkling on top at the end—trust me.
- Mix with butter: Pour in the melted butter and stir until you’ve got the texture of slightly wet sand.
- Press into pan: Pour the cookie mix into a 10-inch springform (lined, if you’d like easy clean-up), and press it down using the bottom of a glass. Don’t forget the edges—it makes for neat slices.
- Chill: Stick the whole thing in the freezer while you whip up the filling. Fifteen minutes should do it. (Great time to sneak a coffee… or a snack.)
Step 2: Make the Strawberry Cheesecake Filling
- Dissolve the Jello: In a medium bowl, stir 1 box of strawberry jello into 1 cup of boiling water and let it cool down a bit (I set mine by a window!).
- Beat the cream cheese: In a large bowl, blend 16 oz of softened cream cheese with 3/4 cup sugar until creamy and smooth. (Don’t rush—nobody likes lumps.)
- Whip the cream: In another bowl, whip 2 cups of heavy cream with 1/2 cup powdered sugar until stiff peaks form. (If you’ve got a stand mixer, now’s the time to use it!)
- Combine: Gently fold the whipped cream into your cream cheese mixture—go slow for maximum fluffiness! Gradually pour in the cooled jello and keep folding till it’s all happy and pink.
- Add crunch: Roughly crush up 10 strawberry wafer cookies and toss those crumbles into the mixture. Every slice will have that little surprise crunch.
Step 3: Assemble the Layers of Cheesecake
- First layer: Spread half of the fluffy filling over your chilled crust. Smooth it out with a spatula (taste-test if you want—this is a judgment-free zone!).
- Chill briefly: Pop the cheesecake back in the freezer for about 15 minutes. This helps all those layers stay where they’re supposed to be.
- Second layer: Carefully spread the rest of the filling over the first layer. Try to get it as even as possible—it’ll look extra pretty when sliced.
Step 4: Prepare the Strawberry Crunch Topping
- Crush the cookies: Use leftover vanilla cream cookies and a few more strawberry wafers. Crush them up—chunky or fine, I won’t judge.
- Brighten it up: If you want that bakery-bright color, mix in a couple drops of pink food coloring or even a little reserved jello powder.
- Sprinkle generously: Cover the top of your cheesecake with the cookie mixture. Press down ever-so-gently so it sticks (but don’t smash your work!).
Step 5: Let It Set
- Chill the cheesecake: The hardest part! Cover it well and chill at least 4 hours or (even better) overnight. Trust me, time lets all the flavors cozy up together.
Step 6: Garnish & Serve
- Whipped topping: Right before serving, pipe (or dollop!) swirls of extra whipped topping around the edges. This is totally optional, but it turns a simple dessert into a showstopper.
- Fresh strawberries: Add a pile of berries or a drizzle of sauce on top for extra wow-factor. Might as well go all out!
Serving Suggestions: Elevate Your Cheesecake
- Fresh Strawberries — They look stunning and taste even better.
- Mint Leaves — For that little pop of freshness (I pretend I’m on a cooking show when I garnish with mint, not gonna lie).
- Chocolate Drizzle — Melted White or dark chocolate over the top is decadent.
- Extra Crunch — Add another mini handful of crushed cookies right before serving for the ultimate texture.
Storage Tips: How to Store Cheesecake
Refrigerator Storage:
- Keep your cheesecake covered in the fridge for up to 3 days. It actually tastes even richer the next day as the flavors meld—and it’s fantastic for breakfast with coffee (I won’t tell the kids).
Freezing Instructions:
- Want to stash some for later? Wrap the whole cheesecake (or individual slices) in plastic wrap, then again in foil. Freeze for up to a month.
- Thaw overnight in the refrigerator. A little time makes the texture just right again.
Yummy Variations & Fun Twists
- Chocolate Strawberry Cheesecake — Drizzle melted chocolate over your finished cheesecake, or fold mini chocolate chips into the filling for a chocolate-strawberry mashup.
- Mixed Berry Cheesecake — If you’re feeling wild, swap strawberry jello and wafers for mixed berry flavors—absolutely gorgeous and bursting with summer flavor.
- Lemon Strawberry Cheesecake — Stir in 1 tablespoon of lemon zest into the filling for a tart, citrusy kick. It’s light and zippy!
- Vegan Version — Sub in your favorite dairy-free cream cheese, use coconut cream for whipping, and grab vegan cookies for the crust. My cousin made it like this for her birthday and it was a huge hit!
In Conclusion: An Indulgent No-Bake Treat
This is truly that show-off dessert that feels fancy but doesn’t make you break a sweat. The creamy, almost mousse-like filling and that addictively crisp topping always have people sneaking extra slivers—as they should! It’s a dessert that manages to feel nostalgic and totally new at the same time.
If you give this no-bake strawberry crunch cheesecake a try, I want to hear all about it! Did you add extra berries, swap in a different cookie, sneak a taste before it set? (We’ve all been there.) Leave me a note or a photo in the comments, and if you make it for a special occasion, I hope it brings as much joy to your table as it does to ours!
No-Bake Strawberry Crunch Cheesecake
Ingredients
- 1 lb vanilla cream cookies about 34 cookies, some reserved for topping
- 6 tbsp butter melted, for crust
- 3.3 oz Strawberry Jello 1 small box
- 1 cup boiling water for dissolving Jello
- 16 oz cream cheese softened
- 3/4 cup granulated sugar for filling
- 2 cups heavy whipping cream for filling
- 1/2 cup powdered sugar for filling
- 10 strawberry wafer cookies about 4 oz, for filling
- 1/2 small tub whipped topping thawed, for garnish
Instructions
- Place 26 vanilla cream cookies in a food processor and pulse until they are fine crumbs. In a mixing bowl, combine the cookie crumbs with melted butter, mixing until crumbs resemble wet sand. Press the mixture into the bottom of a greased 10-inch springform pan. Freeze for 15 minutes.
- In a medium bowl, dissolve the strawberry jello in 1 cup of boiling water, stirring until fully dissolved. Set aside to cool.
- In a large bowl, beat the softened cream cheese with granulated sugar until smooth. In a separate bowl, whip heavy cream with powdered sugar until stiff peaks form. Gently fold the whipped cream into the cream cheese mixture. Gradually fold in the cooled strawberry jello until combined.
- Crush the strawberry wafer cookies and fold them into the filling for extra texture and flavor.
- Remove the crust from the freezer and spread half of the cheesecake filling over it. Freeze for 15 minutes to firm up, then spread the remaining filling evenly over the first layer.
- Crush the reserved vanilla cream cookies and strawberry wafers, and sprinkle over the top of the cheesecake. Press gently to adhere.
- Refrigerate the cheesecake for at least 4 hours, allowing it to fully set.
- Just before serving, pipe decorative swirls of whipped topping around the edge of the cheesecake.
