
Save This Recipe
Sometimes the only thing that’ll bring everyone running to the kitchen after a long, scruffy day is something hot, crispy, and unapologetically cheesy—bonus points if you can eat it with your hands. That’s exactly why these cheesy pocket tacos have become a little weeknight miracle around here. There I was, with hungry faces peeking into the pantry after an afternoon of yard work and scooters, and—boom!—pocket tacos to the rescue. (And honestly, the look on my crew’s faces? Worth every single sprinkle of cheese on my countertop.) It still blows my mind how a simple lineup—ground beef, tortillas, and a couple kinds of cheese—can turn an otherwise regular evening into an everybody’s-excited, Friday-night-in-the-middle-of-the-week situation. And, okay, if you’re a sucker for oozy, melty cheese and that dreamy nacho-vibe, you’re in for a treat. When my people started jousting over the very last one on the tray, you’d better believe I stuck the recipe card right in my game night folder for next week. No regrets here!
Another reason I keep coming back to these tacos? They’re just so easy to dress up “fancy” or keep ultra-casual, depending on my mood (or, let’s be real, how many groceries are actually in the fridge). They’re a hit as a cozy, snacky dinner—you know, that kind of meal where everyone eats with their fingers and laughs a little too much. Or you can cut them in halves or quarters for a potluck, football game, or, frankly, just because you want to outdo Sharon at the neighborhood party. Plus, that pocket style means no more cracked taco shells or rogue toppings flying down your shirt—raises hand in solidarity.

Why You’ll Love This Recipe
- All-in-one coziness: Melty cheese, warm tortillas, luscious beef… everything you want in each bite. This is craveable, hand-held comfort food at its finest.
- No mess, no stress: The “pocket” fold means all the delicious stuff actually stays inside (yes, even if your teenager is eating on the couch—again).
- Swap-friendly: Got picky eaters, vegetarian teens, or a fridge full of leftovers? Make these your own with whatever you’ve got on hand.
- Instant crowd-pleaser: I promise, these always disappear first at parties. If you’re hoping for leftovers, maybe double the recipe just in case.
Key Ingredients
Ground Beef: I usually go with 80/20 for the right amount of flavor, but truly, use what you like. And you’re not married to beef—swap in ground turkey, rotisserie chicken, or (my favorite meatless hack) lentils for a lighter twist. No one’s going to judge you—least of all me!
Taco Seasoning: Store-bought or homemade—either is great. I always keep those little packets in the pantry for “oops, what’s for dinner!” nights.
Salsa: This amps up both the flavor and the moisture, so your filling is never dry. Anything from classic chunky to fire-roasted or even pineapple if you’re feeling bold.
Cream Cheese: Adds sheer magic creaminess, tames the salsa’s kick, and generally makes everything irresistible. Trust me and don’t skip it, even if it sounds a bit funky. (You’ll thank me.)
Cheddar Cheese: Any sharpness level works—mild, medium, sharp—or mix it up with Monterey jack or pepper jack for a punchy twist.
Tortillas: Six-inch flour tortillas work like a dream. Corn is a bit crumbly for this particular project, but go gluten-free or low carb if that’s how you roll.
Butter: Just before baking, a buttery brush on top gives you those golden, toasty, just-slightly-addictive taco pockets. It’s fast, easy, and worth every extra second.
P.S. If you’re hunting for all the measurements and step-by-step instructions, check out the recipe card below!
Instructions
Preparing the Taco Meat
Cook the Ground Beef: Fire up your favorite big skillet (cast iron or nonstick—whatever you’ve got) and crumble the ground beef over medium-high heat. I break it up as I go, so every little bit gets that tasty, browned edge. Cook until beautifully browned, about 7 to 10 minutes, stirring now and then so nothing burns. (Let that sizzle soundtrack put you in a good mood!)
Drain the Grease: Once your beef is golden, drain off almost all the fat. A big metal spoon or a wad of paper towels does the trick—just be careful, it’s hot. Greasy taco filling is the one downer you simply don’t need.
Add Taco Seasoning: Sprinkle in your taco seasoning and add that splash of water the packet always calls for (usually 1/4 to 1/2 cup). Let it bubble away for a couple minutes, until things thicken up and your beef looks saucy and well-coated. At this point, it will smell like taco night heaven. (You’ve been warned.)
Making the Cheesy Filling
Beat the Cream Cheese: Grab a medium bowl and beat the cream cheese until it’s soft and smooth. Leave it out for a bit beforehand if, like me, you tend to forget and end up with sore biceps. (A hand mixer works wonders if you’re feeling fancy.)
Add Salsa: Pour in your salsa—about half a cup—and mix it right into the cream cheese until it’s creamy and just a bit pink. I promise, this simple combo becomes pure, tangy magic. Everyone wants to know “what’s that *secret* flavor?”
Assembling the Taco Pockets
Preheat the Oven: Set your oven to 350°F (175°C). That way, it’ll be nice and hot when you’re ready to bake.
Prepare the Tortillas: Lay a tortilla flat, and if it’s even a little bit stiff, microwave the whole stack under a damp paper towel for 15 seconds. Warm tortillas = happy folding. Cold, crackly tortillas = not so much.
Layer the Ingredients: Spoon a big dollop of the cream cheese-salsa mixture into the center of each tortilla, leaving a good border—no one likes a leaky pocket! Next pile the beef mixture on top, followed by a generous handful of shredded cheese. (More is more in this house.)
Fold the Tortilla: Fold the sides in, then roll it up from the bottom to make a nice, secure little package. Don’t stress if you get some oozing or a tiny tear. The cheese glues it all together in the oven and honestly, “messy” is my favorite food group.
Baking to Cheesy Perfection
Get That Tray Ready: Line a baking sheet with parchment paper or spray lightly with nonstick oil.
Arrange the Pockets: Lay each folded taco seam-side down so they stay closed. (Kitchen hack: tucking that seam underneath really works!)
Butter It Up: Brush the tops with melted butter for that gorgeous golden finish and a whisper of richness that’ll make you swoon.
Bake: Pop them in the oven for about 15 minutes, until the cheese is bubbly and the tortillas are as golden as your grandma’s biscuits. (That’s when the family starts drifting in, noses in the air.)
Serving Suggestions
I love to pile these on a big platter and add bowls of guacamole, extra salsa, and sour cream for all the dunking and dipping. They’re equally dreamy on their own, but if you want to make a meal of it or jazz things up, here are a few ideas:
- Fresh twist: Serve over a bed of crisp lettuce with diced tomato and avocado for a taco-salad vibe.
- Full dinner plate: Add a scoop of Mexican rice or refried beans so no one leaves the table hungry.
- Customize away: Sprinkle with black olives, jalapeños, extra cheese, or a drizzle of hot sauce if you like things spicy (we sure do, at least half the time).
Storage and Reheating
If you’re lucky enough to have leftovers (it *can* happen!), just let the pockets cool and pop them into an airtight container in the fridge for up to 3 days. To reheat, the oven is your best bet: 350°F for about 10 minutes gives you the crisp factor you crave. They also reheat super well in the air fryer—three or four minutes and they’re perfect again. For the planners out there: these freeze beautifully! Wrap each cooled taco pocket in foil and freeze for up to 2 months. I like to thaw them in the fridge overnight, then reheat as usual—your future self will be so grateful after a crazy day.
Variations
- Chicken Taco Pockets: Shredded rotisserie chicken or ground turkey instead of beef is a fun twist—just as comforting, but a little lighter if that’s your thing.
- Meatless Monday: Swap the beef for seasoned black beans, lentils, or sautéed peppers and onions. (Pro tip: a little smoked paprika takes the veggies up a notch!)
- Heat it up: Stir chopped jalapeños or a splash of hot sauce right into your filling. Or, if you’re like us, toss in pickled red onions for bite. Game changer.
- Extra cheesy: Monterey jack, Colby, pepper jack, or that cheddar-jack blend work amazing—play with what you love!
- Breakfast edition: Trust me, fill ’em with scrambled eggs, sausage, and cheese for a brinner (breakfast-for-dinner) extravaganza. I’m obsessed.
Final Note
These cheesy taco pockets are pretty much the definition of comforting, crowd-warming, utterly satisfying goodness. They gather everyone around the table—sometimes with elbows out, “dibs on the last one!” vibes, but hey, that just means you’ve nailed it. If you whip them up, let me know what spin you put on them or what big, hungry moment they saved in your house. Drop a comment below, or tag me if you post your creations online—I’ll be cheering you on from my (kinda crumb-covered) kitchen. Here’s to more cozy nights, crackling cheese, and taco pockets for all!
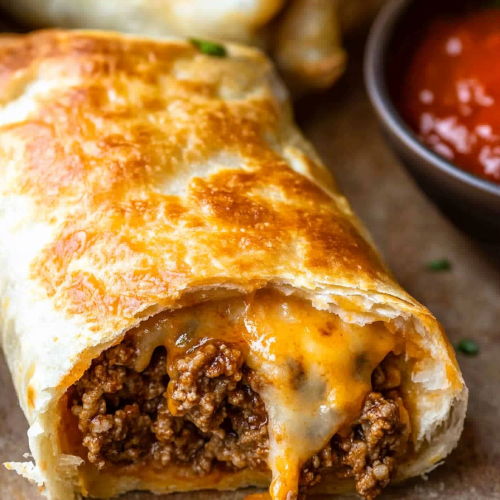
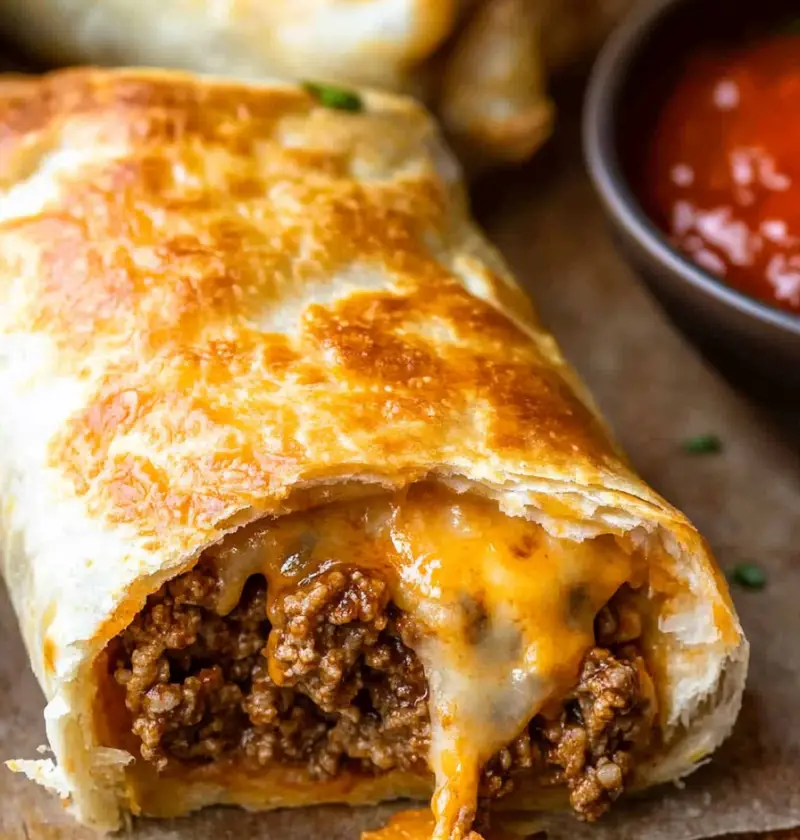
Loaded Cheesy Pocket Tacos
Ingredients
- 1 packet Taco Seasoning
- 1 pound ground beef
- 1/2 cup salsa
- 8 oz cream cheese softened
- 2 tbsp melted butter
- 1 cup Cheddar cheese shredded
- 12 6-inch tortillas
- Optional toppings Lettuce, sour cream, extra salsa, sliced olives, extra shredded cheese
Instructions
- Crumble ground beef into a skillet over medium-high heat and cook until browned (about 7-10 minutes). Drain excess grease, then add taco seasoning and water as directed on the packet. Simmer until thickened.
- In a bowl, beat softened cream cheese until smooth. Add salsa and mix until creamy and uniform.
- Preheat oven to 350°F (175°C). Lay a tortilla flat, spread cream cheese mixture in the center, add a spoonful of taco beef, and sprinkle with cheddar cheese. Fold the tortilla to form a pocket.
- Place the pockets seam-side down on a greased baking tray. Brush tops with melted butter and bake for 15 minutes, or until golden brown.
- Let the taco pockets cool slightly before serving. Serve warm with sour cream, guacamole, or extra salsa for dipping.
