
Save This Recipe
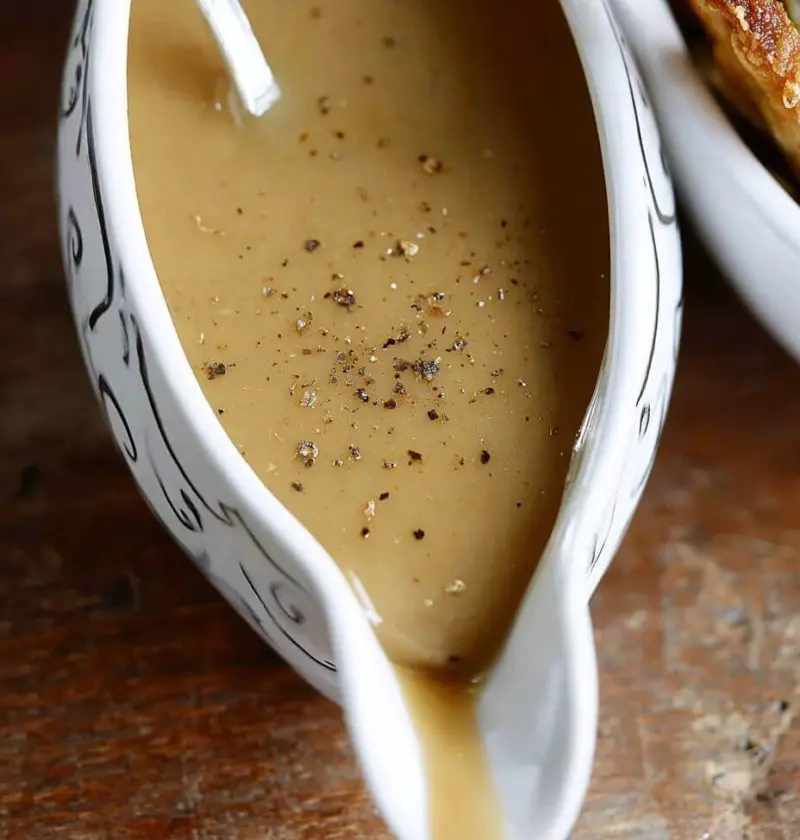
If there’s one thing that makes a roasted turkey or Chicken dinner feel downright magical, it’s a big ol’ boat of homemade gravy made from drippings. I still remember the first Thanksgiving I hosted — both my oven and my nerves were running hot, but when I poured those savory, golden drippings into my trusty saucepan and whisked up a silky gravy, it felt like pulling off an edible party trick. My kids begged for “extra sauce,” my husband licked the spoon, and suddenly, all those cooking jitters felt worth it. Gravy just brings everyone to the table — it’s that cozy, craveable touch you can’t skip.
Why You’ll Love This
- So much flavor, so little fuss — Drippings do most of the work for you!
- Perfectly cozy for holiday meals, Sunday roasts, or even a Tuesday night meatloaf (no judgment here)
- Endlessly adaptable — use turkey, chicken, beef, or even pork drippings
- So much better than any store-bought jar (and you know exactly what goes in!)
- Comes together in under 15 minutes with just a few simple ingredients
Ingredient Notes
Drippings: This is the magical stuff that collects at the bottom of your roasting pan — all that concentrated flavor from your turkey, chicken, or roast beef. (Scrape up every brown bit, that’s where the flavor hides!) Don’t worry about skimming all the fat unless you prefer a lighter gravy. Some fat actually makes for a silkier texture.
Flour: Classic gravy calls for all-purpose flour. If you’re gluten-free, swap in a 1:1 gluten-free blend or even cornstarch (just mix the cornstarch with cold water before adding).
Butter: A little added butter just makes things richer and creamier (plus, it helps with the flour “roux” step). If your pan is super fatty already, you can skip extra butter.
Stock or broth: Chicken, beef, or vegetable stock all work here — homemade, boxed, or even bouillon. Use whatever matches your drippings (chicken with chicken, beef with beef) for the deepest flavor.
Seasonings: Salt and fresh cracked pepper are non-negotiable, but don’t shy away from a little garlic powder, dried herbs, or even a splash of Worcestershire sauce if you like a more savory punch.
Optional extras: Splash of cream or milk for a richer finish, a pinch of fresh chopped parsley, or a glug of wine (for the grown-ups — highly recommend!).
How to Make Gravy from Drippings
Step 1: Collect the drippings — After you’ve roasted your turkey (or chicken or beef), set the meat aside to rest. Pour all those pan juices, brown bits and all, into a glass measuring cup or bowl. Let it settle; the fat will rise to the top. If you want a lighter gravy, skim off some of the fat with a spoon. But if we’re being honest, a little fat = flavor. (I usually leave about half in — don’t tell my doctor.)
Step 2: Make a roux — Place your (empty) roasting pan right on the stove over medium heat (you can use a regular saucepan if your pan won’t fit). Add a few tablespoons of butter if things look dry, then sprinkle in an equal amount of flour. Whisk, whisk, whisk until it’s all combined and a bit golden, about 2 minutes. This step gets rid of the raw flour taste and starts that rich, thickening magic.
Step 3: Add the drippings — Slowly pour your drippings (and any reserved broth or stock) into the pan, whisking the whole time. Don’t freak out if it looks lumpy at first — it’ll smooth out! Scrape up all those golden bits stuck to the bottom of the pan — that’s pure flavor, baby.
Step 4: Simmer (don’t skip this part!) — Bring the mixture to a gentle simmer. Let it bubble away for 5–10 minutes, whisking occasionally. It will thicken up and turn gloriously glossy. Taste as you go — this is when you can add more salt, pepper, or any extras you love. If it’s too thick, add a splash more broth. Too thin? Let it simmer a bit longer.
Step 5: Strain (if you like it silky-smooth) — For an extra-fancy finish, pour the gravy through a mesh strainer into your serving pitcher to catch any lumps or odd bits. If you like it a touch chunky (that’s my husband’s favorite), just leave it as is.
Step 6: Taste and serve — This is your official permission to dip a spoon in and taste test — you earned it. Adjust seasoning, pour into a warm gravy boat, and set it on your table (preferably with mashed potatoes, stuffing, or whatever else needs a cozy drizzle).
Variations & Flavor Twists
Wine-kissed gravy: Add a splash of dry white wine in with your drippings for a subtle tang (especially great with turkey or chicken).
Garlicky herb gravy: Whisk in a clove or two of minced garlic and a handful of chopped fresh herbs at the end — parsley, sage, thyme. It’s like Thanksgiving in every bite.
Cream-rich version: Swirl in a little heavy cream or half-and-half right before serving for an ultra-silky finish. (Kids go bananas for this one!)
Mushroom magic: Sauté chopped mushrooms in the butter before you add the flour for a beefy, earthy gravy that pairs beautifully with roast beef or pork.
Gluten-free & dairy-free: Use cornstarch and your favorite plant-based butter or leave it out if your drippings have plenty of fat.
Storage & Reheating Tips
To store: Let leftover gravy cool, then transfer to an airtight container. Pop it in the fridge — it’ll keep for up to 4 days (if it lasts that long).
To freeze: Yes, gravy can be frozen! I like to portion it in small containers for future comfort-food emergencies. Just thaw overnight in the fridge and give it a good whisk when reheating.
To reheat: Gently warm in a saucepan over low heat, whisking as you go. If it’s too thick, add a splash of broth or water. If it’s separated, just keep whisking — it’ll come back together (trust the process, as the kids say). Microwave works in a pinch, but stovetop is best for that silky texture.
Let’s Chat!
Gravy from drippings is one of those “wow” factors at the table that’s so much simpler than people think — just a little stirring and faith in the process. Nothing fancy, just wholesome, savory, homemade comfort that brings everyone a little bit closer. If you give this recipe a try (or if your family has any gravy secrets I need to know about!), pop into the comments below. I absolutely love swapping kitchen stories — and if your gravy goes lumpy, I promise not to tell a soul. Stay cozy and keep cooking, friends!

Baked Potato Chicken and Broccoli Casserole
Ingredients
- 4 large russet potatoes washed and scrubbed
- 2 cups cooked chicken diced or shredded
- 2 cups broccoli florets blanched
- 1 1/2 cups cheddar Cheese shredded
- 1 cup sour cream
- 1/2 cup milk
- 2 tablespoons unsalted butter
- 2 tablespoons all-purpose flour
- 2 cloves garlic minced
- Salt and pepper to taste
- Chopped fresh chives or green onions optional, for garnish
Instructions
- Preheat your oven to 375°F (190°C) and grease a 9×13-inch baking dish with butter or non-stick spray.
- Place the washed and scrubbed potatoes directly on the oven rack and bake for 45-60 minutes, or until tender. Let them cool slightly.
- In a saucepan over medium heat, melt the butter and cook the garlic for 1 minute. Stir in the flour and cook for another minute, stirring constantly.
- Gradually whisk in the milk, stirring continuously until smooth and thickened. Remove from heat and stir in 1 cup of shredded cheddar Cheese and sour cream. Season with salt and pepper to taste.
- Slice the baked potatoes in half lengthwise and scoop out the flesh, leaving a thin layer in the skins. Place the potato shells in the prepared baking dish.
- Dice the scooped-out potato flesh and combine it with the cooked chicken, blanched broccoli, and cheese sauce. Stir until well combined.
- Spoon the chicken, broccoli, and cheese mixture into the potato shells, dividing evenly. Sprinkle the remaining shredded cheddar cheese on top.
- Bake for 20-25 minutes, or until the cheese is melted and bubbly. The top should be golden brown.
- Let the casserole cool slightly before serving. Garnish with fresh chives or green onions if desired. Enjoy warm!