
Save This Recipe
If you’ve spent any time fussing with tough, bland, or just sad Pie Crusts (hand raised over here!), you’re not alone. For years, I treated pie crust like it was some secret passed down from the pie gods—something only “real bakers” could pull off perfectly. But then I found my groove with this Classic Pie Crust recipe, and let me tell you, my confidence—and pretty much everyone’s dessert expectations—skyrocketed! This crust is buttery, flaky, and pretty much foolproof. Whether you’re making old-fashioned apple pie for Sunday supper or prepping a quiche for a ladies’ lunch, this is the only dough I use. And yes, you can absolutely conquer it too (even if you’ve had more pie-flops than you care to admit!).
There’s just nothing cozier than the smell of a homemade pie baking in your kitchen—especially when you know that tender, golden crust is made from scratch. I promise it won’t require a professional pastry diploma and a stand mixer the size of a small car. Just a little bit of love, patience, and a few basic ingredients you probably already have in your pantry. I’ve even had kids, husbands, and skeptical guests all marvel at how buttery and flaky it turns out. (Pro tip: don’t mention how easy it was. Let them think it took you all day!)

Why You’ll Love This Recipe
- Flaky Texture: Thanks to the shortening (and not overworking that dough!), you’ll get those gorgeous layers and tender bite everyone craves.
- Beginner-Friendly: No fancy gadgets or mysterious techniques. You can totally do this, even if you’re more of a cook-than-baker.
- Versatile: Sweet pies, savory tarts, cheesy quiches—this crust handles them all without complaint.
- Make-Ahead Convenience: Prepare your dough ahead and stash it in the fridge or freezer. Spontaneous pie? Yes, please!
- Customizable: Toss in cheese, herbs, or spices to make it your own and match whatever you’re baking up.
Key Ingredients
All-Purpose Flour: The classic base. No need for pastry flour—just your run-of-the-mill supermarket stuff will do the trick and keep things soft (but never crumbly!).
Shortening: Don’t skip it! Shortening keeps the crust super flaky and workable. If you’re team butter, I hear you—see my swaps below—but shortening really is my secret for “wow factor” layers.
Water: Make sure it’s ice-cold. Pop some ice cubes in your measuring cup before adding water. Cold helps keep the shortening from melting into the dough too soon.
White Sugar: Just enough for a touch of sweetness. It won’t overpower, even with a savory pie (trust me!).
Egg: A humble egg helps bind everything together and gives a bit of richness and gorgeous color.
Salt: Absolutely essential—don’t skip! It brings out all the buttery, nutty, can’t-stop-eating-it flavor.
Complete list of ingredients with quantities and step-by-step instructions is down in the printable recipe card for your convenience.
Instructions
Step 1: Prepare the Dry Ingredients
Pull out a big mixing bowl—the one you haul out for cookie dough and grandma’s banana bread. Whisk together 4 cups all-purpose flour, 2 teaspoons salt, and 3 tablespoons white sugar (combine ’til it looks like soft snow). You want those dry ingredients to play nice and mingle before you add the fat.
Next, add in 1 ¾ cups shortening. Now, don’t overthink this—use a pastry blender, a couple forks, or even your clean fingers. Work it in until the whole thing looks like little pebbles or coarse crumbs, not big slicks of fat. This bit is what creates the magic layers when you bake!
Step 2: Add Wet Ingredients
In a small bowl, beat up 1 egg—just until it’s uniformly yellow and a bit frothy. Pour in ½ cup ice-cold water (measure a smidge less if your kitchen is super humid; dough is forgiving).
Pour the wet ingredients right into your flour-shortening mixture. Use a fork or your hands to gently pull it together. It’ll seem crumbly—don’t panic! Knead just a few times until it holds together. If you overwork it, you’ll lose that dreamy tenderness. When it’s in a mostly cohesive ball, you’re done. Walk away—seriously.
Step 3: Divide and Chill
Now, break the dough into four roughly equal lumps (doesn’t have to be perfect), grab some plastic wrap, and wrap each piece tightly. This is where a little patience pays off: throw ’em in the fridge for at least 30 minutes. Chilling helps the fat firm up and makes the dough less sticky and easier to roll. If I’m planning ahead, I’ll do this the night before and sleep easy, knowing pie is just around the corner.
Step 4: Roll Out the Dough
Lightly flour your countertop (and your rolling pin, and maybe your shirt sleeve if you’re as messy as me). Grab one lump of chilled dough and roll it out into a circle about ⅛ to ¼ inch thick. My trick: slide the dough around as you roll to keep it from sticking (and, if your dough cracks a bit, just pinch it back together—nobody’s judging!).
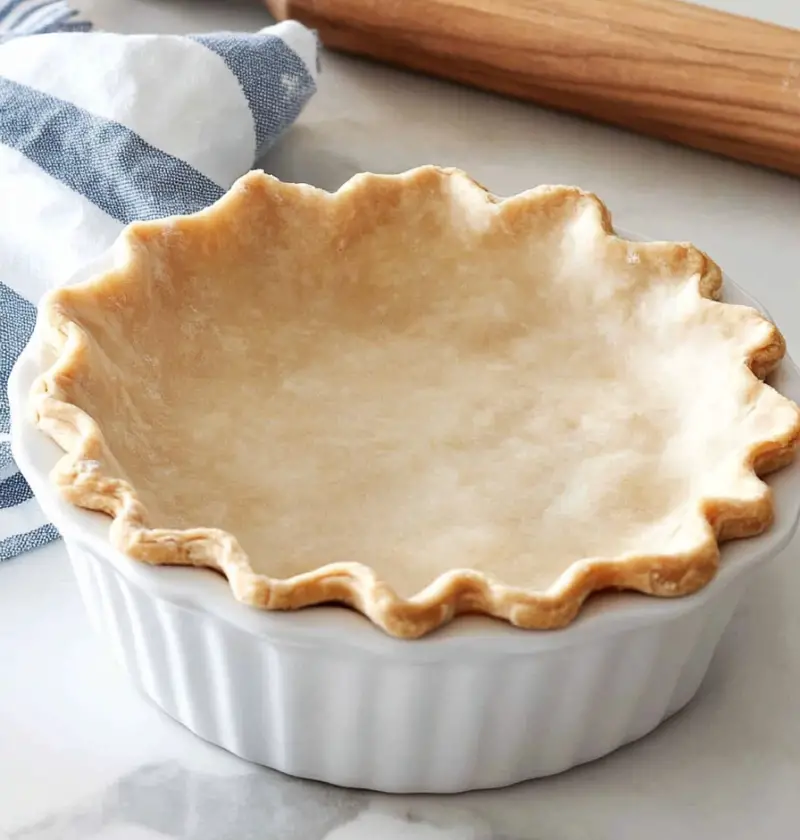
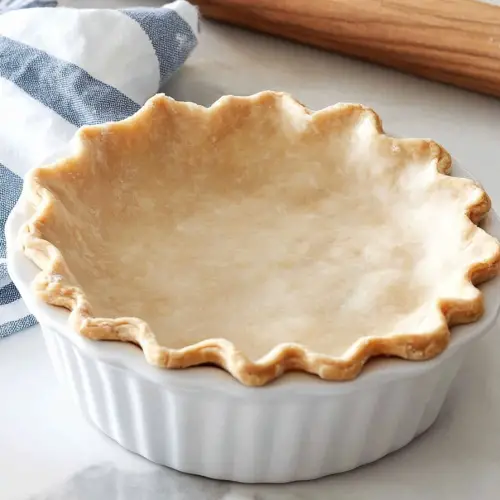
Carefully drape the dough into your pie pan, letting it settle down without stretching it. Gently press into the sides and trim off the extra. Fold the edges under, then use your fingers or a fork to crimp with gusto—this is where your unique style shines (rustic = beautiful!).
Step 5: Pre-Bake or Fill
If your pie needs a blind-baked crust (lemon meringue fans, I see you!), poke the bottom with a fork and bake in a preheated oven as your recipe instructs. Otherwise, pour in your filling and bake as directed. This dough works equally well for fruit pie, creamy quiches, pot pie…name your craving.
Serving Suggestions
Sublime Sweets: This is my forever crust for apple pie, pecan pie, pumpkin pie, and strawberry rhubarb (bonus points if you top with vanilla ice cream!).
Savories: Layer it up with ham and cheese for a killer quiche or hearty Chicken pot pie. Stir fresh herbs into the dough for a fun twist.
Mini Pies: Roll dough thin, cut into circles, and bake up hand pies or mini tarts—perfect party bites or lunchbox surprises.
Garnish: Save those scraps! Cut fun shapes for decorating, or twist into a braided edge (kids love helping with this part—even the wiggly bits turn out adorable after baking).
Storage Tips
Refrigerator: Store extra dough balls in the fridge (well-wrapped) for up to 3 days. Before rolling, let them sit at room temp for about 5–10 minutes so they’re easier to work with.
Freezer: Pop the wrapped dough balls in a zip-top bag and freeze for up to 3 months (mark the date so you don’t forget what’s hiding back there!). Thaw overnight in the fridge—easy as…well, pie.
Ready-to-Use Crusts: You can bake crusts ahead and store at room temperature for a day or freeze for a month. Just wrap extra tight with plastic wrap and foil to ward off that dreaded freezer burn.
Variations
Butter-Based Crust: Swap the shortening with very cold, cubed butter for an ultra-rich, almost croissant-y crust.
Gluten-Free: Use your favorite gluten-free flour blend (I like King Arthur’s). The dough might be a touch more delicate, but it totally works.
Herb-Infused: Chop in fresh thyme, rosemary, or sage for a savory stunner that makes quiches and pot pies extra special.
Spiced: Try a pinch of cinnamon, nutmeg, or cardamom in the dry mix for pies with spice-forward fillings (think pumpkin or sweet potato).
Cheese-Infused: Toss in a handful of freshly grated sharp cheddar or Parmesan for a crust that’s outstanding with savory pies or even a veggie galette.
Conclusion
This Homemade Pie Crust is my cozy kitchen secret—my go-to for every holiday, birthday, and “just because” baking spree. It’s buttery, flaky, and tender with not a hint of cardboard in sight (I’m looking at you, store-bought). And hey, if you’re nervous about homemade crust, don’t be! Grab that old rolling pin—dings, dents, and all—turn on your favorite playlist, and jump right in. If you have questions or a pie story to share, leave me a comment below! I’d love to hear how your pie turns out or help troubleshoot if the pie gods throw you a curveball. Happy baking, friend—your kitchen’s about to smell amazing!
Homemade Pie Crust
Ingredients
- 4 cups all-purpose flour
- 1 ¾ cups shortening
- ½ cup water
- 3 tbsp white sugar
- 1 egg beaten
- 2 tsp salt
Instructions
- In a large bowl, combine all-purpose flour, salt, and sugar. Whisk to evenly distribute. Add shortening and use a pastry cutter or fingers to mix until the texture resembles coarse crumbs.
- Beat the egg in a small bowl. Add the egg and cold water to the flour mixture. Gently combine using a spoon or hands until a dough forms. Avoid overworking the dough.
- Divide the dough into 4 equal portions. Wrap each portion in plastic wrap and refrigerate for at least 30 minutes. This step ensures a flaky crust.
- Lightly flour your work surface and rolling pin. Roll out one portion of dough to about 1/8 to 1/4 inch thick, ensuring it fits your pie pan. Transfer the dough to the pan and press gently to shape. Trim and crimp the edges.
- For pre-baking, poke holes in the bottom with a fork to prevent bubbling and bake according to your recipe. For filled pies, follow the specific baking instructions in your pie recipe.
