
Save This Recipe
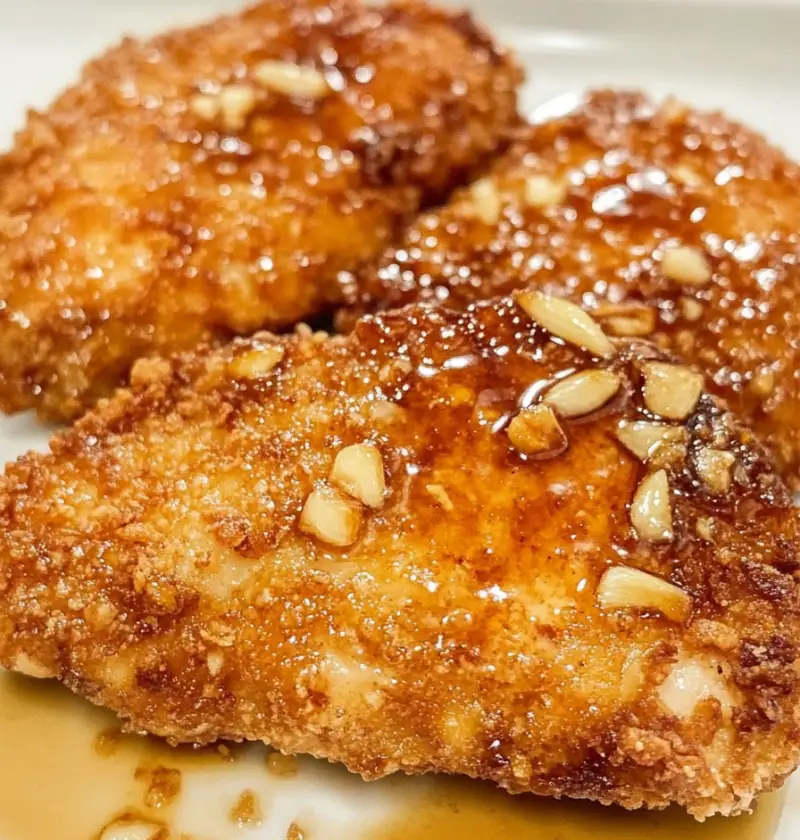
You know those recipes that somehow make you feel like a kid again—when Mom would call you down for dinner and the whole house just smelled…well, like pure comfort? This Crispy Honey Garlic Chicken does that for me, every single time. I honestly started making this dish because I was obsessed with a certain (unnamed, but you probably know it) restaurant takeout version. But in my opinion, this homemade version beats it, hands down. There’s something magical about that lightly crisped chicken, glossy sweet-and-savory sauce and, let’s face it, how downright satisfying it is to make something craveable in your own kitchen.
Also, if you’re like me and get a bit of a thrill from everyone (even the picky eaters) asking for seconds, oh, you’re in for a treat. The best part: you don’t need a special trip to the store or a culinary degree. Just a little stirring, a simple fry, and a few pantry basics.

Why You’ll Love This Recipe
- Restaurant Quality at Home: You’ll get that deep-fried, sticky-sweet chicken everyone loves—without changing out of your sweatpants (score!).
- Crowd Pleaser: This dish is always a hit—kids devour it (there’s rarely leftovers!), and adults inevitably ask for the recipe.
- Faster Than You’d Think: Just under an hour from start to finish, so it’s totally weeknight doable without turning your kitchen upside down.
- Flexible Heat: A little cayenne for warmth, but you can crank it up or down—no sweat. (Pun intended. I can’t help myself.)
- Versatile: Pile it on Rice, nestle next to steamed veggies, toss with Noodles—whatever’s hanging out in your fridge or pantry works just fine.
Key Ingredients
You probably have most of these on hand already—don’t you love when that happens? Here’s what you’ll need, plus a few of my favorite subs and kitchen tips:
- Chicken Breast: I go for boneless, skinless. If you want extra juiciness, swap in thighs, or grab tenders for the fastest version. (Pro tip: giving them a little pounding makes for even cooking—plus, whacking chicken can be oddly therapeutic.)
- Flour: All-purpose does the trick for that golden, crispy exterior. Gluten-free blends work beautifully, too—just use your favorite.
- Eggs: These help the coating stick like glue (don’t skip this or you’ll end up with a floury mess… speaking from experience, more than once!).
- Cayenne Pepper: Totally optional, but I can’t resist adding a pinch or two. If heat isn’t your thing, just leave it out or swap for smoked or sweet paprika.
- Honey: That dreamy sweet note. Use real honey for the best flavor—and if you like things on the sweeter side, add an extra drizzle.
- Garlic: Fresh garlic gives the sauce its punch. Honestly, I sneak in an extra clove every time.
- Soy Sauce: Brings that deep umami, salty goodness to balance the honey. Tamari is great if you need gluten-free.
- Cornstarch Slurry: Just a little slurry thickens the sauce to the perfect, clingy consistency. Arrowroot or potato starch work in a pinch.
- Vegetable Oil: For frying. Use something neutral like canola or sunflower so the chicken and sauce can shine—no weird aftertastes allowed.
Complete list of ingredients with exact quantities and instructions is just below in the recipe card!
Instructions
Step 1: Prepare the Sauce
First things first—start with the honey garlic sauce so it’s ready and waiting when your chicken finishes frying.
- Combine Ingredients: In a medium saucepan, combine ½ cup honey, 4 cloves minced garlic, and ⅓ cup soy sauce.
- Bring to a Boil: Heat over medium, stirring here and there, until the sauce gets bubbly and smells amazing.
- Thicken the Sauce: In a small bowl, whisk together 1 tablespoon cornstarch with 2 tablespoons cold water (cold water is key, trust me!). Pour it into your sauce, and stir until it thickens up—this part always feels a little magical to me.
- Remove from Heat: Set the saucepan aside while your chicken gets crispy.
Step 2: Prepare the Chicken
- Mix the Coating: In a shallow bowl, whisk together 1 cup all-purpose flour, 1 teaspoon garlic powder, ½ teaspoon cayenne (or less if you want), ½ teaspoon paprika, ½ teaspoon salt, and ¼ teaspoon black pepper. (Give it a good whisk so everything mixes evenly—nobody wants a cayenne landmine.)
- Prepare the Egg Wash: Crack 2 large eggs into another bowl, add 2 tablespoons water, and whisk until smooth and a little frothy.
- Coat the Chicken: Take your halved, pounded chicken breast pieces (or thighs, or even cut-up for nuggets), dip in the egg, then dredge in the flour mixture, gently pressing so that glorious coating sticks. This is how you get those craggy, crunchy bits everyone fights over.
Step 3: Cook the Chicken
- Heat the Oil: Pour about an inch of vegetable oil into your largest skillet and heat over medium until shimmering. If you have a thermometer, it should hit around 350°F, but if not, toss in a pinch of flour—it should sizzle instantly but not brown too fast.
- Fry the Chicken: Slip in the coated chicken pieces (don’t crowd the pan; fry in batches if needed). Cook for 4-5 minutes per side, or until deeply golden and the inside is fully cooked (you’re aiming for 165°F, or just slice into one to check).
- Drain Excess Oil: Move the Crispy Chicken to a paper towel-lined plate. Try not to eat half right off the plate—so hard not to!
Step 4: Combine and Serve
- Toss in Sauce: In a big mixing bowl, gently combine your hot, crispy chicken with that glorious honey garlic sauce. Toss until every piece is glossy and coated—don’t leave anyone behind!
- Serve: Dish up immediately over rice, next to crunchy veggies, or even piled onto a fresh salad. Seriously, don’t forget a drizzle of extra sauce—everyone fights for it at my table.
Serving Suggestions
This chicken is basically a blank slate—all your favorite sides work beautifully. Here are a few that make regular appearances at my house:
- Steamed White Rice: It’s classic for a reason. (Or swap for brown if you’re feeling virtuous!)
- Vegetable Stir-Fry: Broccoli, sugar snap peas, or bell peppers—whatever’s kicking around in your crisper drawer.
- Garlic Mashed Potatoes: Major comfort food energy. Don’t knock it—these two together are dreamy.
- Asian-Style Slaw: Toss up whatever crunchy veg you have with a splash of rice vinegar, sesame oil, and a sprinkle of sesame seeds. Super fresh counterbalance.
- Sesame Noodles: Toss hot noodles with a bit of sesame oil, scallions, and maybe just a touch of chili flakes. (Perfect for leftovers too.)
Storage and Meal Prep Tips
If you’re lucky enough to have leftovers (around here they disappear fast), here’s how to keep everything tasting just as good as the first go-round:
- Fridge: Store cooled chicken in an airtight container for up to three days. For best results, reheat in a 350°F oven—skip the microwave if you want to keep the lovely crunch.
- Freezer: Freeze the cooked chicken (before saucing) for up to two months. Thaw overnight in the fridge and reheat in the oven, then toss with warmed sauce before serving.
- Make-Ahead: You can bread the chicken and stash it (uncooked) in the fridge up to 24 hours ahead. The sauce also keeps for a couple days—just give it a quick reheat and whisk before using.
Variations
- Spicy Kick: Up the cayenne, add a swirl of Sriracha to the sauce, or hit it with extra chili flakes after tossing.
- Gluten-Free: Swap in your favorite gluten-free flour blend and use tamari instead of soy sauce. Double-check your cornstarch too—most are naturally gluten-free.
- Air Fryer Option: Looking for a lighter version? Cook your breaded chicken in a 400°F air fryer for about 15–18 minutes, flipping halfway, then toss in the sauce as usual. Super crispy, less oil, still so good.
- Vegetarian Twist: Pressed firm tofu or cauliflower florets both work magic here. Don’t knock cauliflower until you’ve tried it smothered in this honey garlic sauce!
- Lemon Honey Garlic: Want something zingier? Replace soy sauce with fresh lemon juice and a little zest. Tangy, sunny, and extra bright.
Conclusion
Crispy Honey Garlic Chicken is one of those recipes I turn to over and over, whether it’s a fridge-raiding Tuesday night or a lazy weekend family dinner. There’s just something magnetic about the combo of sweet, salty, and shatteringly crisp—honestly, I think it’s better than takeout. Plus, it’s SO flexible: you can dial up the heat, switch the protein, serve with your favorite sides, or just double the whole thing if you know what’s good for you. Give it a try, and let me know your favorite sides or swaps—I truly love reading your kitchen stories and hearing what you’re cooking! Drop a comment if you have questions or your crew falls in love with this cozy, craveable chicken the way mine has. Happy cooking, friends!

Crispy Honey Garlic Chicken
Ingredients
- 2 large boneless, skinless chicken breasts halved and pounded to an even thickness
- 2 large eggs beaten with 1 tbsp water
- 1 cup all-purpose flour
- 1 tsp cayenne pepper
- 1 tsp smoked paprika or regular paprika
- ½ tsp salt
- ¼ tsp black pepper
- ½ tsp garlic powder
- ¼ cup vegetable oil for frying
- ½ cup honey
- 2 tsp minced garlic
- 2 tbsp soy sauce
- 1 tbsp cornstarch mixed with 3 tbsp cold water
Instructions
- In a medium saucepan, combine honey, minced garlic, and soy sauce. Bring to a boil over medium heat. In a small bowl, mix cornstarch with water until smooth, then pour into the saucepan. Stir until the sauce thickens, then remove from heat and set aside.
- In one bowl, whisk together eggs and water. In another bowl, combine flour, garlic powder, cayenne pepper, paprika, salt, and black pepper. Dip each piece of chicken into the egg mixture, then dredge in the flour mixture, pressing gently to coat.
- Heat vegetable oil in a skillet over medium heat until hot. Fry the coated chicken for 4-5 minutes per side until golden brown and cooked through. Internal temperature should reach 165°F (74°C). Drain on paper towels.
- Toss the fried chicken in the prepared honey garlic sauce until evenly coated. Serve immediately with rice, vegetables, or a side salad.
