
Save This Recipe
You know how some foods just live in your memory? For me, it’s the smell of buttery sweetness wafting from those big cafeteria trays. And the taste? Warm, rich, just the right amount of crumbly. No frosting. No sprinkles. No nonsense.
These cookies are pure simplicity — the kind that doesn’t need bells and whistles. Just good ingredients, a little patience, and a well-loved baking tray.
Why These Old-School Cookies Still Hit the Spot
-
Five ingredients — That’s it. Nothing you can’t pronounce.
-
Iconic texture — Buttery, tender, thick without being Cakey.
-
No eggs — So they stay sturdy but delicate.
-
Nostalgia on a plate — Every bite takes you back to simpler times.
-
Make-ahead friendly — Chill the dough and bake when you’re ready.
What You’ll Need
1 lb unsalted butter (softened)
Yep, one whole pound. That’s four sticks. This isn’t the time for margarine or “light” anything. Room temp is key so you get that fluffy, lump-free cream.
1 cup granulated sugar
It’s not a super-sweet cookie. The sugar is there to balance the butter, not overpower it.
2 tablespoons vanilla extract
That’s not a typo. Two whole tablespoons — the vanilla is doing a lot of the heavy lifting in the flavor department.
1/2 teaspoon fine salt
A little salt keeps things from being flat. If you’re using salted butter (not recommended, but hey, it happens), skip this.
4 cups all-purpose flour
Spoon and level, don’t pack it in — and resist the urge to overmix once it’s all in. You’re looking for a soft dough, not something that bounces back like bread.

Let’s Bake!
Step 1: Cream the Butter and Sugar
In a big ol’ bowl (stand mixer if you’ve got one), beat the softened butter and sugar together until it’s light, fluffy, and smooth. Take your time here — you want it creamy, not grainy. Scrape down the bowl a couple times to be sure no buttery pockets are hiding.
Step 2: Add That Beautiful Vanilla
Once it’s all smooth, mix in the vanilla. Smells good already, doesn’t it?
Step 3: Flour and Salt, Gradually
Now slowly add the salt and flour. Do it in batches so the flour doesn’t fly out of the bowl and cover your kitchen like a snowstorm. Mix until the flour’s just incorporated — no dry streaks, but don’t keep going or the dough will get tough.
The dough will feel soft and rich, almost like Play-Doh. That’s what you want.
Shaping the Cookies
Here’s where the tradition comes in:
-
Scoop out 24 evenly sized balls. They should be about the size of a small tangerine — bigger than your usual cookie dough ball.
-
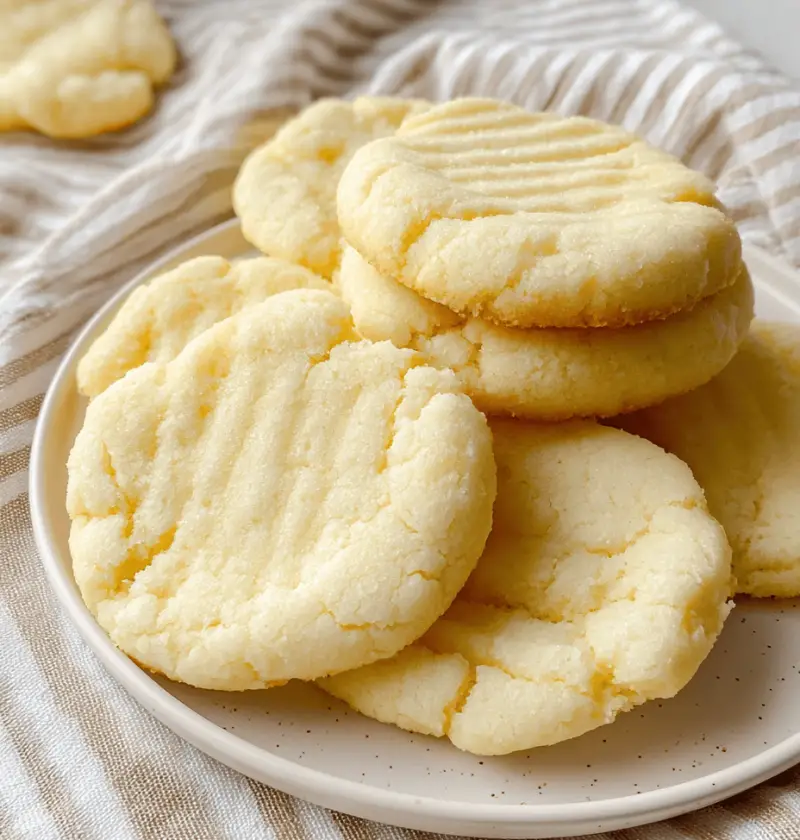
Place them on a tray and use three fingers to press straight down across the top of each one. Not flat — just enough to leave three gentle grooves. Like the lunch lady used to do.
-
Repeat with all your dough balls.
Now — and this part matters — chill the cookies for at least 1 hour. That rest helps them hold shape in the oven and deepens the flavor. You can even chill them overnight if you’re prepping ahead.
Time to Bake!
Once the cookies are good and chilled:
-
Preheat your oven to 375°F.
-
Line two large baking sheets with parchment paper.
-
Set the dough balls on the trays with 2–3 inches between each one. These are wide, thick cookies — they need some room to spread.
-
Bake for 15–18 minutes, or until the bottoms are just starting to turn golden.
Do not wait until the tops are brown — by then, you’ve gone too far. The tops will stay pale, like a shortbread cookie. That’s what you want.
Let them sit on the tray for 5 minutes, then move them to a wire rack to cool completely.
Storing These Beauties
-
Room temp: Store in an airtight container for up to a week.
-
Freezing: You can freeze the raw dough balls or the fully baked cookies. Just let them cool fully first.
-
Warming: If you want that fresh-baked taste the next day, microwave for 5–10 seconds. Heaven.
A Sweet Little Ending
These Chicago Public School Butter Cookies are more than just a treat — they’re a little slice of childhood. The kind you can pass down, pass around, or pull out for a special kind of “remember when?” moment.
So go on — pour yourself a glass of milk (or a cup of strong coffee), turn on some Motown or ’90s R&B, and enjoy the kind of cookie that doesn’t need to try too hard. It just is.
Let me know if these take you back — or if you’re introducing them to someone for the first time. I’d Love to hear your stories (and see your cookies!).
Chicago Public School Butter Cookies
Ingredients
- 1 pound unsalted butter, softened
- 1 cup granulated sugar
- 2 tablespoons vanilla extract
- 1/2 teaspoon fine salt
- 4 cups all-purpose flour
Instructions
- In a large bowl, beat butter and sugar until light, fluffy, and smooth.
- Scrape the bowl and add vanilla. Mix to combine.
- Gradually mix in salt and flour until no streaks remain.
- Portion dough into 24 tangerine-sized balls.
- Press each with 3 fingers to create indentations.
- Place on tray and chill for 1 hour.
- Preheat oven to 375°F. Line 2 trays with parchment.
- Place cookies 2–3 inches apart and bake for 15–18 minutes, until edges are golden.
- Cool on tray 5 minutes, then transfer to wire rack to finish cooling.
