
Save This Recipe

Why You’ll Love This Recipe
- Fast and Simple: No oven, no fancy equipment, just a saucepan and a spoon. You’ll have treats cooling on the counter in under 20 minutes—a real weekday win.
- Foolproof: This recipe is as forgiving as they come, so even if you’re not a pro baker, you’re going to get delicious results (time the boil and you’re golden).
- Best Chew Factor: Fudgy, chocolatey, and perfectly chewy with just the right hint of peanut butter. These cookies absolutely nail that craveable bite.
- So Flexible: Use a different nut butter, toss in coconut, sprinkle some mini chips on top—these cookies aren’t fussy, and they’ll adapt to whatever you have on hand.
- Big Crowd Pleaser: Whether it’s picky kids, the extra-hungry neighbor, or your late-night movie binge, everybody finds something to love (and snack on) here.
Key Ingredients
Butter or Margarine: Grab whichever you prefer. Butter gives that rich, classic flavor that brings out some serious cookie nostalgia, but a stick of margarine (or even a good quality plant butter) totally works if that’s what’s in your fridge. Sugar: Go with regular granulated sugar for the right amount of sweetness and that slightly fudgy texture. I know, it sounds like a lot, but trust me—don’t skimp or your cookies won’t set up the way you want. Milk: Full-fat whole milk makes these a little extra decadent, but honestly, I’ve used 2%, almond, oat, whatever was in the fridge at the moment. They’ve all worked beautifully! (Dairy free? Not a problem.) Cocoa Powder: Unsweetened cocoa is your BFF here. Dutch-process or regular natural cocoa—you can’t go wrong. Just steer clear of hot cocoa mix or anything sweetened, or the balance will get thrown off. Peanut Butter: Creamy is my personal favorite because it melts in perfectly, but chunky gives you those little bites of texture. Allergic to peanuts or need a school-safe cookie? Sunflower seed butter or soy nut butter are both excellent swaps. Vanilla Extract: Adds that warm, homey flavor that really makes everything pop. Don’t leave it out unless you absolutely must! Quick-Cooking Oats: These help the cookies firm up and give that signature chew. Old-fashioned rolled oats can work if that’s all you’ve got, you’ll just get a different, a bit chunkier texture (and a little extra chewiness). Heads up: The full ingredient amounts and clear, step-by-step instructions are all in the recipe card down at the bottom of this post. So relax—no need to pull out the notepads yet!Step-by-Step Instructions
Step 1: Prepare Your Workspace
Line your countertop (or a big rimmed baking tray, if you like things contained) with a good roll of wax paper or parchment. This is where your cookies will set up, so give yourself plenty of elbow room, especially if you’re making a double batch. These cookies do like to spread!Step 2: Make the Chocolate Base
Grab a medium-to-large saucepan (at least 4-quart—things bubble up quickly and you don’t want an oozy mess). Into the pan goes: ½ cup butter, 2 cups sugar, ½ cup milk, and 4 tablespoons cocoa powder. Set your burner to medium and stir it all together as the butter melts—you’re looking for a glossy, smooth chocolate river. (Sneak a little taste? I won’t tell!)Step 3: Boil Briefly—Timing Matters!
Keep stirring and watch for a nice brisk, rolling boil—big bubbles popping energetically across the whole surface, not just here and there. Now, this is the most important part: Let the mixture boil (still stirring!) for just 30–40 seconds. Set a timer. If it boils too long, you’ll get chalky, crumbly cookies. Not long enough, and they’ll stay gloopy and never set. That quick timer makes all the difference.Step 4: Add Peanut Butter and Vanilla
Take the pan right off the stove as soon as that timer buzzes. Stir in ½ cup creamy peanut butter and 2 teaspoons vanilla, and watch the magic happen—everything melts into a dreamy chocolate-peanut swirl. Keep stirring until it’s completely smooth and you don’t see any peanut butter lumps lurking about.Step 5: Stir in the Oats
Now, add in 3 to 3½ cups quick oats, a scoop at a time. I start with 3 cups and mix really well. If the mixture still looks a bit loose or shiny, add another ½ cup—what you want is a thick, sticky batter that scoops easily but doesn’t run all over the place. (Think super thick, chunky oatmeal.)Step 6: Scoop and Shape
Work fairly quickly here, because the mixture starts setting as it cools. Use a big spoon or a medium cookie scoop to drop little mounds (about a tablespoon each) onto your wax paper. For extra neatness, you can gently nudge the edges with the back of the spoon to round them up before they start to set. (Or embrace the rustic look—it’s all good!)Step 7: Let Cool and Set
Let the cookies sit at room temp for about 20–30 minutes, untouched (hardest part: keeping eager hands away while they set!). They should be firm, peel off the paper cleanly, and still feel a little soft and chewy inside. If it’s hot in your kitchen, I sometimes pop them into the fridge for 10–15 minutes—just speeds things up for those of us who are extra impatient.Serving Suggestions
I’ll be honest—I love pulling one (or three) of these out with a cold glass of milk as an afternoon snack. Kids love them, but don’t be surprised if grown-ups keep sneaking seconds, too. You can sandwich a scoop of vanilla ice cream between two cookies for THE easiest ice cream sandwich, or slip a few into a pretty jar and tie them up with a bow for the sweetest homemade gift. But most of the time? It’s pajamas, a cozy spot, and a cookie straight off the wax paper for me. No judgment.Storage and Freezing Tips
Storage
These cookies should last a good week at room temperature in an airtight container (assuming you don’t eat them all first—this has yet to happen at my house). If your kitchen’s warm or you just love a little extra chew, stash them in the fridge. They’ll stay fresh for about two weeks that way and, honestly, I think the chilling gives them the most irresistible chew.Freezing
To freeze, place the cookies in a single layer on a baking sheet and freeze until solid, then transfer to a freezer-safe baggie or container. They’ll keep for 2–3 months and don’t really take long to thaw—just set a few on the counter for five minutes and you’re back in business. And, confession: I kinda love sneaking one straight from the freezer on a hot day (it’s almost like a no-bake candy bar!).Variations
- Nut-Free: Sunflower seed butter or soy nut butter swaps right in, making these perfect for lunchboxes or classrooms where nuts are a no-go.
- Extra Chocolatey: Toss in a handful of mini chocolate chips just after the oats (don’t worry if some melt in—they’ll just make the cookies that much richer).
- Coconut Dream: Sub in up to ½ cup shredded sweetened coconut for part of the oats for a fun twist—adds extra chew and a little tropical vibe.
- Lighter Touch: Try natural peanut butter for a different flavor, or cut back on the sugar by about ¼ cup if you prefer things less sweet. I’ve also stirred in a tablespoon of chia seeds for a tiny nutrient boost—no one ever guesses!
Conclusion
No-bake cookies are one of those happy, reliable treats that just feel like a hug in cookie form—especially when life gets a little bit hectic or you want a sweet treat without having to clean a mountain of dishes. That classic chocolate-peanut butter-oat combo is pure comfort, and with no oven in sight, anyone (yes, even “never-baked-a-thing” folks) can make them. My best tips? Keep your timer handy for the boil, and always (always!) give yourself permission to taste-test one “just checking” cookie. If you have questions, want to share your own family’s twist (sprinkles? sea salt?), or just want to reminisce about your favorite no-bake cookie memories, leave me a note in the comments—I’d truly love to chat cookies with you!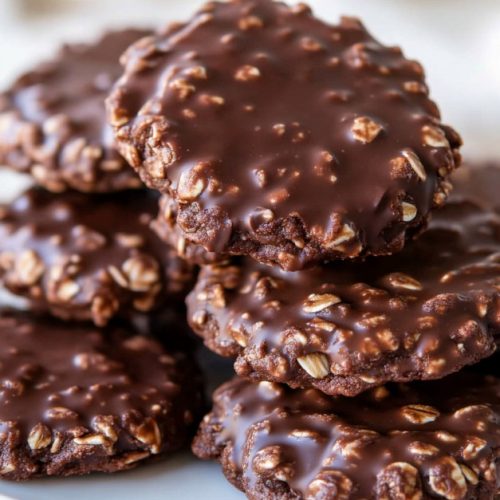
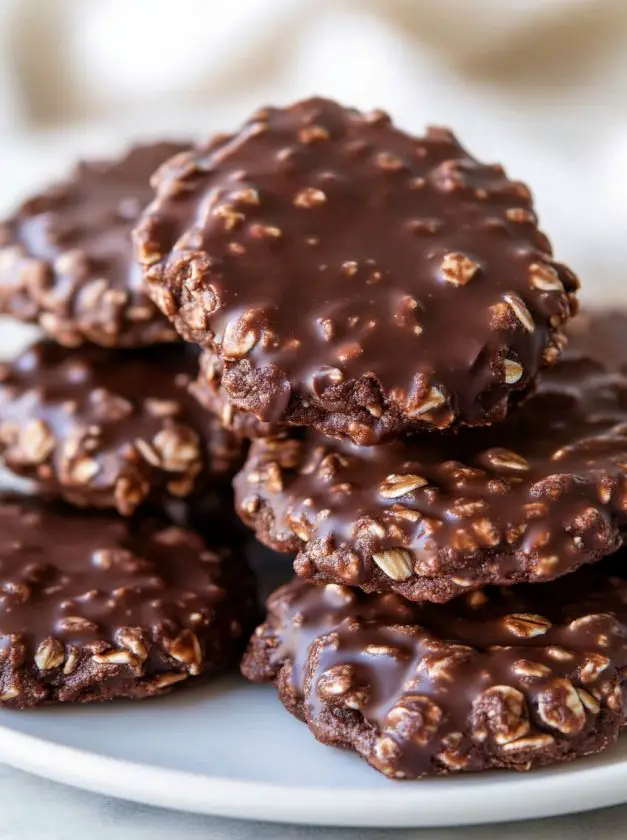
Best Ever No-Bake Cookies
These Best Ever No-Bake Cookies combine the rich flavors of chocolate and peanut butter with the satisfying chewiness of oats. They are quick, easy, and require no oven, making them a perfect treat for any time of the year.
Ingredients
- 1/2 cup butter or margarine
- 2 cups sugar
- 1/2 cup milk
- 4 tablespoons cocoa powder
- 1/2 cup creamy peanut butter or chunky, but it may result in a more crumbly cookie
- 2 teaspoons vanilla extract
- 3 to 3 1/2 cups quick-cooking oats not old-fashioned oats
Instructions
- Cover your counter or a baking sheet with wax paper to serve as the cooling surface for the cookies. Ensure the area is large enough to accommodate all the cookies.
- In a 4-quart saucepan, combine butter, sugar, milk, and cocoa powder. Stir these ingredients together to create the chocolate base.
- Place the saucepan over medium heat and stir continuously. Bring the mixture to a rolling boil and boil for 30-40 seconds. Overcooking may lead to dry, crumbly cookies, so time this step carefully.
- Remove the saucepan from the heat. Stir in peanut butter until fully melted and smooth, then add vanilla extract and mix well.
- Gradually add quick-cooking oats to the mixture, stirring to combine. Adjust the amount of oats to achieve your desired cookie consistency.
- Using a tablespoon or cookie scoop, drop spoonfuls of the mixture onto the wax paper. Work quickly, as the mixture will begin to set as it cools.
- Allow the cookies to cool and harden at room temperature for 20-30 minutes. Once set, they should easily peel off the wax paper. Store in an airtight container for up to a week.
Notes
For extra flavor, try adding a pinch of sea salt or substituting almond butter for peanut butter. Ensure quick-cooking oats are used for the best texture.
Nutrition
Calories: 150kcal
Love this recipe?Fllow us at @itsnotaboutnutritionrecipes for more
