
Save This Recipe
These cherry cheesecake bars are the kind of no-bake dessert that sounds almost too simple — until you set the pan on the table and watch it disappear. Creamy, chilled, and topped with glossy cherry filling, they come together with just three ingredients and zero oven time.
Why you’ll love these
Only 3 ingredients — cream cheese, cheesecake filling, and cherry pie topping. That’s the whole list.
No baking required — mix, spread, chill, done. The fridge does all the work overnight.
Makes two full pans — perfect for feeding a crowd or keeping one at home and sharing one.
Incredibly easy to transport — make them right in the dish, cover with plastic wrap, and carry them anywhere without a second thought.
Endlessly forgiving — swap the cherry topping for blueberry or strawberry, use reduced-fat cream cheese, forget to add the cherries until the next day. Still works.
About the ingredients
The cream cheese needs to be softened, full stop. Don’t try to beat it cold. I’ve done this. You end up with lumps and frustration and possibly a cracked bowl. Leave it on the counter for half an hour, or if you’re impatient like I tend to be on weeknights, cut it into chunks and let it sit for twenty minutes — that gets you most of the way there.
The cheesecake pie filling — the ready-made kind that comes in a can or tub — is what makes this a no-bake situation. You can usually find it in the baking aisle near the pie fillings, sometimes refrigerated, sometimes shelf-stable. I’ve used both and couldn’t tell you the difference honestly. Whatever’s available.
And the cherry pie filling is cherry pie filling. I use whatever’s on sale. I’ve tried the fancy ones with whole cherries, and I’ve used the basic store brand, and both are fine. I’m not precious about it.
Ingredients
3 (8-ounce) packages cream cheese, softened — real cream cheese, not the whipped kind in the tub
3 (21-ounce) cans ready-made cheesecake or cream cheese pie filling
2 (21-ounce) cans cherry pie filling

Making them
Lightly grease your two 8×8 or 9×9 glass baking dishes. I use cooking spray. You could use butter. My mother-in-law used both, which I now suspect was unnecessary, but it also never stuck, so maybe she was onto something.
Beat your softened cream cheese in a big bowl until it’s smooth. This is where a hand mixer is your friend — you want it really smooth, no lumps, no chunks. Scrape the sides of the bowl at least once because there’s always a chunk hiding under there that you missed.
Then pour in your cheesecake filling and mix it all together. It gets silky and thick and honestly smells incredible. There was a phase when my son was about fourteen where he would try to eat this plain with a spoon directly from the bowl every single time I made it. I’d like to say I stopped him. I didn’t always stop him.
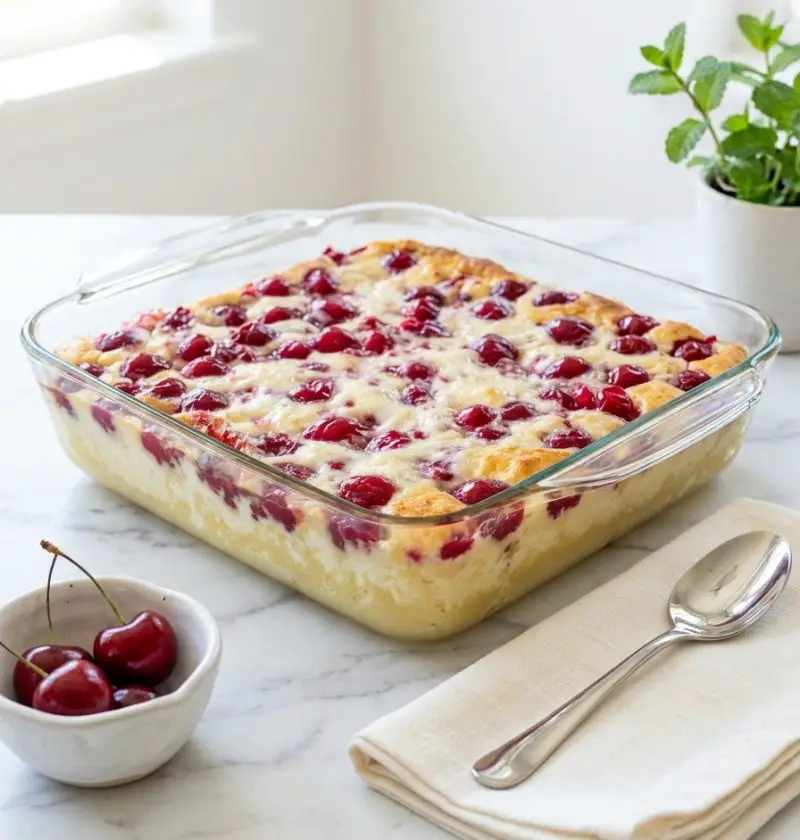
Divide this mixture between the two dishes and spread it out with a spatula. Try to get it even, get it into the corners. Then — and this is the part I skip when I’m in a hurry, but it does help — let it chill in the fridge for about twenty or thirty minutes before you add the cherries. If you don’t, the cherry topping tends to sink in a little and mix with the cream cheese layer, which isn’t the end of the world but it’s not as pretty.
Add your cherry topping. Spread it all the way to the edges. Then cover both dishes and refrigerate for at least four hours, though overnight is better. The bars set up more and the slices are cleaner and the whole thing just tastes more like itself after a night in the cold.
When you’re ready to serve, run your knife around the edges first. Cut each pan four by three — twelve bars per pan, twenty-four total. Use a spatula to lift them out, and wipe the blade between cuts if you care about clean edges. I care about clean edges approximately half the time.
Variations
If you’ve got someone in your house who doesn’t like cherries — and I have, I did, for about nine years — blueberry pie filling works beautifully. So does strawberry. Apple works once in a while in the fall, with a little cinnamon stirred into the cream cheese layer, and that’s genuinely good. Different, but good.
If you want a crust, you can press crushed graham crackers mixed with melted butter into the bottom of each pan before adding the cheesecake mixture. About a cup and a half of crumbs per pan, half a stick of butter melted in. Gives it something more solid to stand on.
Storage
Cover and refrigerate. They keep for three or four days without any trouble, though they’re honestly best within the first day or two when the cherry topping is still glossy. I’ve had them in the fridge for five days and they were still fine — a little softer, but fine. Don’t leave them on the counter. This seems obvious but I’ve learned not to assume anything is obvious.