
Save This Recipe
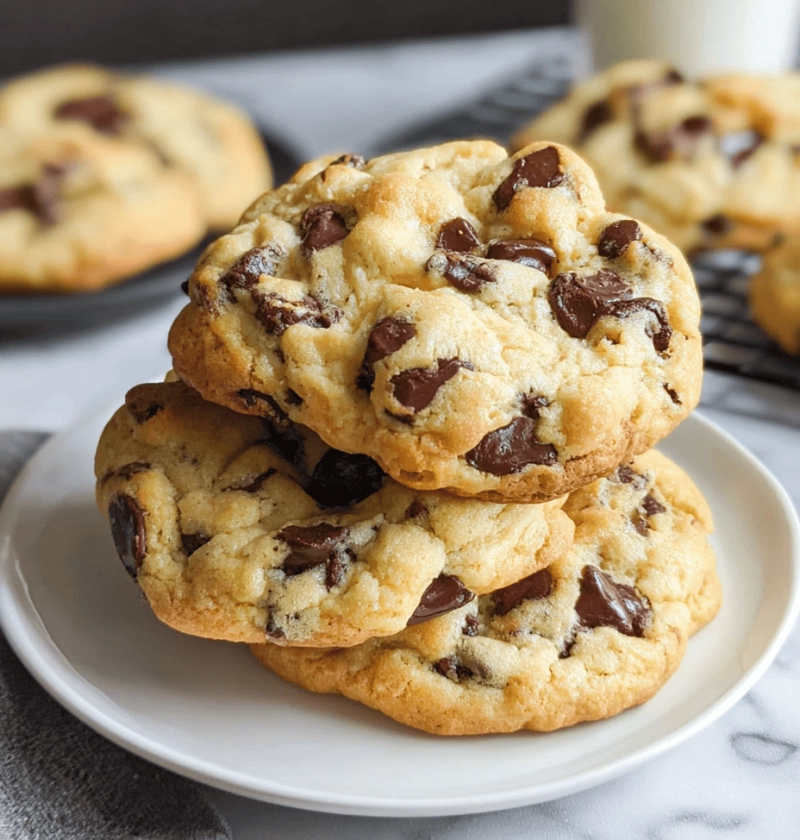
You know those days when you just need a cookie that means it? Not some flat little crisp with a few chocolate chips scattered like afterthoughts. No, ma’am. I’m talking about the kind of cookie you break open with both hands — warm, molten in the center, pockets of melted chocolate oozing out like a dessert lava flow.
Well, one rainy afternoon (the kind where your slippers stay on ‘til 3pm), I found myself craving that exact cookie. I wanted thick, I wanted chewy, and I wanted to bite into something that felt like a hug. After a few test batches and a bit of old-fashioned cookie logic, these beauties were born. And let me tell you — my grandkids call them “lava cookies,” which is the highest praise in our house.
Why You’ll Love These Cookies
-
Bakery-style thickness – No flat, sad discs here.
-
Molten chocolate centers – That bar chocolate? It’s the magic.
-
Perfect balance of chew and crisp – Tender inside, golden edges.
-
Freezer-friendly – Make ahead and bake just what you need.
-
Customizable – Want to toss in walnuts? You go for it.
A Few Notes on Ingredients (and some cozy swaps)
All-Purpose Flour + Cake Flour
Yes, two flours. And no, it’s not being fussy. The Cake flour gives tenderness while the all-purpose holds structure. If you’re in a pinch, you can use all all-purpose — just know the cookies might be a tad denser.
Cornstarch
This little secret gives that soft, thick texture. I add it to most of my cookies these days — try it and you’ll never go back.
Butter
Room temperature is key here. If it’s too cold, it won’t cream properly. If it’s too melty, the cookies spread too much. Think “soft like the inside of your arm.”
Egg Yolks
Extra yolks = richness. Don’t skip this. They’re like adding a plush rug to your kitchen — unnecessary, but elevates everything.
Chocolate Chips + a Chocolate Bar
Oh honey, the chips are great, but that chopped chocolate bar? It melts differently. It creates little molten pockets of magic. I use Ghirardelli or Trader Joe’s Belgian bars. Use what you love to eat.
Walnuts (Optional but delightful)
If you love a bit of crunch and nutty depth, toss ‘em in. If you’re baking for kids, maybe skip it — mine tend to dig around ‘em like treasure hunters.

Let’s Make ‘Em — Step-by-Step
1. Get those dry ingredients together
Sift the flours, cornstarch, baking soda, baking powder, and salt into a big bowl. Set it aside — this is your cookie’s foundation.
2. Cream that butter and sugar
Using a mixer, beat the butter with both sugars for about 2–3 minutes until it’s smooth and creamy. Not just mixed — creamed. This is where texture starts.
3. Add eggs and yolks, one at a time
Go slow. You want each to mix in well. It’ll look glossy and fluffy — like you’re doing something fancy (because you are).
4. Fold in dry ingredients
Don’t overmix. Just blend until the flour disappears. Scrape the sides and bottom — there’s always a flour pocket hiding somewhere.
5. Add chocolate and nuts
Dump in your chips, chopped chocolate, and nuts if using. Give it a good fold. You’ll feel the dough get chunky and rich.
6. Chill (the dough and you)
Wrap that bowl in plastic wrap and pop it in the fridge for at least 30 minutes. Go sip some coffee or clean the kitchen — or just sit. You earned it.
7. Preheat and shape
Crank the oven to 400°F. Line your pans with parchment. Scoop 1/3 cup portions (yes, big!). Shape into thick hockey puck mounds. No flattening. Trust the process.
8. Bake, but not too long
10–12 minutes. Watch for slight browning on top. The magic trick? Pull them before you think they’re done. Let carryover heat do the rest.
9. Let them rest
I know, it’s torture — but let them sit on the pan for 15–30 minutes. Then move to a wire rack to cool. Or, you know, eat one warm. I won’t tell.
Craving a Twist? Try This
-
Sea Salt Sprinkle – Right before baking, add a pinch of flaky sea salt on top. Game changer.
-
Espresso Powder – A teaspoon in the dough adds a subtle richness and depth.
-
White Chocolate & Macadamia – Swap the chips and nuts — totally tropical.
-
No Nuts, Extra Chips – Make it a double chocolate party.
Storing and Reheating
Room Temp
Keep cookies in an airtight tin or container for up to 3 days. Add a slice of bread to keep them soft — a little old-school trick that still works.
Freezer Friendly
Freeze the raw dough balls on a tray, then transfer to a bag. Bake straight from frozen — just add 2 extra minutes. Lifesaver for last-minute guests (or midnight cravings).
Reheat Like a Pro
Microwave for 10–15 seconds for that fresh-baked warmth. If you’ve got a toaster oven, even better.
Let’s Talk Cookies
These cookies are more than a dessert — they’re a memory in the making. Whether you bake them for a cozy Sunday afternoon, a school bake sale, or just to treat yourself after a long week, they deliver comfort in every bite.
If you give this recipe a whirl, I’d love to hear how they turn out. Do you like your cookies with a crunch or gooey all the way through? Got a favorite chocolate brand? Leave a comment or send a note — I read every single one, usually with coffee in one hand and a cookie in the other.
Happy baking, sweet friend.
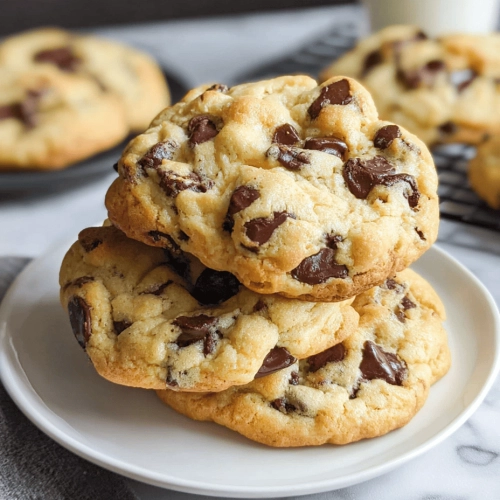
Thick and Molten Chocolate Chip Cookies
Ingredients
- 2 1/2 cups all-purpose flour
- 1 1/2 cups Cake flour
- 2 teaspoons cornstarch
- 1 teaspoon baking powder
- 1 teaspoon baking soda
- 1 teaspoon fine salt
- 1 cup unsalted butter, room temperature
- 1 cup packed light brown sugar
- 1/2 cup granulated sugar
- 2 large eggs, room temperature
- 2 large egg yolks, room temperature
- 2 cups semi-sweet chocolate chips
- 8 oz chocolate bar, roughly chopped
- 1/2 cup roughly chopped walnuts (optional)
Instructions
- Sift together the flours, cornstarch, baking powder, baking soda, and salt.
- Cream butter, brown sugar, and granulated sugar until smooth, about 2–3 minutes.
- Add eggs and yolks one at a time, mixing well after each.
- Mix in dry ingredients just until combined.
- Fold in chocolate chips, chopped chocolate, and walnuts (if using).
- Cover dough and chill for 30 minutes.
- Preheat oven to 400°F and line baking sheets with parchment paper.
- Portion dough using a 1/3 cup measure and form into thick mounds. Do not flatten.
- Bake 10–12 minutes until tops are just lightly browned.
- Let cookies rest on sheet for 15–30 minutes, then cool on wire rack before serving.
