
Save This Recipe
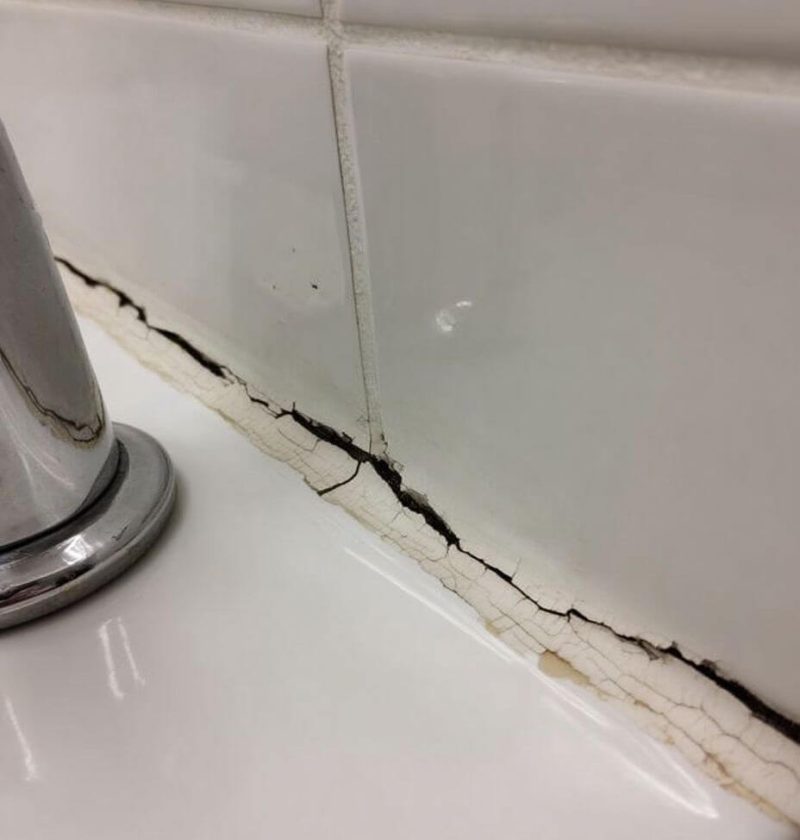
I don’t know about you, but every time I walk into the bathroom and spot that crusty, cracked line of caulk around the tub, I feel two things: annoyance… and dread.
Annoyed because it just looks bad—like my bathroom’s been quietly falling apart behind my back. Dread because I assume fixing it means scraping out all the old stuff, spending half the day on my knees, and probably making it look worse before it gets better.
But then my dad—bless him—comes over one weekend, takes one look, and says, “You don’t need to rip all that out. I’ve got a better way.”
And boy, did he ever.
Why Cracked Caulk Matters (Even If It’s Just a Little)
So here’s the thing. That line of caulk around your tub or sink? It’s not just decorative. It’s your bathroom’s raincoat. Once it cracks, even a little, water starts sneaking in behind the tiles or under the tub.
Give it a few weeks, and that harmless little crack becomes mold, mildew, maybe even warped walls. Not fun. But if you catch it early—and you don’t panic—you can fix it in less time than it takes to get through an episode of your favorite show.
No scraping. No mess. Just patch and go.
Here’s What You’ll Need (Nothing Fancy)
-
A tube of silicone caulk (get one that matches your old caulk or use clear)
-
Rubbing alcohol + a clean rag
-
A utility knife (or your kid’s craft knife if you’re brave)
-
Painter’s tape
-
A plastic spoon or an actual caulk-smoothing tool if you’re feeling fancy
My dad swears by silicone. He says it holds up better in wet places—and let’s face it, bathrooms stay damp.
The “Patch-and-Dash” Method: Step-by-Step
This isn’t about gutting your bathroom. This is quick. Easy. Satisfying.
1. Wipe the area down
Use rubbing alcohol to clean the cracked area. No soap. No shortcuts. Get rid of all the gunk and old shampoo residue. You want the new caulk to stick, not slide.
2. Tape around the crack
Lay down painter’s tape just above and below the crack. This is your insurance policy against sloppy lines. Trust me, it’s worth the extra minute.
3. Squeeze in the new caulk
Cut a tiny tip off your caulk tube (I always cut too big—don’t do that) and gently squeeze a line right along the crack. Just enough to fill it. No blobs.
4. Smooth it out
Here’s where the spoon comes in. Use the back of it to smooth the bead into the crack. Don’t press too hard—just enough to make it neat. Wipe the extra on a paper towel as you go.
5. Let it dry
This is the hard part: do nothing for 24 hours. No showers. No steam. Don’t poke it to see if it’s done (ask me how I know). Just walk away and let it cure.
Why This Works (and When It Doesn’t)
If the caulk is just cracked—not peeling off in strips or black with mold—this trick will give it a second life. It’s like putting a patch on your favorite jeans instead of tossing them.
Now, if the whole line of caulk is lifting or moldy beyond saving, you’ll need to pull it out and start fresh. But if you’re dealing with a couple little splits or hairline cracks? Patch it, smooth it, move on with your day.
Real Talk from My Dad (and Me)
-
Don’t skip the cleaning. Caulk won’t stick to soap scum. Period.
-
Tape is your best friend. Even if you think you’ve got a steady hand—you don’t.
-
Silicone smells. Crack a window. Or two.
-
Don’t cheap out. The $2 caulk tube might work, but the $5 one lasts longer and goes on smoother.
Final Thoughts from Someone Who Hates Re-Doing Projects
Look, I’m no professional handyman. I just like things to look like I have my act together. This little caulking patch job? It’s easy, satisfying, and kind of weirdly fun. You can finish it in under 20 minutes and feel like a home repair wizard.
So next time you see a crack along the tub, don’t sigh and ignore it. Grab a spoon, channel my dad, and fix it fast. It’s cheaper than a plumber, neater than a full redo, and one more thing off your to-do list.