
Save This Recipe
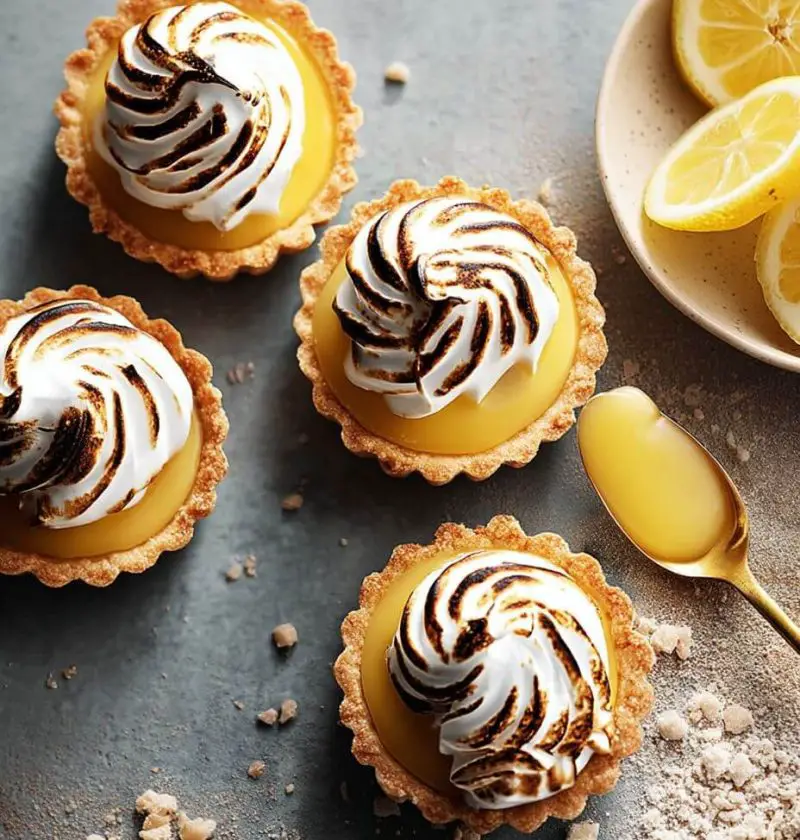
The first time I made these mini Lemon Meringue tarts, my oldest was elbow-deep in sprinkles, my husband was asking (again) if they’d be “that lemony,” and the kitchen smelled like pure sunshine. There’s something so inviting about a batch of bite-sized tarts cooling on the counter—almost guarantees you’ll have a few disappear before the tray ever hits the table. These little beauties are the perfect citrus dessert, with a bright, zippy filling piled high with fluffy meringue, all tucked into a buttery, hand-held crust. They’re basically summer in a cup! Whether you’re planning a backyard get-together or just want a fun party appetizer that won’t last long, this is one recipe that’ll make you the most popular person on the block (or at least in your house!).
Why You’ll Love This
- That lemon flavor! Tangy, sweet, and just a little bit tart (not so sour it’ll make your jaw lock up—promise).
- Seriously cute. Mini tarts are always a hit at brunches, baby showers, or when you’re just feeling a little fancy on a Wednesday.
- Make-ahead friendly—bake the crusts and prep the curd a day ahead, then finish with meringue right before serving. Easy!
- Bite-size treats mean less mess and no need for forks—just pop and go. (Although I won’t tell if you double up.)
- It’s a classic with a twist. All the joy of a lemon meringue pie, but in the most snackable form ever.
Ingredient Notes and Handy Tips
For the Tart Shells:
Store-bought mini tart shells work beautifully if you’re short on time (life hack!), but if you’re in the mood to roll out dough, homemade shortcrust pastry is melt-in-your-mouth good. I like to use unsalted butter for a richer flavor, and keep a little extra on hand for greasing the muffin tray if making from scratch.
Lemon Curd:
Fresh lemons are the star here. Bottled juice can do in a pinch, but real lemons bring a brightness you’ll notice. You’ll need both zest and juice, so grab at least two large lemons. For the curd, eggs, sugar, and a little butter round out that creamy texture. Tip: Whisk gently and constantly while cooking the curd; if it gets too hot or you walk away (speaking from experience), you might get scrambled eggs instead of smooth curd.
Meringue:
Good ol’ egg whites, granulated sugar, and a pinch of cream of tartar. If you don’t have cream of tartar, a few drops of lemon juice work to stabilize the meringue. Use room temperature egg whites for more volume (set them out for 30 minutes or so).
Optional Touches:
A dusting of toasted coconut, a sprinkle of zest, or even a handful of berries make these mini tarts extra eye-catching at parties. For a gluten-free crowd, try a nut-based crust (almond meal and butter). Swapping lemon for lime or orange is a fun twist—try what your taste buds are craving!
Step-By-Step Directions
Alright, let’s do this! (Don’t worry, the steps look longer than they feel… and it’s worth every minute.)
1. Prep Those Tart Shells
If you’re using frozen pre-made shells, let them thaw for 10 minutes and then bake according to package directions, usually about 10-12 minutes at 350°F until lightly golden. If rolling homemade dough, cut into small rounds and fit into a mini muffin pan—prick the bottoms with a fork, then chill them for 20 minutes before baking. It helps them hold their shape (skipping this is playing pastry roulette—ask me how I know!). Bake until just golden and let them cool completely.
2. Make the Lemon Curd
In a small saucepan, whisk together 3 large eggs, ¾ cup sugar, ½ cup fresh lemon juice, 1 tablespoon zest, and a pinch of salt. Set over medium-low heat and whisk constantly until the curd thickens enough to coat the back of a spoon, about 8–10 minutes. Pull off the heat and whisk in 4 tablespoons butter, one piece at a time. Push the curd through a sieve to keep it silky-smooth (don’t skip this—those little bits of zest can make your tarts lumpy, and nobody likes lumpy!). Set aside to cool to room temp or cover and chill up to two days.
3. Whip Up the Meringue
In a super clean mixing bowl, beat 3 room-temperature egg whites and ¼ teaspoon cream of tartar (or a tiny bit of lemon juice) on high until frothy. Gradually add in ½ cup sugar, one spoonful at a time, and keep beating until stiff, glossy peaks form. You’ll know it’s ready if you can turn the bowl upside down and nothing budges (careful, kids think this is hilarious—but sometimes it’s messy!).
4. Assemble and Bake
Spoon or pipe about 1–2 teaspoons of lemon curd into each cooled tart shell—you want them generously filled but not overflowing (the meringue will help hold it in). Top with big swirls of meringue—I love big, dramatic swoops, but you can go as simple or as wild as you like.
Pop the tray under the broiler for just 30 seconds to 1 minute, watching closely! You want the meringue tops to get toasted and golden, not burnt to a crisp (walk away, and you’ll have “extra flavor,” as my grandma always said). If you’ve got a kitchen torch, now’s the time to show off and toast those swirls to perfection.
5. Cool and Serve
Let the tarts cool for a few minutes so everything can set. Serve within an hour or two for the best texture. These little cuties love to be the star of the dessert table—don’t expect leftovers.
Optional Variations and Fun Twists
- Switch out the lemon for lime or orange for a whole new citrus vibe—kids especially seem to love lime!
- Add a teaspoon of poppy seeds to the crust or filling for a tiny crunch and hint of nuttiness.
- Top with sugared berries or edible flowers for a “wow, you made these?” look (even if they took you all afternoon, no one needs to know).
- Go gluten-free with an almond or pecan crust—mix nut flour with a little melted butter and sugar, press into mini muffin tins, and bake until golden.
- Feeling daring? Spread a little raspberry jam under the lemon curd for a surprise burst of berry flavor.
Storage and Reheating Tips
If you’ve got leftovers (you lucky thing!), store your mini lemon meringue tarts in the fridge, uncovered or loosely tented with foil. The meringue can get a little sticky in humidity, so don’t stack them. They’re best the same day, but you can stretch them to 2 days—after that, the crust loses its crunch and the curd might weep (it’s normal; happens to the best of us).
Don’t re-bake to reheat—just let them sit at room temp for 30 minutes to take off the chill if you want. If you need to freshen up the meringue, a quick pass under the broiler works wonders, but only if you’re watching like a hawk!
Let’s Chat—Share Your Mini Lemon Meringue Tart Wins!
These mini tarts are one of those treats that spark big smiles. Whether you make them for a party, an afternoon pick-me-up, or just because you love anything citrus, they’re guaranteed to brighten your day (and maybe your neighbor’s, too). If you bake a batch, I’d love to hear how it went—did you add a twist, or did the classic win the day? Drop your questions, comments, or “I-ate-four-before-dinner” confessions below. Happy baking, friends—can’t wait to see what you whip up next!

Mini Lemon Meringue Tarts
Ingredients
- Mini tart shells store-bought or homemade shortcrust pastry
- Fresh lemons zested and juiced
- Eggs
- Sugar
- Butter
- Cream of tartar
- Optional toppings toasted coconut, zest, berries
Instructions
- Prepare the tart shells by baking store-bought or homemade pastry until golden.
- Whisk together eggs, sugar, lemon juice, zest, and butter over heat until thickened.
- Beat egg whites and cream of tartar until stiff peaks form.
- Fill tart shells with lemon curd, top with meringue, and bake or broil until golden.
- Let tarts cool before serving, topped with optional garnishes.