
Save This Recipe
Imagine this: A buttery graham cracker crust that you press in with your fingertips. Already satisfying, right? But that’s just the base.
Next comes a dreamy, tangy cream cheese layer that hugs your taste buds just right. Then sliced bananas—fresh and firm—followed by crushed pineapples that bring the whole tropical vibe home.
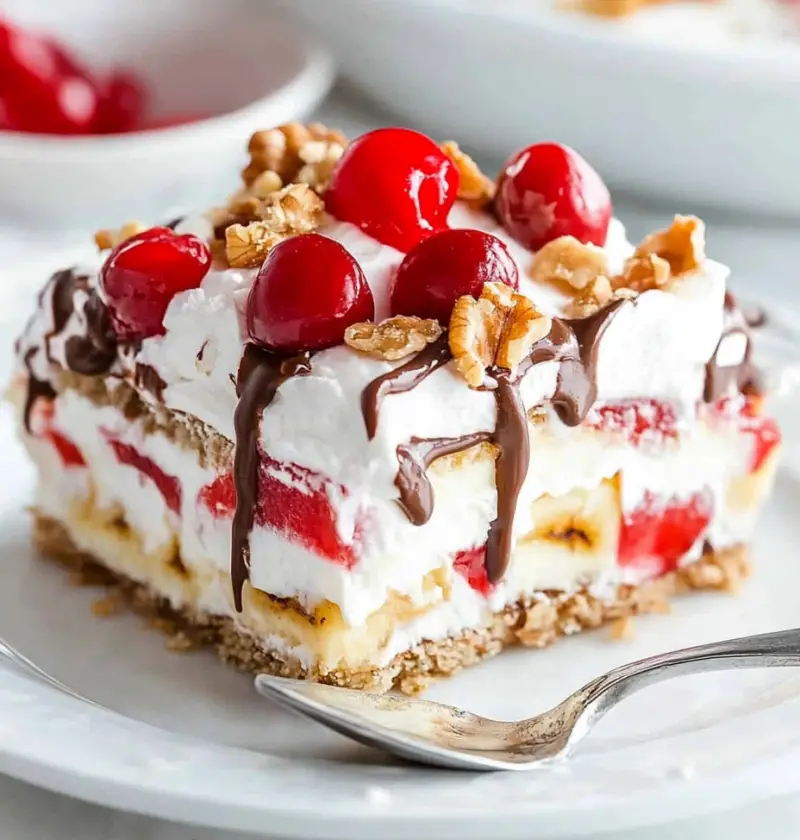
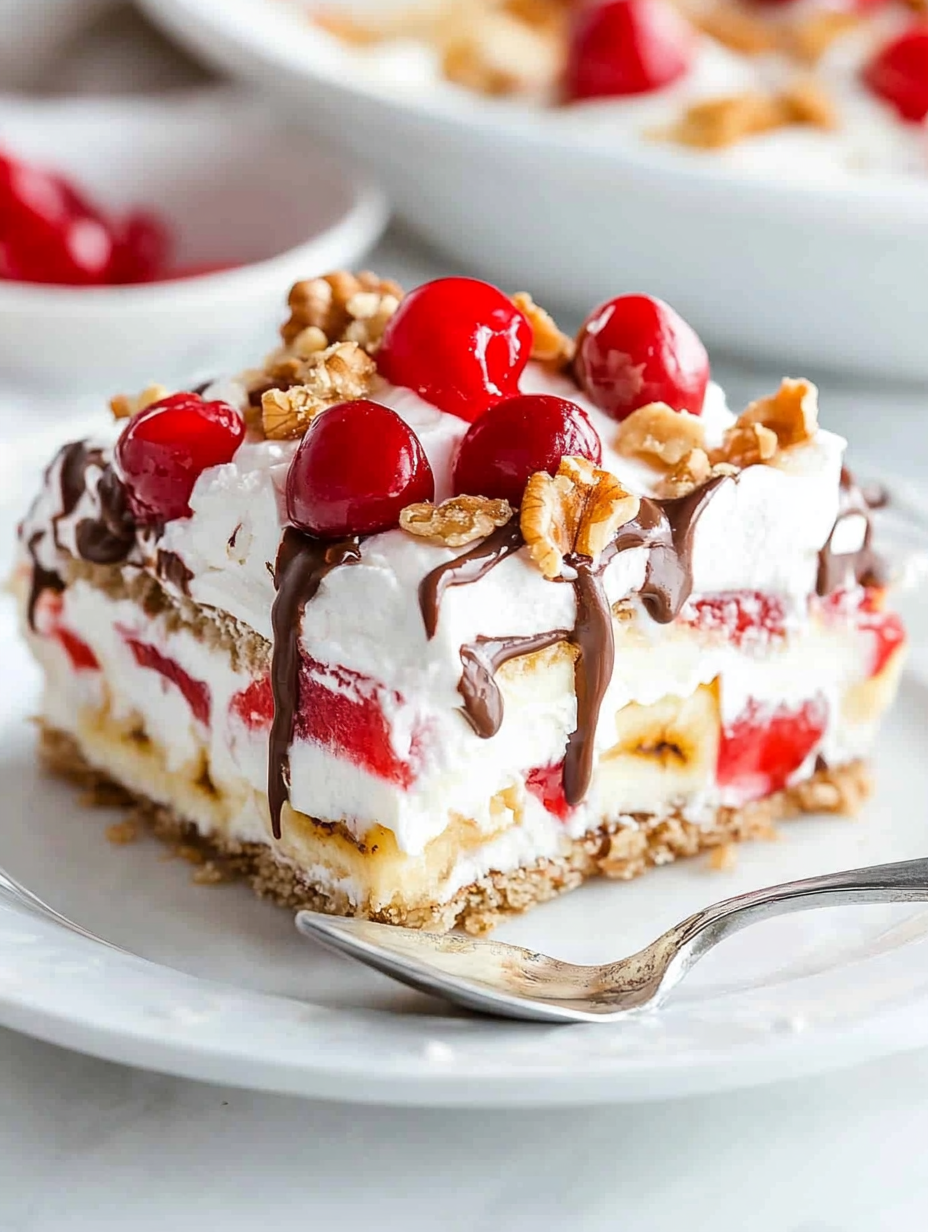
But wait. We’re not stopping there. A fluffy layer of whipped topping (hi Cool Whip, you glorious shortcut), drizzles of chocolate syrup, a generous sprinkle of chopped nuts, and cherries on top. Optional sprinkles if you’re feeling extra. And really—who isn’t?
This cake doesn’t try too hard. It doesn’t need to. It knows it’s a hit.

Here’s Everything You’ll Need
You probably already have most of this in your kitchen. And if not, a quick grocery run and you’re set.
For the Crust:
-
2½ cups graham cracker crumbs
-
½ cup (115g) unsalted butter, melted
-
¼ cup (50g) granulated sugar
For the Cream Cheese Layer:
-
2 (8 oz) packages cream cheese, softened
-
½ cup (100g) granulated sugar
-
1 tsp vanilla extract
For the Banana Split Layers:
-
4–5 ripe but firm bananas, sliced
-
1 (20 oz) can crushed pineapple, well drained
-
1 (12 oz) container whipped topping (like Cool Whip)
-
¼ cup chocolate syrup
-
¼ cup chopped nuts (pecans or walnuts work great)
-
10–12 maraschino cherries
-
Sprinkles (optional, but delightful)
Instructions
1. Crust Comes First
In a medium bowl, combine the graham cracker crumbs, melted butter, and sugar. Mix until it feels like damp sand.
Press it firmly into a 9×13-inch pan—this is your foundation, so give it some love. Pop it into the fridge while you handle the next part. Chill time = structure.
2. Cream Cheese Layer (Aka the Crowd-Pleaser)
Grab a large bowl. Beat the softened cream cheese, sugar, and vanilla until smooth and creamy. No lumps allowed.
Spread this evenly over your chilled crust. Use a spatula. Use your heart. Smooth it out like frosting on a birthday cake.
3. The Fruit Parade
Now, layer those banana slices across the cream cheese. Cover every inch. Then spoon the drained pineapple over the top.
If there’s excess juice, don’t just dump it in—your crust worked hard. Keep it dry-ish.
4. Clouds of Whipped Topping
Gently spread the whipped topping over the fruit. Don’t press too hard—just float it across like frosting a cloud. (Nigella would be proud.)
5. Dress It Up
Drizzle chocolate syrup in swirls or zigzags. Get artsy if you’re feeling it. Sprinkle nuts like you mean it. Crown with cherries and maybe toss on some rainbow sprinkles.
Voilà. You’ve just built a masterpiece.
6. Chill—Literally
This part is non-negotiable. Cover the cake and let it chill in the fridge for at least 4 hours. Overnight is even better. Trust me—the flavors need time to settle in and become friends.
Pro Tips from the Dessert Pros
Paula Deen’s hack? A thin brush of melted butter over the crust before the filling goes on for extra richness.
Nigella? She swears by folding in a bit of whipped cream into the cream cheese mixture. It makes the middle light and mousse-like.
Jamie Oliver suggests adding some fresh berries—strawberries or raspberries bring brightness and a little acidity that balances the sweet.
Honestly, all three work beautifully. Try them. Mix and match. Make it your own.
FAQs – Because You Will Get Asked
Can I use other fruit instead of bananas?
Yep! Strawberries, peaches, mango slices—whatever you love. Just keep the fruit firm and fresh.
What if I don’t have graham crackers?
Crushed digestive biscuits, vanilla wafers, or even pretzels (for a salty-sweet vibe) work too.
Can I make it ahead?
You should. It’s actually better that way. Everything melds. It’s like letting a stew sit—dessert edition.
How do I stop the bananas from browning?
Dip the slices in a little lemon juice before layering. It helps keep them looking fresh without changing the flavor.
Gluten-free?
Use gluten-free cookies or graham crackers. Easy fix.
Can I use real whipped cream?
Absolutely. Whip up about 2 cups of heavy cream with a tablespoon or two of powdered sugar. But if you’re short on time, store-bought whipped topping is perfectly fine.
Why did my crust fall apart?
You probably didn’t press it down firmly enough or let it chill long enough. Try lining the pan with parchment next time for easier lifting.
Serving and Storing
I just cut it into squares and we eat it cold out of the fridge. If I’m feeling fancy, maybe I’ll throw some whipped cream on top or drizzle a little chocolate sauce, but most of the time we just grab a piece and go.
It keeps fine in the fridge for a few days. The bananas might get a little brown after a while, but it still tastes good. Doesn’t look as pretty, but nobody here cares.
Freezing? It’s doable. Wrap tightly and freeze for up to a month. Thaw in the fridge before serving. But let’s be real—it’s so good, it probably won’t last that long.
Final Thoughts: Dessert, Deconstructed—Then Deliciously Rebuilt
Not every dessert has to be fancy to be amazing. Sometimes you just want something easy and sweet that everybody loves — the kind of thing that gets eaten straight out of the pan when no one’s looking.
This no-bake banana split cake is exactly that. It’s a little messy, a little old-school, and every bite is creamy, fruity, crunchy — just plain good.
Next time you’re craving something fun (or need a dessert without turning on the oven), this one’s a no-brainer. Big spoons and seconds highly encouraged.
No-Bake Banana Split Cake
Ingredients
- 2 cups graham cracker crumbs
- 1/2 cup unsalted butter melted
- 1/4 cup granulated sugar
- 2 packages cream cheese 8 oz each, softened
- 1/2 cup powdered sugar
- 1 tsp vanilla extract
- 4 bananas sliced
- 1 can crushed pineapple 20 oz, drained
- 2 cups strawberries sliced
- 1 tub whipped topping 12 oz, thawed
- 1/4 cup chopped walnuts optional
- 1/4 cup chocolate syrup for drizzle
- 12 maraschino cherries for garnish
Instructions
- In a medium bowl, mix graham cracker crumbs, melted butter, and granulated sugar until combined. Press into the bottom of a 9x13-inch dish.
- In a large bowl, beat cream cheese, powdered sugar, and vanilla extract until smooth. Spread evenly over the crust.
- Arrange sliced bananas over the cream cheese layer.
- Spoon the drained crushed pineapple evenly over the bananas.
- Add a layer of sliced strawberries over the pineapple.
- Spread the whipped topping over the fruit layer until fully covered.
- Sprinkle chopped walnuts on top, if using.
- Drizzle with chocolate syrup and garnish with maraschino cherries.
- Chill for at least 2 hours before serving.
